Kitchen Garden

Kitchen news – 14th August 2014

ourkitchengarden.net

Brrrrrrrrrrrr it’s frrrrrreezing! My hands are cold and stiff as I type, so I’m looking forward to cranking the ovens up in our classes later and getting into some dough-work to warm up!

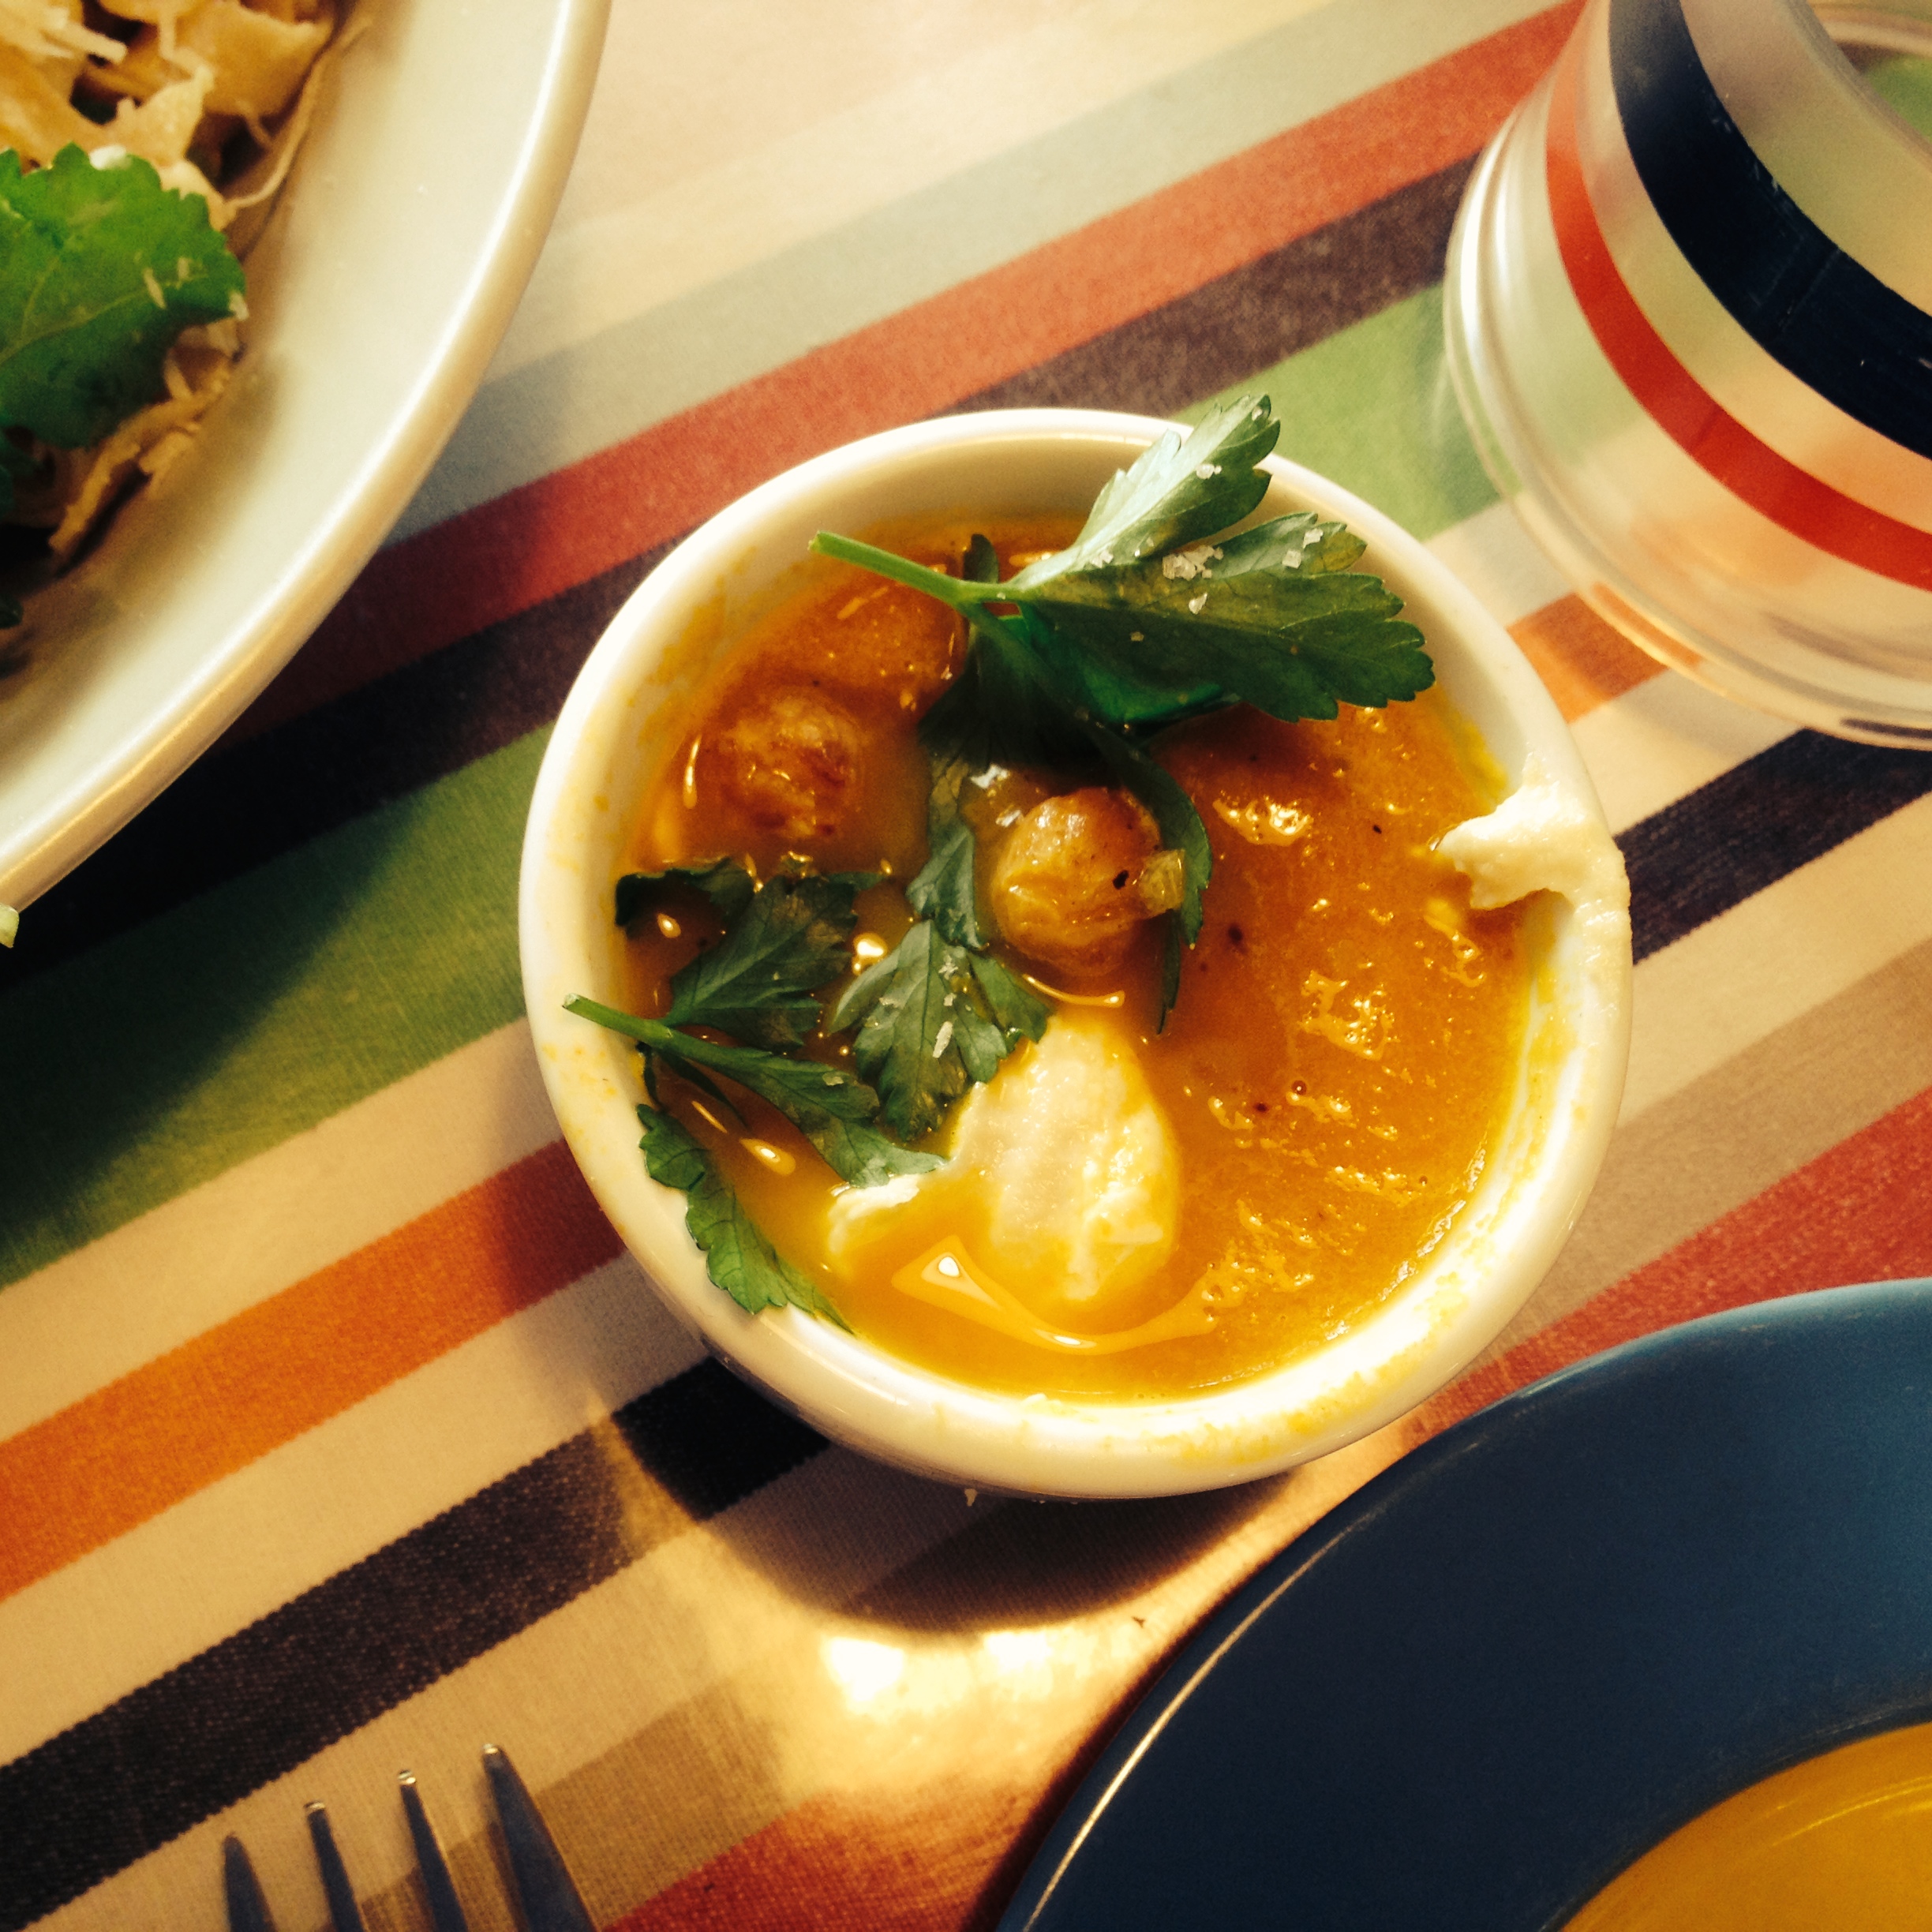
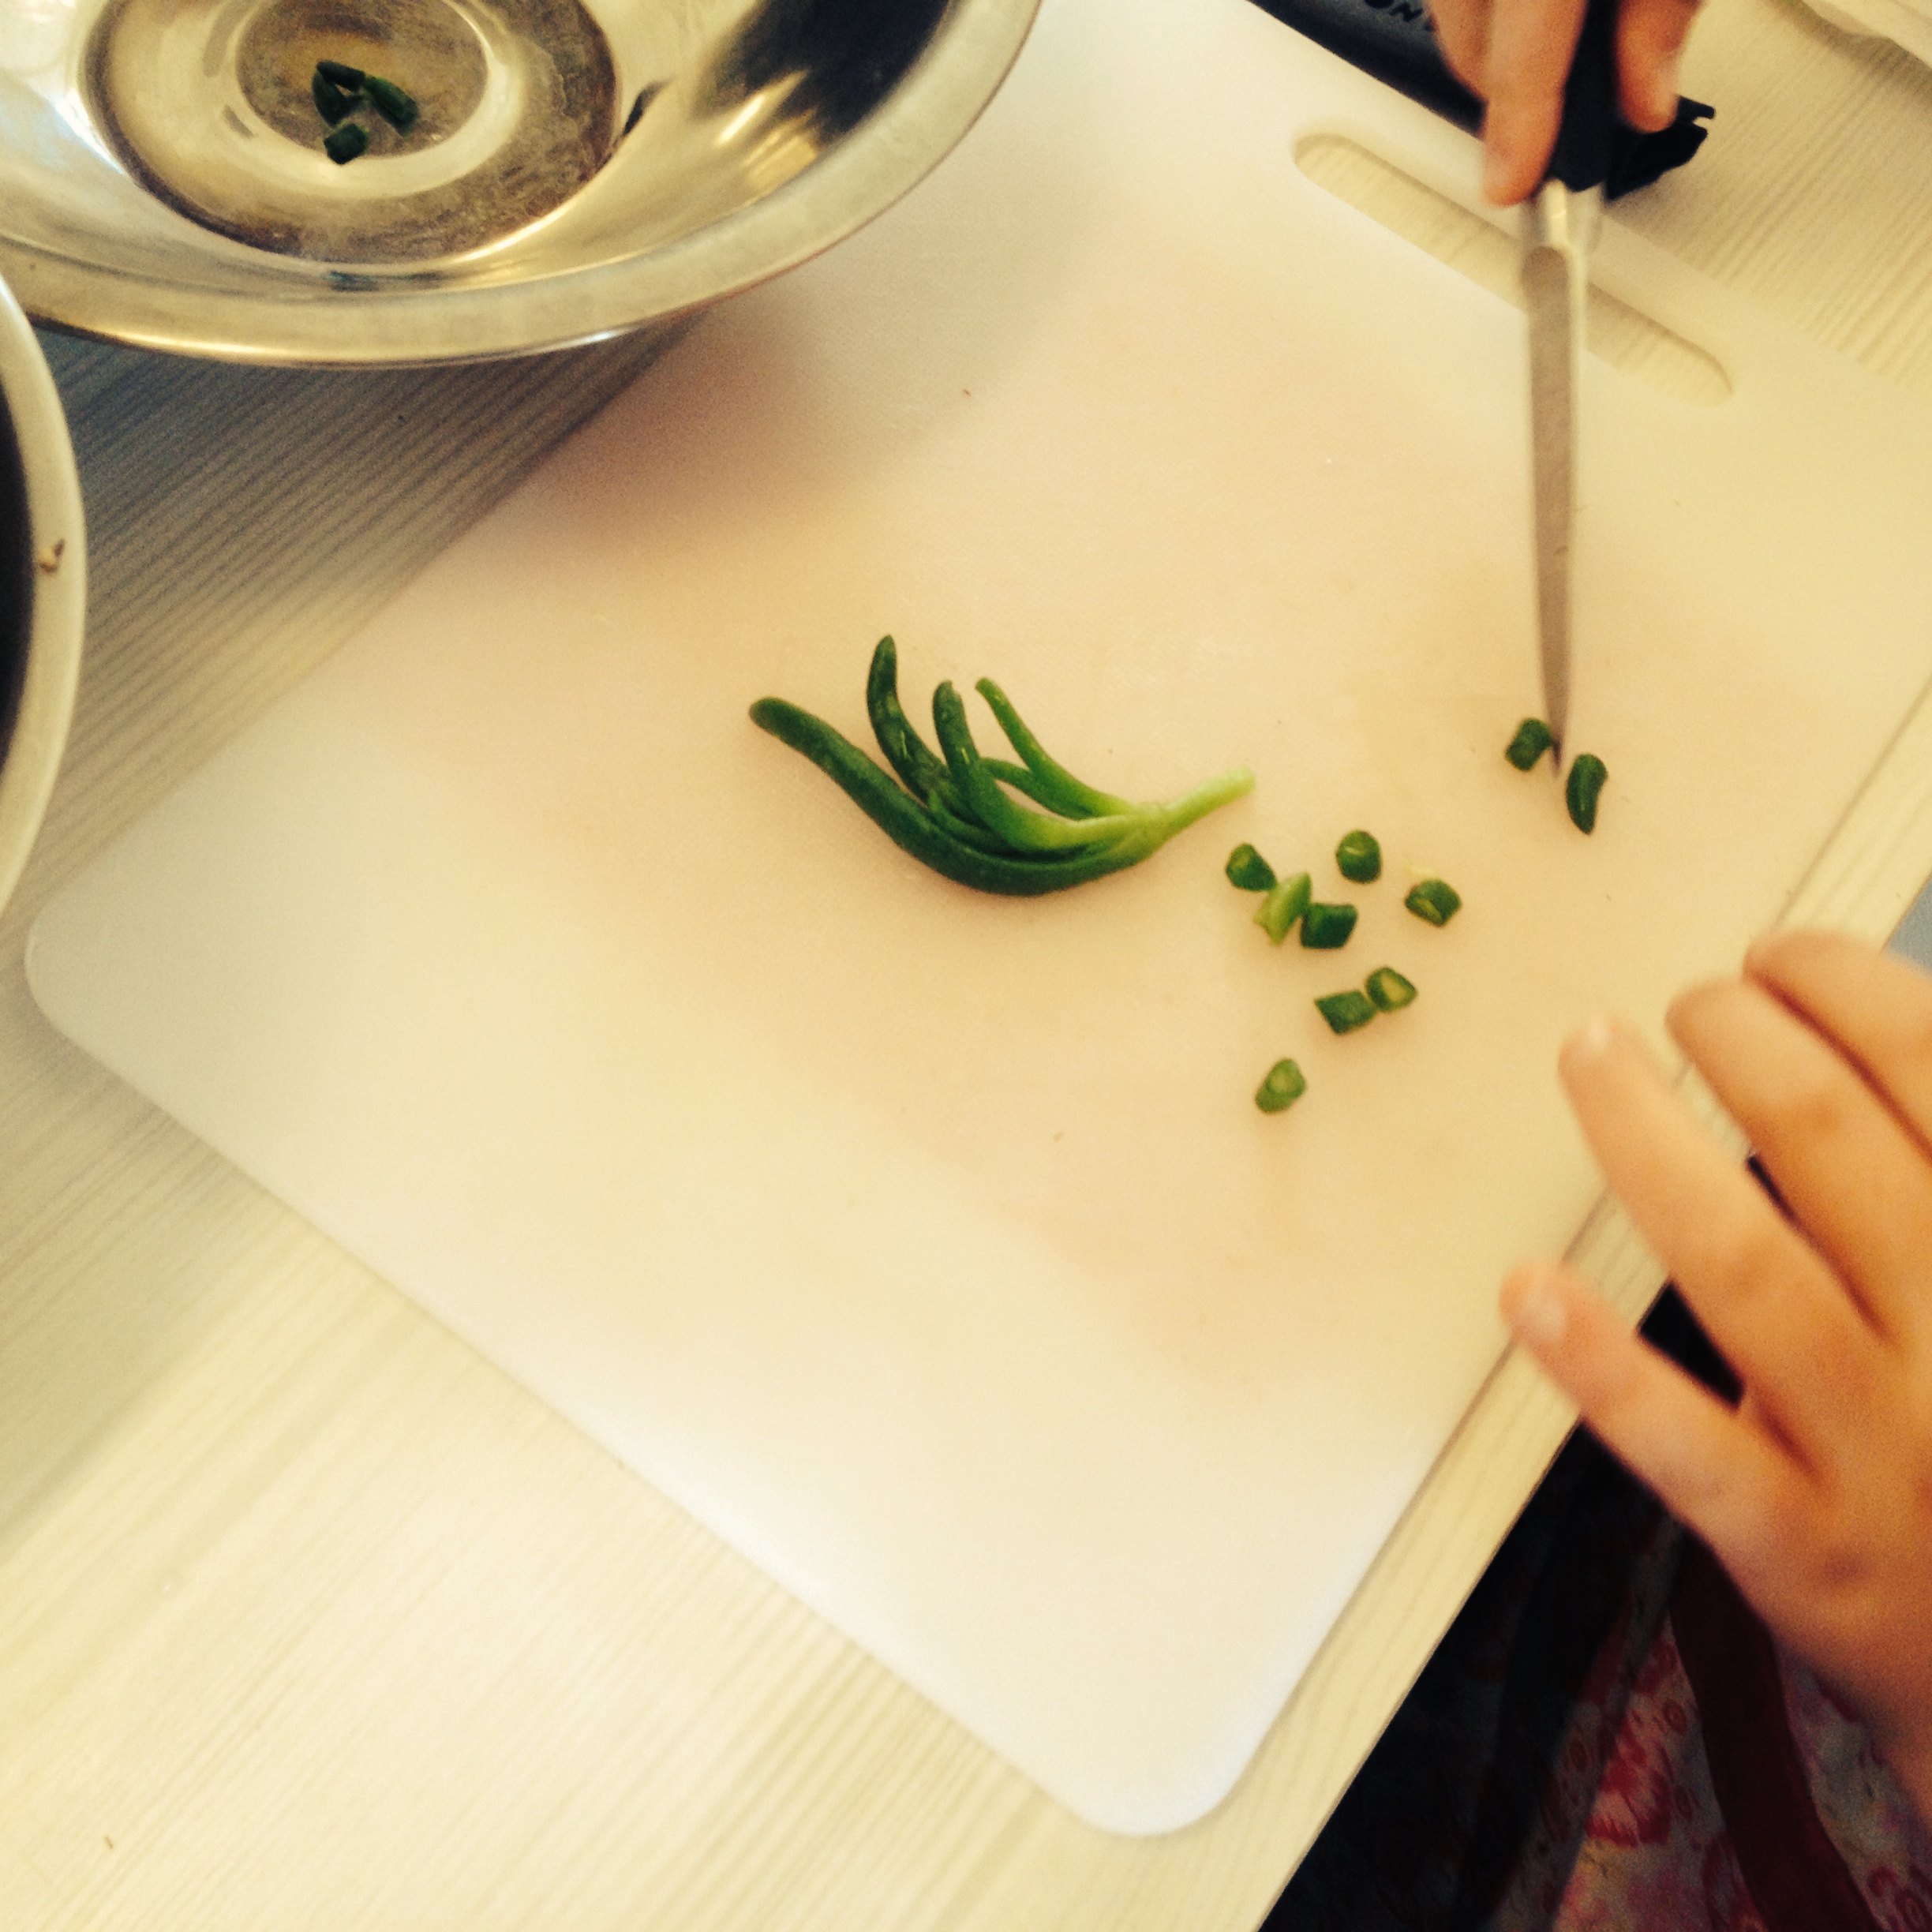
We’ve been truly taking all advantage of our winter crops and preparing fine feasts this fortnight, learning different techniques and also new uses for some old veggie favourites: Roasted winter veggies with rosemary honey drizzle – Japanese turnips and cauliflower florets roasting in the oven with a little olive oil and salt, with their buddies Brussels sprout leaves adding an almost crispy-kale-like element of savouriness. A surprise hit indeed! And who would have thought roasted cauliflower was so delicious? It’s much, much better than the soggy, white-sauced version of my childhood… We’ve added crispy and creamy elements to a thick pureed Carrot soup with lemon tahini and crisped chickpeas, with also a little flake or two of chilli to get the blood racing.

We are harvesting some lovely juicy and aromatic lemons at the moment, from our tree in the kindergarten playground, so have been juicing and zesting galore! And at the same time have been working up a sweat rolling, rolling and rolling pasta for Sean’s linguine with lemon, parmesan and rocket (and another touch of chilli!).

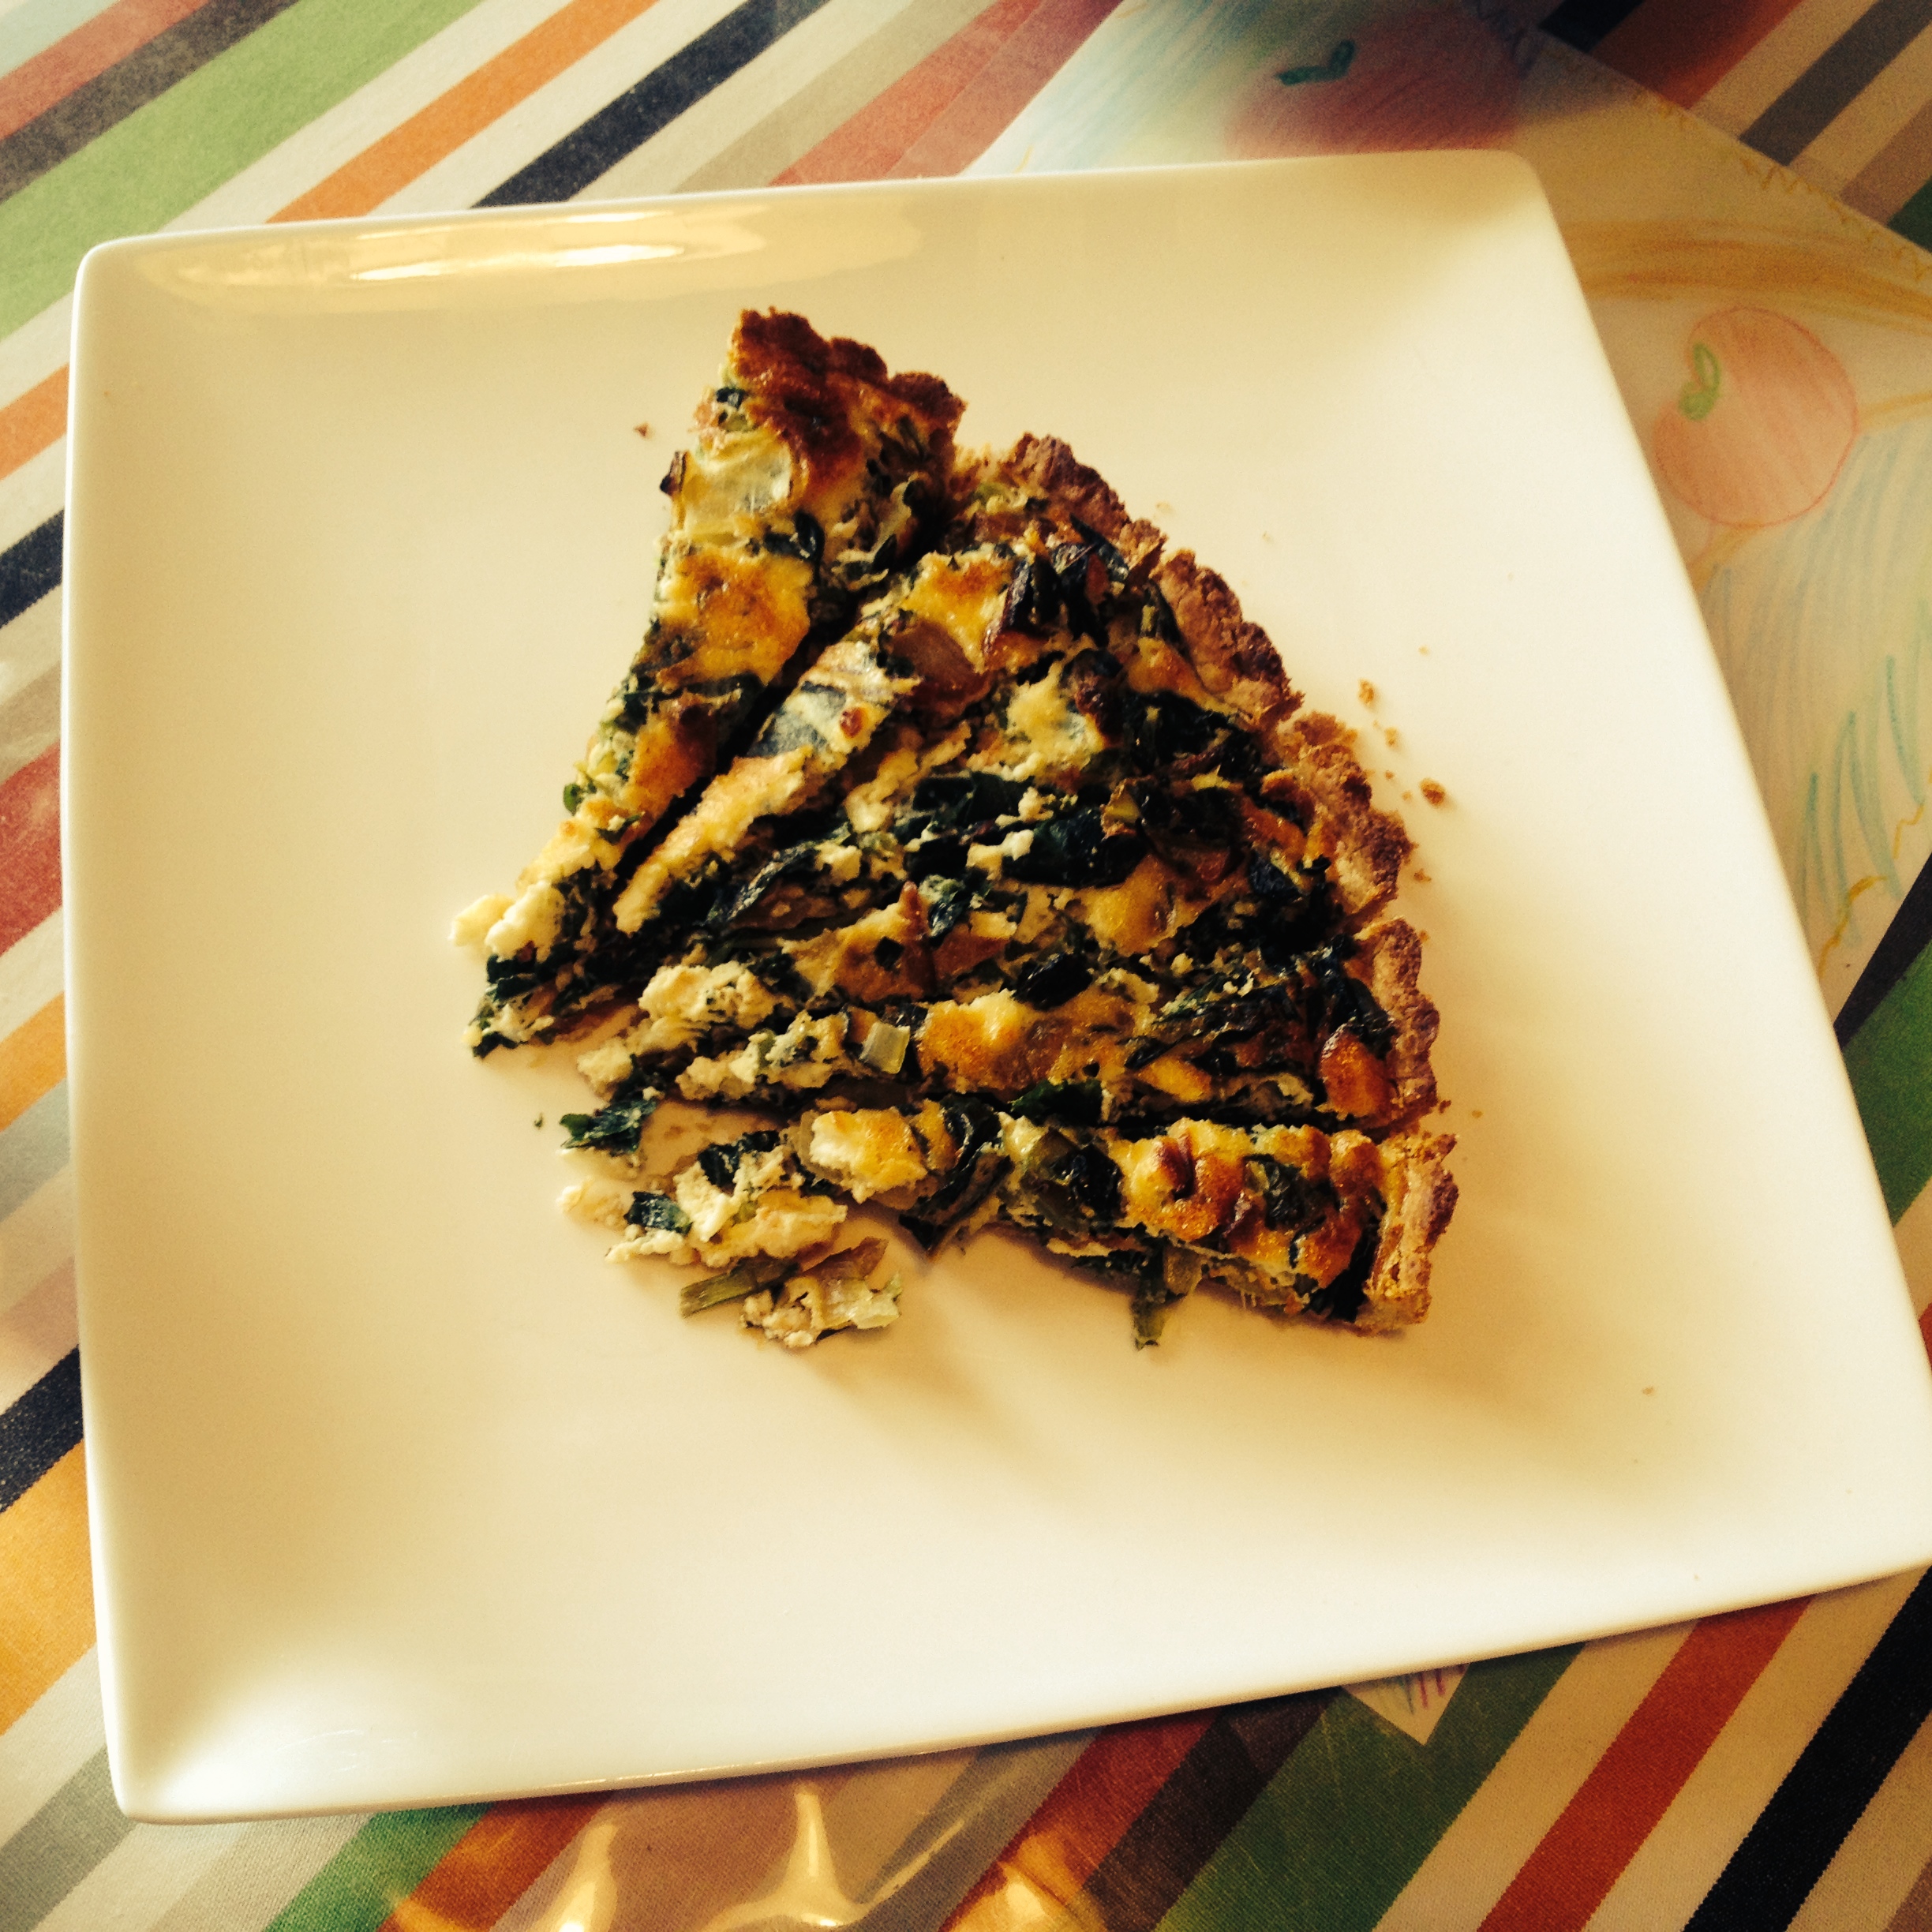
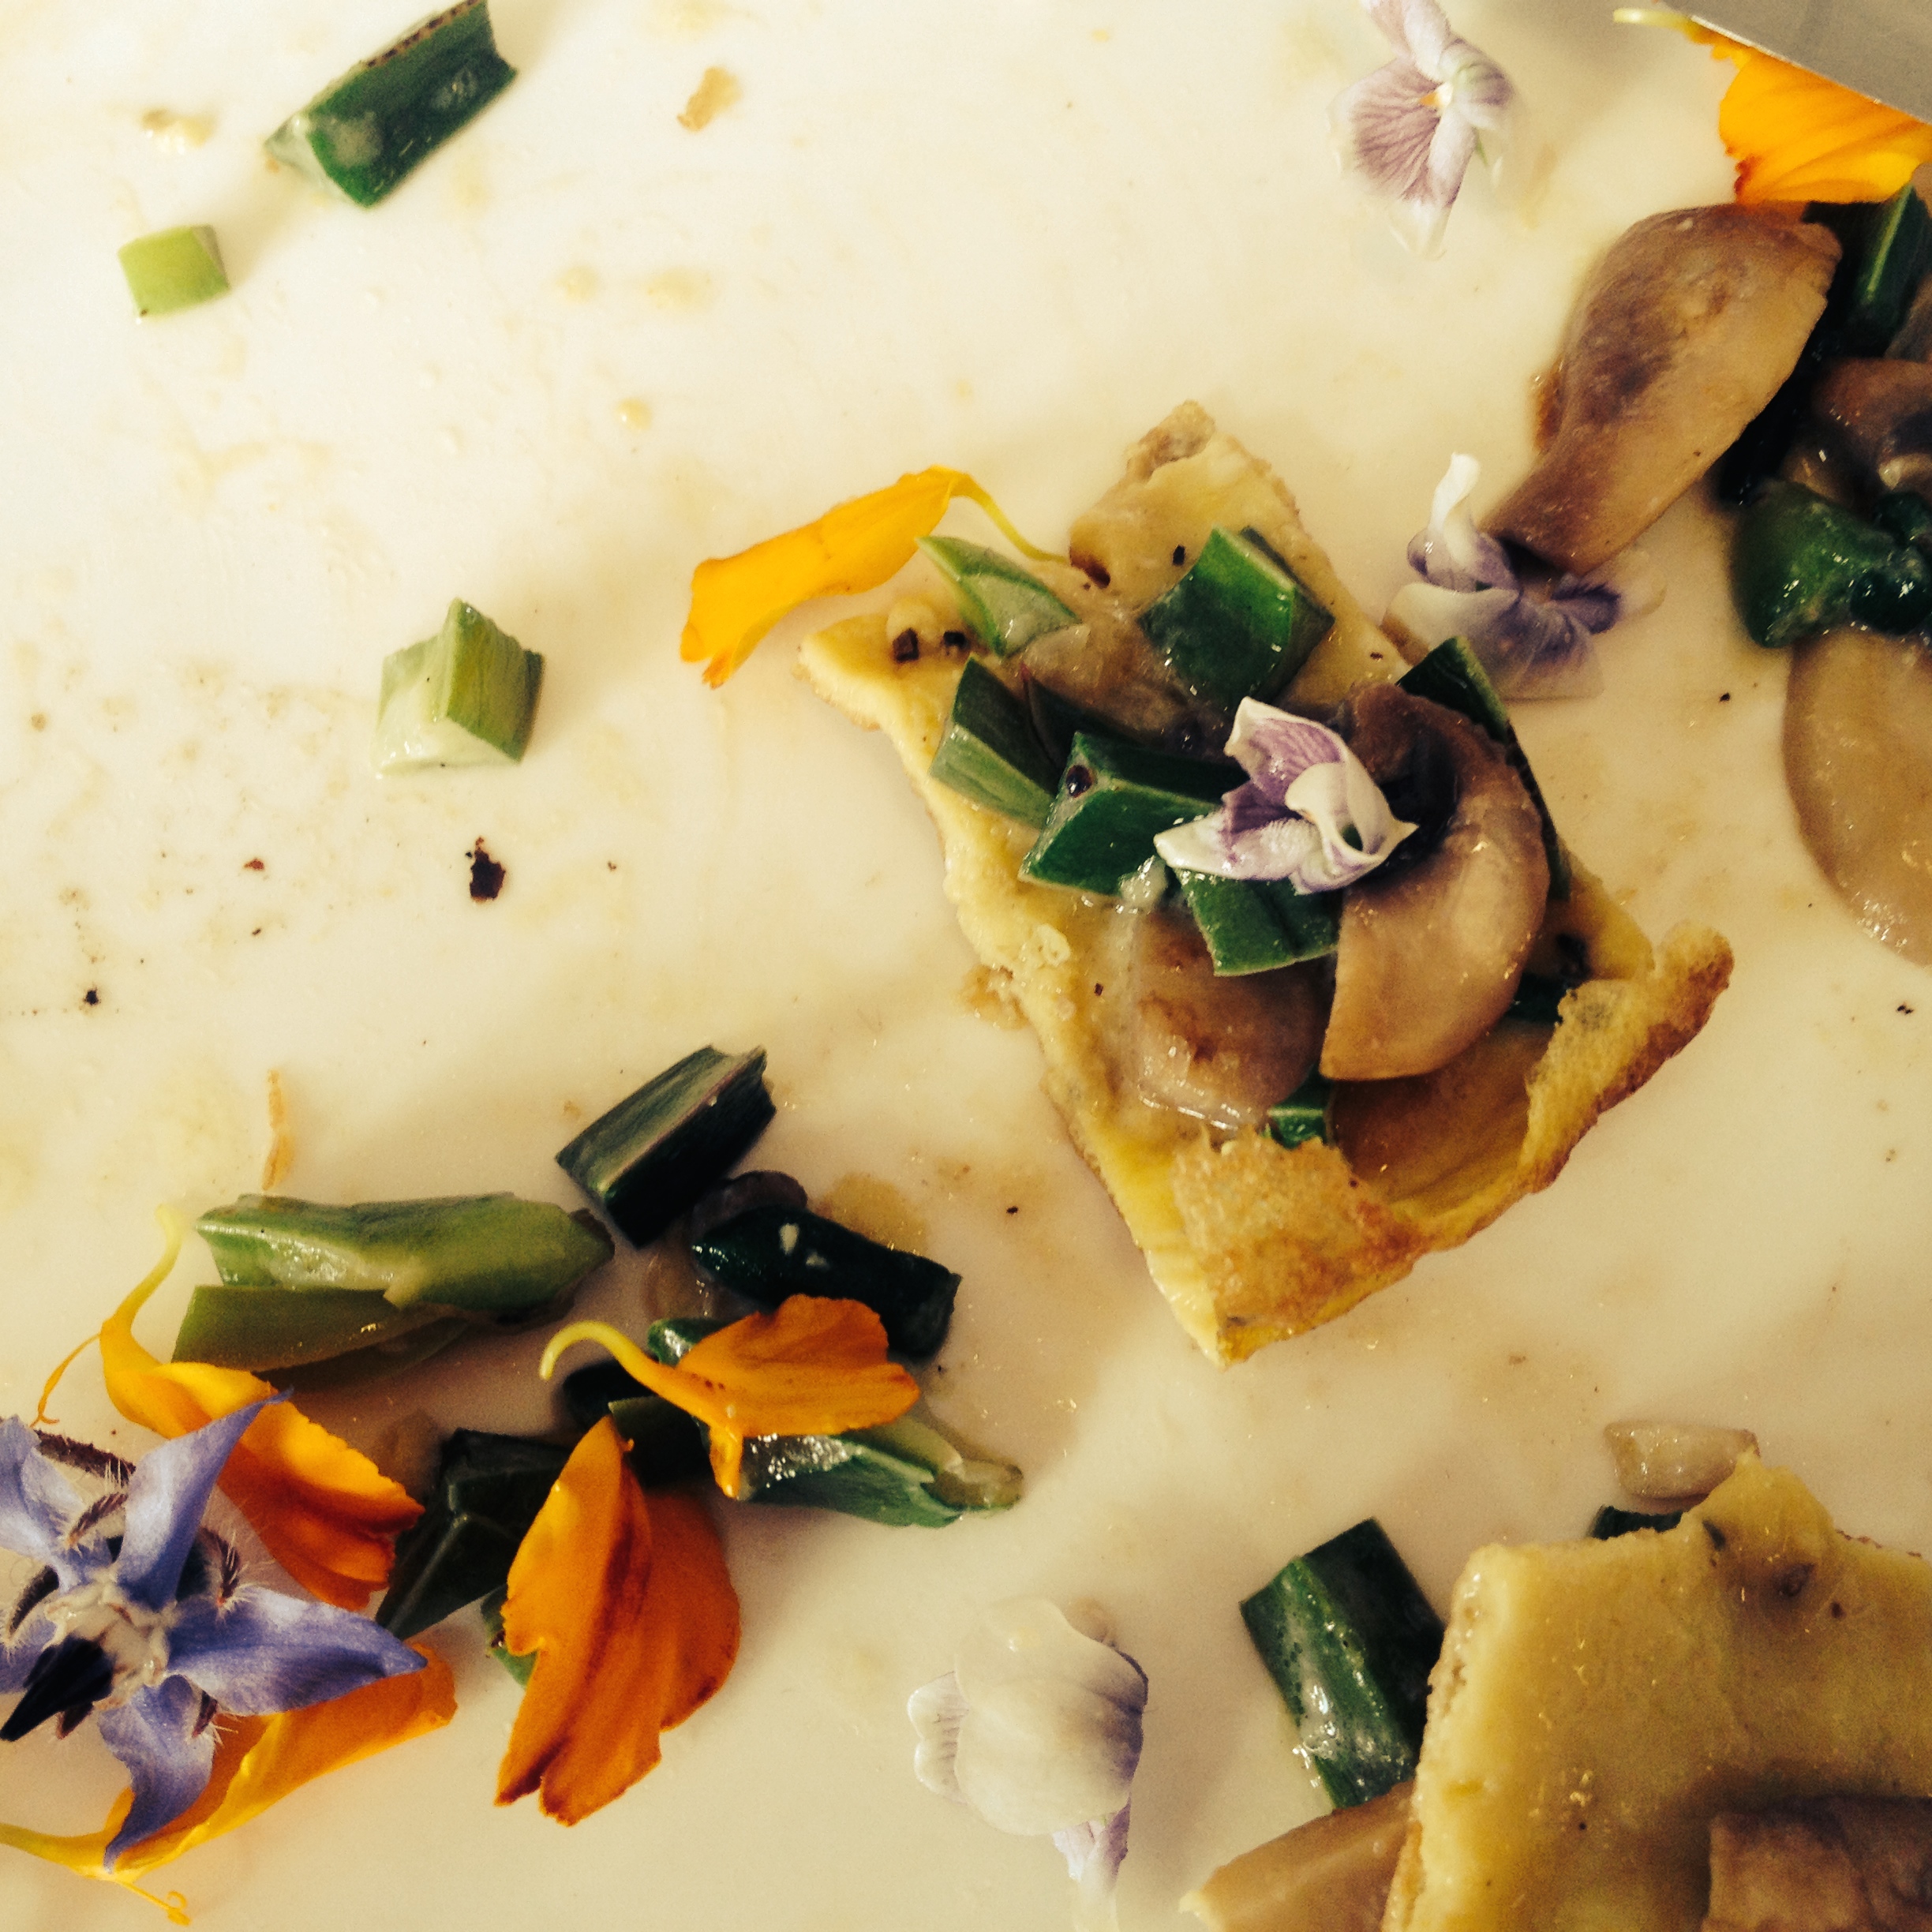
Another favourite, and definitely a dish to hone cooking craft is the Silverbeet, turnip top and ricotta tart, preparing our own shortcrust lemon-zested pastry and learning the art of blind baking. Fabulous!

And last but not least, several of the classes have had enough volunteers helpers present to have a fifth group (known as the Broad Beans…) make the Blood orange and cardamom upside-down cake. Blood oranges! My favourite fruit of all time, and wonderful in a cake with wholemeal flour (and a little bit of butter and sugar, natch).

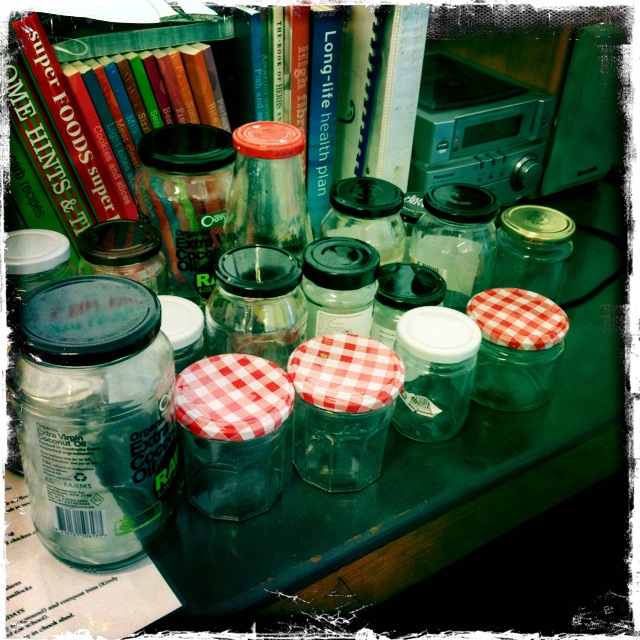
A perfect winter meal! Thanks to all the wonderful adult and kid helpers who make it happen (and especially those that help clean it all up afterwards!). And also for the clean jars that have flooded in since my request in the Class Newsletter earlier this week. Thanks and keep them coming!

Mx

Categories: Kitchen Garden, News | Tags: , , , | Leave a comment

Silverbeet and ricotta tart

This is an open tart filled with a lovely soft silverbeet mixture. To save time, we use the pastry dough made by the class before, and then make the pastry for the next class.

ourkitchengarden.net

Fresh from the garden: silverbeet, marjoram, eggs, onion, lemon
Recipe source: adapted by Melissa from the recipe in The Silver Spoon
Serves: 6 or 24 tastes

Equipment:

  • Rolling pin
  • 26cm tart tin
  • Fork
  • Aluminium foil
  • Baking beans
  • Oven mitts
  • Chopping boards & knives
  • Mixing bowls – selection
  • Large frying pan
  • Whisk
  • Measuring cups – 1, ½, ¼
  • Scales
  • Large metal spoon
  • Microplane grater
  • Food processor
  • Cling film
  • Serving plates


Ingredients:

Italian shortcrust pastry

  • 1 lemon
  • 200g plain flour plus extra for rolling
  • 100g cold unsalted butter
  • 1 egg
  • 1 tablespoon iced water

Tart filling

  • An onion
  • 6 silverbeet stalks & leaves
  • 3 sprigs marjoram
  • 30g unsalted butter
  • 3 free-range eggs
  • 1 cup milk
  • ¼ cup cream
  • Salt and freshly ground black pepper to taste
  • 1 nutmeg
  • 100g ricotta

What to do:

Blind baking the pastry:

  • Preheat oven to 180C.
  • Roll out pastry onto floured surface to approximately 4mm thick.Rolling the pastry onto a rolling pin, lift it gently into the tart tin, and prick all over with a fork. Place a sheet of foil to cover the pastry, empty in the baking beans and blind bake in the oven for 15 minutes.

Preparing the tart:

  • Finely chop the onion and thoroughly wash the silverbeet. Wash, dry & pick the marjoram leaves.
  • Melt the butter in the large frying pan over medium/low heat. Add the onion and cook gently on a low heat, stirring regularly for 5 minutes.
  • Meanwhile shake off the excess water from the silverbeet, and slice it (including the stalks) finely. Add it to the frying pan and cook, stirring occasionally, for 5 minutes or so until it’s wilted but the leaves are still deep green. (If there is liquid in the base of the pan, briefly increase the heat to boil it off.) Turn off the heat. Set aside.
  • Whisk the eggs in the large bowl to break them up. Weigh the ricotta then push it through the sieve into the bowl then stir in the milk, cream, and a little salt, pepper and a grate of nutmeg. Stir in the silverbeet and the marjoram.
  • Using the oven mitts, remove the tart shell from the oven and let it cool for a few minutes. Pull off the beans (reserving them for future use) & discard the foil.
  • Using the large metal spoon, spread the silverbeet mixture evenly over the base of the tart shell.
  • Bake the tart for about 30 minutes until it is golden and lightly set. Use this time to make the pastry for the next class.
  • After 30 minutes is up, check the tart by inserting the tip of a knife into the middle and gently pressing the sides of the cut apart. The filling should be softly set with no liquid running into the cut.
  • Remove it from the oven and leave it to cool and settle for a few minutes before serving. Then just slip off the outer ring of the tin, gently slide the tart onto a clean chopping board to slice before placing onto your serving plates.

To make the pastry:

  • Carefully zest the lemon using the microplane grater.
  • For the pastry sift the flour and add to salt in food processor. Chop the butter and add to flour mixture – whiz until mixture resembles fine breadcrumbs.
  • Sprinkle in the zest and pulse to incorporate.
  • Separate the egg and add the yolk only to processor with the cold water and motor running.
  • As soon as the pastry resembles a ball, take out of processor. Flatten dough to form a disc and wrap in cling film. Refrigerate for at least an hour.

Notes: What else could be used in the filling instead of silverbeet? Why do we ‘blind bake’ & what does it mean? What does ‘shortcrust’ mean?

ourkitchengarden.net


Categories: Kitchen Garden, Recipe | Tags: , , , , , , , , | Leave a comment

Carrot soup with lemon tahini and crisped chickpeas

Carrot soup seems to go down a treat with our kids, and this one is super-special with a wonderful lemony dollop and also some crunch from roasted chickpeas.

ourkitchengarden.net

Fresh from the garden: carrots, onion, garlic, parsley, lemon
Recipe source: adapted from a recipe by Deb Perelman on smittenkitchen.com
Serves: 6 or 24 tastes

Equipment:

  • Kettle
  • Peelers
  • Chopping boards and knives
  • Large stockpot
  • Measures: tablespoon, teaspoon, ½ teaspoon
  • Baking tray and paper
  • Colander
  • Mixing bowls – selection
  • Citrus juicer
  • Salad spinner
  • Stick blender
  • Ladle
  • Serving bowls


Ingredients:

  • 1.5 litres boiling water with 2 tablespoons of bouillon (or 1.5 litres vegetable stock)
  • 2 tablespoons olive oil
  • 1kg carrots
  • 1 large onion
  • 4 garlic cloves
  • A teaspoon ground coriander
  • A teaspoon ground cumin
  • 1/2 teaspoon table salt, plus more if needed
  • Pinch of chilli flakes
  • A small handful flat leaf parsley

Crisped chickpeas

  • 400g tin of chickpeas
  • 1 generous tablespoon olive oil
  • 1/2 teaspoon coarse salt

Lemon-tahini dollop

  • 3 tablespoons tahini paste
  • A lemon
  • Pinch or two of salt
  • 2 tablespoons water

What to do:

  • Fill the kettle with cold water to the 1.5 litre mark and set it to boil. Preheat the oven to 220C.
  • Wash and peel carrots and dice into small cubes. Peel and finely chop the onion. Smash and peel the garlic cloves.
  • Heat two tablespoons olive oil in the large pot over medium heat. Add the onion and sauté gently for 5 minutes, then add the carrots, garlic, coriander, cumin and chilli flakes and cook until they begin to brown, about 5 minutes.
  • Once vegetables have begun to brown, add the hot water and bouillon (or stock), using it to scrape up any bits stuck to the bottom of the pot. Cover pot with lid and simmer until carrots are tender, stirring occasionally, about 15 minutes.

To make the chickpeas:

  • Meanwhile, line the tray with baking paper. Drain the chickpeas and then pat dry on paper towels and pop into a large bowl. Toss chickpeas with the olive oil, salt and cumin until they’re all coated. Spread them on the tray and roast them in the oven until they’re browned and crisp. This can take anywhere from 10 to 20 minutes, depending on the size and firmness of your chickpeas. Toss them occasionally to make sure they’re toasting evenly.

To make the lemon tahini:

  • Meanwhile cut the lemon in half and juice to yield 2 tablespoons. In a small dish, whisk together the juice, tahini, salt and water until smooth with a yogurt-like consistency. If more liquid is needed to thin it, you can add more lemon juice or water, a spoonful at a time, until you get your desired consistency.

To finish:

  • Wash and spin-dry the parsley. Pick the leaves from the stalks and chop.
  • Puree soup with the stick blender until smooth. Taste to check seasoning, then ladle into bowls. Dollop each with lemon-tahini, sprinkle with crisped chickpeas and garnish with chopped parsley. 

Notes: Carrot and cumin goes well together. What other classic combinations can you think of?

Categories: Kitchen Garden, Recipe | Tags: , , , , , , , , | Leave a comment

Roasted winter veggies with rosemary honey drizzle

The colder weather brings us turnips, Brussels sprouts and cauliflower but they’re a tricky bunch to convince kids to eat… Unless they’re swaddled in buttery honeyed goodness!

ourkitchengarden.net

Fresh from the garden: Japanese turnips, cauliflower, Brussels sprouts, kale, rosemary
Recipe source: adapted from a recipe by Susie Middleton in Fast, Fresh & Green
Serves: 6 or 24 tastes

Equipment:

  • Large rimmed baking tray
  • Baking paper
  • Paper towel
  • Chopping boards and knives
  • Colander
  • Salad spinner
  • Mixing bowls
  • Spatula
  • Mezzaluna
  • Scales
  • Measures: ¼ cup, tablespoon, teaspoon
  • Small saucepan
  • Serving bowls
Ingredients:

  • 4 or 5 medium Japanese turnips
  • 500g cauliflower
  • A large handful Brussels sprout leaves
  • A few branches of kale
  • 1/4 cup olive oil
  • 1½ teaspoons coarse salt
  • 25g unsalted butter
  • 1 tablespoon honey
  • 1 sprig fresh rosemary


What to do:

  • Preheat oven to 220C. Line a large rimmed baking sheet with baking paper and set aside.
  • Scrub the turnips under running water and wipe dry. Without peeling, chop them into 2cm cubes by cutting into slices first, then rods, then cubes.
  • Wash and dry the cauliflower and prepare in the same way as the turnips.
  • Wash the Brussels sprout leaves in a big bow of cold water, drain in the colander and dry in the salad spinner.
  • Wash the kale and strip the leaves from the stalks. Chop all finely.
  • In a large bowl, toss together all the veggies with the oil and salt until well combined. Place in an even layer on prepared baking sheet.
  • Transfer to oven and roast, turning with a spatula once or twice during cooking, until browned and turnips are easily pierced with a paring knife, for about 25 minutes.
  • Meanwhile, wash the rosemary sprig and wipe dry with paper towel. Strip the needles from the stalk and finely chop using the mezzaluna. We will need about a tablespoon worth.
  • Melt the butter in a small saucepan over medium heat. Add honey and rosemary; let simmer for a few seconds and remove from heat.
  • Transfer veggies to serving bowls and drizzle with butter mixture. Toss to combine and serve.

Notes: What other winter veggies can you name? What does a turnip smell like?

Categories: Kitchen Garden, Recipe | Tags: , , , , , , , , | Leave a comment

Kitchen news – 31st July 2014

ourkitchengarden.net

Here we are with some fabulous warm weather, but more cold is forecast? Don’t pack those winter jackets away just yet… Regardless of hot or cold, the pots have been bubbling away in the cottage this last fortnight, while we’ve been exploring our native Bush Tucker foods menu in celebrating NAIDOC week.

We’ve had some wonderful discussions in both our Kitchen and Garden classes about what Bush Tucker is, where you find ingredients and how you might prepare them to make them palatable and importantly, non-toxic! And also whether we are being culturally sensitive to mix native ingredients into our own recipes… Our answer has been that we think we are being respectful in a number of ways: by acknowledging that the indigenous Australians have been using these foods for tens of thousands of years; by foraging considerately (for example, taking less than a third of what we find growing in one spot in the wild); and by adding to the diverse and rich culture of Modern Australian food that we have in Sydney. A massive thanks to Allison who got out of bed early quite a few times in the last two weeks to hunt down, under cover of darkness, secret local spots to poach ingredients from (and out of the hands of hipster chefs!).

To the recipes! A (Javanese) Soup of barilla bower spinach and sweetcorn, with fresh turmeric to ward away colds and to dye all fingers, chopping boards and white shirts a golden yellow! We have also been perfecting the art of Omelettes with sautéed mushrooms and karkalla (or pigface, much more fun to say!). And we’ve realised how pigface grows EVERYWHERE in Bondi! And for a truly multicultural dish, we’ve topped our dough for Pizza bianca with Warrigal greens, kale and dolcelatte (gorgonzola) for a wonderful take on the classic – and converted a few children to the wonders of blue cheese too! And thanks to Paul, we’ve had a huge branch of lemon myrtle leaves to use: flavouring stock for Broccolini and lemon myrtle risotto; blending with sugar to infuse the sherbet-like flavour of Lemon myrtle shortbread; and also to simply make Lemon myrtle tea. Wonderful!

Whatever shall we do in the next weeks to top this menu?! You’ll have to come along and see!

Mx

ourkitchengarden.net

Categories: Kitchen Garden, News | Tags: , , , | Leave a comment

Bush tucker: Lemon myrtle tea

We make all sorts of herbal tea variations in the cottage, using aromatic lemongrass, lemon balm, lemon verbena, mint, lemon thyme, chamomile, citrus rind and ginger as well as this foraged lemon myrtle… The tea is easy to make and lovely chilled from the fridge overnight too, once the tea has brewed just remove the leaves so that it doesn’t stew.

ourkitchengarden.net

Foraged bush tucker food: lemon myrtle leaves
Recipe source: Melissa
Makes: 2 to 3 litres

Equipment:

  • Stockpot
  • Tea glasses or jugs
Ingredients:

  • A bunch of lemon myrtle leaves
  • 2 or 3 litres water

What to do:

  • Fill the stockpot with water and set it on high to boil with the lid on.
  • Rinse the bunch of leaves well in cold water and shake dry. Remove the leaves from the branch, discarding the branch.
  • Once the water is boiling, turn the pot off and carefully drop the herbs in.
  • Let the tea steep for several minutes and serve, ladling the tea carefully into each glass or jug.

Notes: What else is herbal tea know as? What other herbs or spices could you use? What does aromatic mean?

Categories: Kitchen Garden, Recipe | Tags: , , , , | Leave a comment

Bush tucker: Lemon myrtle shortbread

Lemon myrtle leaves are wonderful to use steeped in liquid – in oil, water, milk or stock – as the flavour permeates so well. This recipe uses lemon myrtle leaves that were dried in a dehydrator and then blended with sugar and used for the intense flavour.

 ourkitchengarden.net

Foraged bush tucker food: lemon myrtle leaves
Recipe source: adapted from Jill Dupleix’s recipe for Anytime Shortbread in ‘Simple Food’
Makes: about 30 biscuits

Equipment:

  • Baking trays
  • Baking paper
  • Stick blender with bowl attachment
  • Sieve
  • Scales
  • Mixing bowls
  • Food processor
  • Sieve
  • Chopping board and knife
  • Cling film
  • Rolling pins
  • Biscuit cutters
  • Serving plates
Ingredients:

  • 2 large or 3 small dried lemon myrtle leaves
  • 50g caster sugar
  • 300g unsalted butter, soft
  • 100g icing sugar
  • Pinch of sea salt
  • 300g plain flour
  • 150g rice flour or cornflour


What to do:

  • Heat the oven to 150C. Line the baking trays with baking paper.
  • Tear up the lemon myrtle leaves into the stick blender bowl attachment with the caster sugar and blitz until the leaves are tiny specks. Then pour out the contents into the sieve set over a medium bowl and shake the sugar through. Discard the bits of leaf.
  • Combine the butter, icing sugar and sea salt in the bigger food processor and whiz until smooth.
  • Sift together the flour and rice flour into a medium bowl, then add it to the processor with the blended caster sugar – pulsing off and on, scraping down the sides from time to time, until the mixture gathers into a ball. Knead for a minute or two with your hands until smooth, then cut into two, wrap in cling film and refrigerate for 30 minutes. Tidy & wipe down your workspace.
  • Turn out onto a floured surface and pat or lightly roll out the dough until it is 1cm Cut into shapes with the biscuit cutters. Reshape the scraps and cut more shapes. Place on a baking tray and prick with a fork.
  • Bake on the middle shelf of the oven for 10 minutes, then turn the tray around and bake for another 5 to 10 minutes until touched with colour. Leave to cool on the tray.
  • Divide among serving plates and gobble up!

Notes: This shortbread can be stored in an airtight container for up to 2 weeks.

Categories: Kitchen Garden, Recipe | Tags: , , , , , | Leave a comment

Bush tucker: Pizza bianca with Warrigal greens, kale and dolcelatte

Warrigal greens are high in oxalic acid – and poisonous raw in large quantities – so need to be properly cooked first before eating. We blanch our leaves first in boiling water for a few minutes and then refresh before draining, and then using.

ourkitchengarden.net

Foraged bush tucker food: Warrigal greens
Recipe source: adapted from a recipe by Bill Granger in Sunday Life Magazine
Makes: 2 large pizzas

ourkitchengarden.net

Equipment:

  • Stand mixer, bowl and dough hook
  • Measures: cup, ½ cup, tablespoon, teaspoon, ½ teaspoon
  • Plastic wrap
  • Bowls – 2 medium, 2 small
  • Stockpot
  • Chopping boards and knives
  • Frying pan
  • Wooden spoon
  • 2 large oven trays
  • Rolling pins
  • Pastry brush
  • Metal spoons
  • Tongs
  • Wide egg lifter
  • Large wooden board
  • Pizza cutters
  • Serving plates
Ingredients:

For the pizza base:

  • 4 cups strong white bread flour plus extra for kneading
  • 2 teaspoons instant yeast
  • 1 teaspoon sugar
  • 1 teaspoon salt

For the pizza topping:

  • 4 tablespoons olive oil, plus extra for drizzling
  • 4 garlic cloves
  • A large handfulWarrigal greens
  • 4 large stalks of kale
  • A knob of butter
  • ½ teaspoon chilli flakes
  • 100g crème fraîche
  • 100g dolcelatte or other mild blue cheese
  • 2 handfuls of rocket

What to do:

For the pizza base, in advance:

  • Put the flour, yeast, sugar and salt into the bowl of the stand mixer and stir to combine. Make a well in the centre and pour in 1½ cups of tepid water. Turn mixer on and knead for 10 minutes until smooth and elastic.
  • Turn out onto your work surface and knead by hand for another minute or so, then place in a lightly oiled bowl and cover with plastic wrap. Leave for an hour until doubled in size.

To make the topping:

  • Half fill the stockpot with water and set to boil. Wash and shake the Warrigal greens dry, then when the water is boiling, add the greens and blanch for 3 minutes. Drain and refresh in a big bowl of cold water, then drain again.
  • Wash the kale then slice the leaves from the stalks, and chop into ribbons. Peel and thinly slice the garlic.
  • Heat the olive oil in the frying pan & gently cook the garlicand sizzle for a minute until fragrant. Add the kale ribbons and toss to coat in the oil. Pour in a cup of hot water and a teaspoon of bouillon and cook the kale gently until most of the liquid has evaporated and the leaves have wilted. Add in the Warrigal greens and toss to coat in the oil for one minute.
  • Toss in the butter and chilli flakes and shake the pan to coat the leaves. Set aside.
  • ourkitchengarden.net

Assembling the pizza:

  • Preheat the oven to 200C.
  • Brush the baking trays all over with a little olive oil.
  • With the dough still in the bowl, punch any air out, then divide into two and roll them out on a lightly floured surface. Transfer to the greased trays, pressing and pushing the dough into the corners using the palm of your hands.
  • Measure out the crème fraîche and dolcelatte.
  • Spoon the crème fraîcheover the pizza bases, then top with the Warrigal greens mix and chunks of dolcelatte.
  • Wash the rocket in a few changes of cold water and then spin it dry. Chop any large leaves into smaller ribbons. Reserve until the pizzas are cooked.

Baking the pizza:

  • Drizzle generously with olive oil and bake for 15-20 minutes until cooked through.
  • Use this time to make the dough for the next class if needed.
  • You may want to slip the pizza off the trays onto the rack for the last few minutes, so that you get a really crusty base.
  • Once the pizzasare done, transfer them to the large wooden board using the wide egg lifter.
  • Cut the pizzas crossways into small squares, and divide onto serving plates.
  • Sprinkle with rocket leaves and serve.
  • Yum!

Notes:What are Warrigal greens like and where do they grow? What is crème fraîche? What is dolcelatte and what does its name mean?

ourkitchengarden.net

Categories: Kitchen Garden, Recipe | Tags: , , , , , , | Leave a comment

Bush tucker: Pigface and mushroom omelettes

Pigface is also called karkalla or bush bananas & grows everywhere along the Eastern seaboard. Have a look next time you’re down at the beach!

ourkitchengarden.net

Foraged bush tucker food: pigface/ karkalla
Recipe source: Melissa
Makes: 4 omelettes

Equipment:

  • Paper towel
  • Chopping boards and knives
  • 1 large, 1 medium & 4 small mixing bowls
  • Garlic press
  • Colander
  • Fork, butter knife
  • A large wok
  • A non-stick frying pan
  • Wooden spoon with straight end
  • Egg slice
  • Serving plates
Ingredients:

  • A large handful of mushrooms
  • A clove of garlic
  • A large handful pigface
  • 8 eggs
  • Flaked salt & black pepper
  • 50g butter
  • Olive oil

What to do:

  • Trim the mushrooms of any dirt and wipe clean with a damp piece of paper towel. Chop into thin slices and reserve in a large bowl.
  • Peel the garlic clove and squeeze through the garlic press into the mushrooms.
  • Wash the pigface in a large bowl of cold water and drain. Pick through and discard any damaged ends and reserve the rest. Chop any large pieces into smaller slices.
  • Break 2 of the eggs at a time into each small bowl, season with salt and pepper and whisk lightly with a fork.
  • Heat a small knob of butter and a tablespoon of olive oil in the wok over medium heat until foaming. Add in the mushrooms and garlic and carefully toss a few times to cover in the butter mixture. Sprinkle in a few pinches of salt, a grind of pepper, and then sauté for 2 minutes until slippery.
  • Add the pigface to the wok and toss for another minute.
  • Add another small knob of butter to the frying pan and then when foaming, pour in one of the bowls of whisked egg mixture and gently tilt the pan to distribute. Cook for 20 seconds or so on a low heat, until it begins to bubble, then draw the egg into the centre with the wooden spoon and rotate the pan again to redistribute the uncooked egg.
  • The omelette is cooked when the base is set, but is still slightly runny in the middle.
  • Slide a quarter of the mushroom and pigface onto one half of one omelette, fold the other half over with the egg slice to form a half-moon and slice out on to one of the serving plates.
  • Repeat with the remaining omelettes and the rest of the mushroom mixture, and serve!

Notes: What does pigface look like and where does it grow?

ourkitchengarden.net

Categories: Kitchen Garden, Recipe | Tags: , , , , , , , | Leave a comment

Bush tucker: Broccolini and lemon myrtle risotto

This lovely risotto is textural and beautifully herby, and very easy once you get past all the stirring! Serve just before eating while it’s still soupy.

ourkitchengarden.net

Foraged bush tucker food: lemon myrtle leaves
Recipe source: Melissa
Serves: 6 or 24 tastes


Equipment:

  • Saucepan
  • Measures: scales, jug, cup, ¼ cup, tablespoon
  • Salad spinner
  • Garlic press
  • Mixing bowls
  • Chopping boards & knives
  • Grater & microplane zester
  • Ladle
  • Wooden spoon with a straight end
  • Heavy based stockpot
  • 4 soup plates or bowls to serve


Ingredients:

  • 2 litres water with 2 tablespoons bouillon (or 2 litres stock)
  • 1 brown onion
  • 3 fresh lemon myrtle leaves
  • A small handful marjoram
  • 3 garlic cloves
  • 1 handful broccolini & leaves
  • 3 tablespoons extra-virgin olive oil
  • 20g butter
  • 400g Arborio rice
  • 50g parmesan
  • Flaked salt & black pepper

What to do:

  • Pour the water and bouillon into a saucepan, and bring it to a boil. When boiling, turn down to bare simmer and add the lemon myrtle leaves.
  • Peel and finely chop the onion. Squeeze the garlic cloves through the press into a small bowl.
  • Wash the broccolini & shake dry. Chop the stems into ½ cm pieces and add stems to the stock, reserving the florets. Wash the leaves, strip from the stalks and finely slice the leaves.
  • Heat the olive oil and butter over medium heat in the stockpot. Add the chopped onion and cook gently for about three minutes until translucent but not brown. Add the garlic and cook gently for another few seconds.
  • Stir in the rice until the grains separate and begin to crackle.
  • Begin adding the simmering stock, a ladle at a time, and stir in. The stock should just cover the rice and bubble. Stir every minute or so for about 15 minutes.
  • After about 10 minutes, add the broccoli florets & sliced leaves to the rice and keep stirring for about another 5 minutes. When the rice is just tender all the way through but still slightly firm, usually in about 20 minutes all up, it is done.
  • Meanwhile, weigh and cut the parmesan & grate it. Wash and spin dry the marjoram, strip and discard the stems.
  • Add the last ladleful of stock and the rest of the broccolini in to the rice. Stir in the marjoram and parmesan, and remove from the heat. Taste now and check the seasoning. The mixture should be creamy and lose.
  • Serve into the bowls and eat right away!

Notes: What sort of rice is Arborio? Why do we use this sort of rice? Why do we fry the rice off first? What does ‘yield’ mean? What do lemon myrtle leaves smell like?

Categories: Kitchen Garden, Recipe | Tags: , , , , , , , , | Leave a comment

Create a free website or blog at WordPress.com.