Monthly Archives: November 2013

Don’t get yourself into a sticky mess on a sticky bun these holidays!

ourkitchengarden.net

Do you need ideas for your Kris Kringle?

Are you after some small but well-thought-out and perfectly handcrafted presents?

Freaking out at the thought of glazing your ham and no idea what to do?

No fear! Pre-order your jars of jam from me for delivery before Xmas!

I will be bottling up a storm over the next few weeks so get your order in – I will mainly be bottling the infamous Jam Girls Tomato Chilli Jam (spicy, sweet, addictive… and the perfect ham glaze) but will look around for some great local fruit too – last year’s best were Apricot and Vanilla, and Rhubarb and Vanilla, but who knows what this years warm harvests will bring!

Speak to me at school, text or email asap

Mx

ourkitchengarden.net

Advertisement
Categories: Jam Girls Jams | Leave a comment

Kitchen news – 21st November 2013

ourkitchengarden.net

Flatbread production line

The theme this fortnight has been ‘Our Families’, recommended to me by Miss Murden for her Stage 1 unit theme. This has been particularly appropriate at my house as we’ve had our English family to stay (who of course brought the rain with them!) but also has led to discussion in the classes about our Bondi Kitchen Garden Family, where we cook, eat and work together – and also how I very much feel like an auntie to all the children (or as a cheeky little Year 3 kid said, a Great Grandma. Hmph!) The UK folks left yesterday, so the weather should be a lot better from now on…

So to our menu: Hugh’s fish-free salad Niçoise (gorgeously golden yolks from our fresh eggs); slurpy Cream of celery soup; River Cottage garlicky flatbreads to mop up Alice’s broad bean puree (that’s the end of them!); and the most popular dish ever, judging by the requests for the recipe and general comments from parents AND children: the creamy and vibrant Risotto primavera.

A fabulous bunch of dishes and the children working so well together – so helpful, mature and an absolute delight to cook with! And not a grain of rice left…

To finish, I made a call-out for some haberdashery help… I mentioned that I had over a dozen aprons that need some sewing-machine attention or other and said would love to hand them over for a fix, and that it could be a project for the holidays? But it looks like I have a Machinist Miracle Maker who is even picking up the aprons on Tuesday! Thanks Fiona 🙂

For loads of great photos from the week and recipes updated fortnightly, click back here!

Mx
ourkitchengarden.net

Team zest!

Categories: Kitchen Garden, News | Tags: , , , , , , , , , , , , , , , | 1 Comment

Risotto primavera

This lovely spring risotto is positively bursting with green goodies!

ourkitchengarden.net

Fresh from the garden: broad beans, green beans, marjoram, garlic, onion, pea shoot tendrils
Recipe source: Melissa
Serves: 6 at home or 24 tastes

Equipment:

  • Saucepans – small, medium and large stockpot
  • Salad spinner
  • Bowls – 1 large, small, med
  • Large knife& chopping board
  • Grater, microplane zester
  • Ladle
  • Wooden spoon with a flat end
  • Heavy based stockpot
  • Measures: scales, jug, cup, tablespoon
  • 4 bowls or soup plates to serve


Ingredients:

  • 2 litres water with 2 tablespoons bouillon (or 2 litres stock)
  • 3 garlic cloves
  • 1 brown onion
  • 20g butter
  • Extra-virgin olive oil
  • 400g Arborio rice
  • A handful broad beans
  • A bunch of asparagus
  • A handful of green beans
  • A cup of frozen peas
  • 1 lemon
  • 50g parmesan
  • A small handful marjoram
  • A handful pea shoot tendrils

What to do:

  • Measure 2 litres of water into the medium saucepan, add the bouillon and bring it to a simmer on medium heat.
  • Peel and finely chop the onion and garlic.
  • Heat the butter and 2 tablespoons of olive oil and butter over medium heat in the large stockpot. Add the chopped onion and cook until translucent & then stir in the garlic and then rice until the grains begin to crackle.
  • Begin adding the simmering stock, a ladle at a time, and stir in until fully absorbed. The stock should just cover the rice and bubble. Stir every minute or so, making sure you get into all the edges of the pan with the wooden spoon.
  • Meanwhile fill the smaller saucepan with water and set to boil. Pod the broad beans and boil for 3 minutes. Drain, refresh in a bowl of cold water and pod again. Reserve in a small bowl.
  • Wash and chop the asparagus into 1cm lengths. Measure out the peas from the freezer and reserve. Wash and snip the beans into 1cm lengths.
  • After about 15 minutes add all the peas, the broad beans, the green beans and the asparagus and stir in, cooking for another 5 minutes.
  • Meanwhile, zest the lemon and grate the parmesan to yield about ½ cup. Wash and gently spin the pea shoots dry. Wash, spin and strip the marjoram leaves.
  • When the rice is just tender all the way through but still slightly firm, usually in about 20 minutes, it is done.
  • When you are ready to serve, add in a last ladleful of stock. Stir in the pea shoots, lemon zest and parmesan, and remove from the heat. Taste now and check the seasoning. The mixture should be creamy.
  • Serve onto the bowls and eat right away!

ourkitchengarden.net

Categories: Kitchen Garden, Recipe | Tags: , , , , , , , , , , | Leave a comment

Cream of celery soup

The classics keep coming back, and for good reason! We love our 70’s soups…

ourkitchengarden.net

Fresh from the garden: celery, onion, potatoes, garlic, chives
Recipe source: Melissa
Serves: 6 at home or 24 tastes

Equipment:

  • Kettle
  • Chopping boards and knives
  • Peelers
  • Paper towel
  • Scissors
  • Stockpot, wooden spoon
  • Scales
  • Measures: jug, tablespoon
  • Microplane grater
  • Garlic press, ladle
  • Stick blender, mouli
  • Serving bowls
  • Teaspoons

Ingredients:

  • 1.5 litres boiling water and 1.5 tablespoons bouillon (or 1.5 litres vegetable stock)
  • 1 brown onion
  • 1kg white potatoes
  • 4 garlic cloves
  • A large bunch of celery
  • 2 tablespoons olive oil
  • 1 whole nutmeg
  • 100ml single cream
  • A small handful chives
  • Freshly ground black pepper
    What to do:
  • Fill the kettle and set it to boil. Measure the bouillon and boiling water into the jug and stir.
  • Peel the potatoes under running water and then coarsely chop into 2cm cubes.
  • Peel and coarsely chop the onion.
  • Wash and finely chop the celery, including leaves.
  • Heat the oil in the stockpot over medium heat. Add the onion and cook, stirring, for 5 minutes and then add the chopped celery and cook for another few minutes.
  • Meanwhile peel and crush the garlic, and then add the garlic and potato cubesand stir together.Sweat for a minute until aromatic.
  • Increase heat to high. Add the prepared stock and bring to the boil, then simmer gently, uncovered, for 10 minutes or until the potato is almost tender.
  • Remove from heat, add the cream and using the microplane, grate 1/2 a nutmeg into the soup.
  • Blitz the soup with the stick blender. You may want to pass the soup through the mouli to make it super-smooth.
  • Taste and season if needed.
  • Wash the chives and then roll them in a piece of paper towel. Snip into tiny pieces and reserve.
  • Ladle soup among serving bowls and sprinkle with the snipped chives.

Notes: What do celery leaves taste like? Where does nutmeg grow?

Categories: Kitchen Garden, Recipe | Tags: , , , , , , , , | Leave a comment

Kitchen news – 7th November 2013

ourkitchengarden.net

Year 2 Initiation Ceremony!

Week 5 and we’re galloping ahead this term… Ok I’ll stop the horse puns right now then?! Instead, it’s been action packed this fortnight, with the last of the Year 2 Initiation Ceremonies and their delicious antipasti menu of Smashed broad bean and garlic bruschetta, Marinated feta, Roasted capsicum, Rosemary and thyme grissini and our Simple salad with edible flowers. Salute to the program Year 2 students!

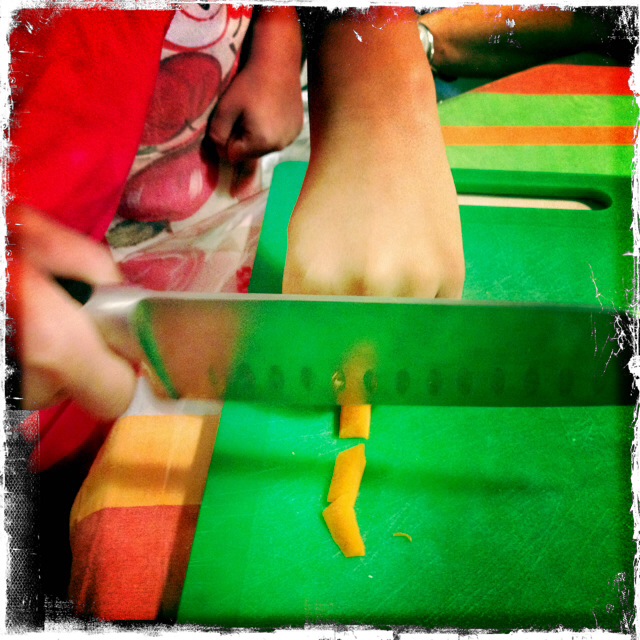
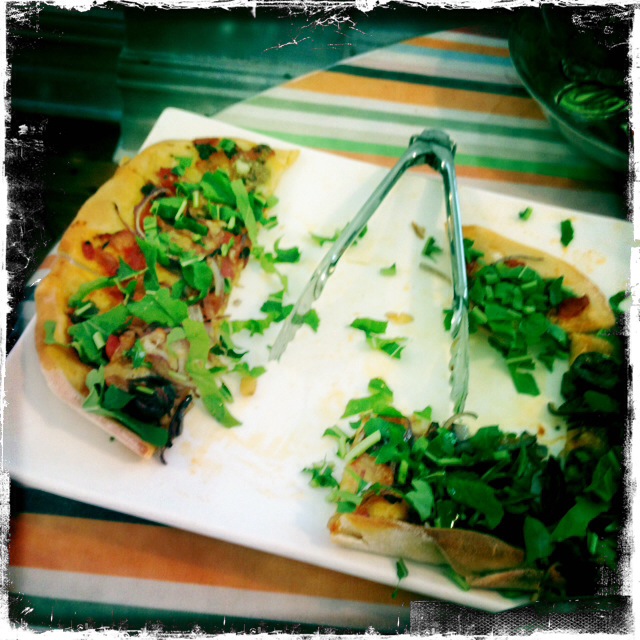
For the bigger kids in the program we had a veg-heavy menu with loads of chopping, snipping and whirring: some classes made Beetroot soup, others Silverbeet soup, both with crème fraiche and chives; we made the fabulous Salad of roasted beets, goats’ cheese and broad beans; we kneaded and baked Pizza bianca with smashed olives and rocket; we charred capsicum for a fiery Harissa paste; and then used the harissa for the dish of Braised greens with harissa, fried egg and preserved lemon (with the lemons we preserved in Term 3)… All so wonderfully delicious and gobbled up instantly!

ourkitchengarden.net

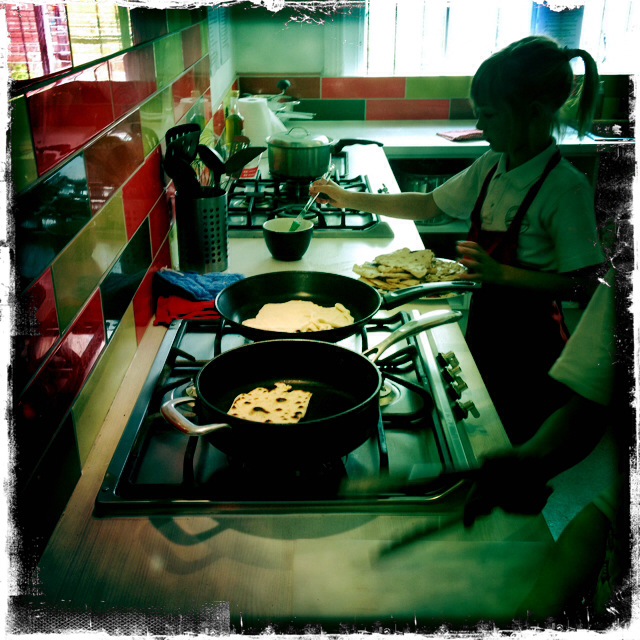
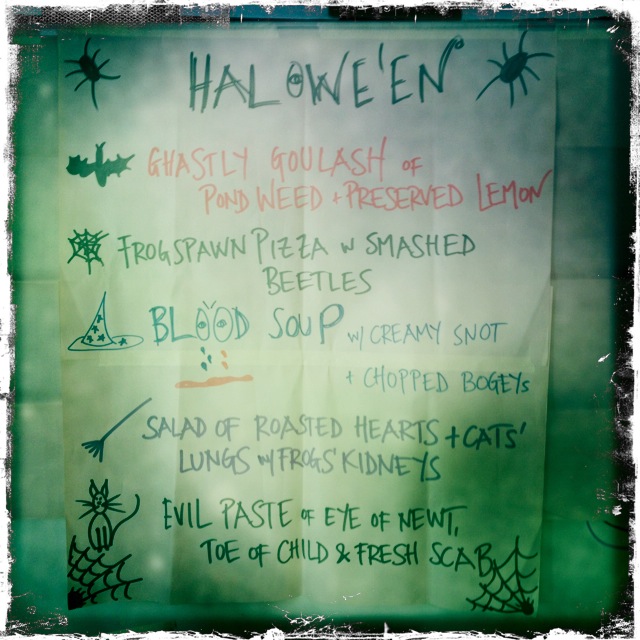
Hallowe’en also figured last week so the above menu featured as: Blood soup with creamy snot and chopped bogeys; Salad of roasted hearts and cats’ lungs with frogs’ kidneys; Frogspawn pizza with smashed beetles; Evil paste of eye of newt, toe of child and fresh scab; and Ghastly ghoulash of pond weed and preserved heel of old man. Yummy!!!

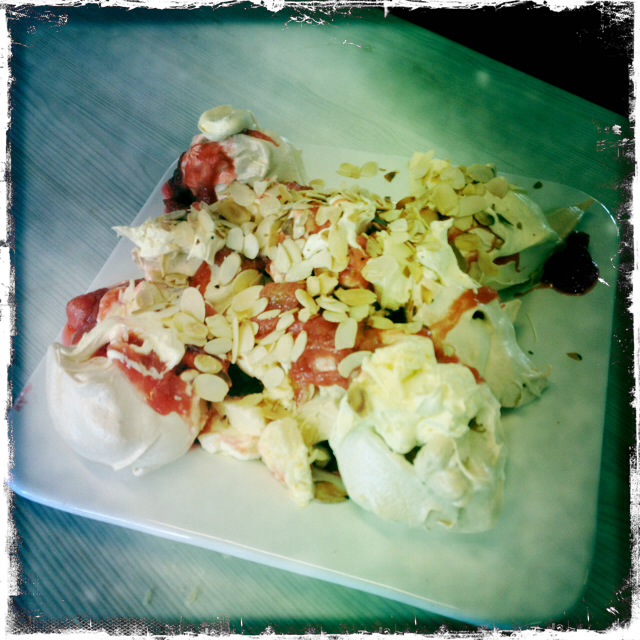
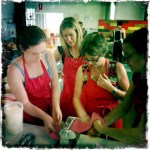
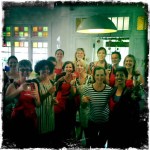
On Saturday the cottage was taken over by a horde of starving mothers who sliced, harvested, diced, whisked, baked, rolled and created the most amazing feast!  Tonia (mum to Anna and Alice) was the winning bidder of the Silent Auction entry at the P&C Gala Night ‘A Day in the Cottage with Melissa & 12 adults’… What a change to have only grown-ups in the kitchen! Although I did see some child-like wonder on a few faces as the Beetroot linguine rolled  – served a la Sean’s Panaroma style with rocket, lemon and chilli oil – and the Red onion and smashed olive pizza baked and the Roasted beetroot salad was dressed and the Silverbeet soup was mouli’d and then set on our beautiful table complete with starched linen, wine glasses and matching cool climate wines! And then to complete the feast, we ended on an even higher note of Rhubarb and rosewater Eton mess (baby meringues, vanilla cream, ice cream mmmmmmm)… Thanks to all the great girls who made the day such a success – and raised $700 for the school to boot! Hooray to you! Next up: a Dad’s Day?
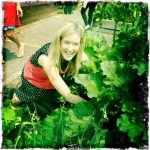
For loads of great photos from the week and recipes updated fortnightly, check back here!

Mx

Categories: Kitchen Garden, News | Leave a comment

Rhubarb and rosewater Eton mess

A take on the classic English dessert with gorgeous contrasting textures & flavours: crunchy, soft, creamy, hard, sweet, acid… yum yum YUM!

ourkitchengarden.net

Fresh from the garden: strawberries, rhubarb, eggs
Recipe source: Adapted from a recipe by Sophie Dahl in The Delicious Miss Dahl
Serves: 12 at home

Equipment:

  • Kitchen Aid, whisk attachment
  • Scales
  • Large baking tray
  • Baking paper
  • Measures: teaspoon
  • Chopping board and knife
  • Saucepan
  • Wooden spoon
  • Frying pan
  • 2 serving plates


Ingredients:

For the meringues

  • 8 large eggs
  • 400g raw caster sugar
  • 1 pinch salt

For the rhubarb compote

  • 200ml boiling water
  • 120g raw caster sugar
  • 1kg rhubarb
  • 2 teaspoons rose water

For the cream

  • 500ml double cream
  • 1 vanilla pod
  • Almond slivers to serve

What to do:

  • First make the meringues. Preheat the oven to 120C. Separate the eggs.
  • In a clean bowl or mixer whisk the egg whites until they reach firm peaks.
  • Gradually mix in the sugar and salt and whisk well until the mixture is thick white and glossy. This should take about 7-8 minutes.
  • Line a large baking tray with non-stick baking paper – use a little dab of the meringue mixture to stick it down.
  • Spoon the mixture into blobs on your baking tray leaving a generous gap between them. Bake for 1 hour.
  • Whilst the meringues are baking, make the rhubarb compote. Wash the rhubarb and trim any leaves away. Chop into 3cm rounds.
  • In a pan, boil the water with the sugar and add the rhubarb when it starts bubbling. Stir and let it cook for about 5 minutes on a medium heat. When the rhubarb is tender, remove from the heat. Add the rose water and leave to the side.
  • Whip the cream until it forms soft peaks.
  • Split the vanilla pod down the middle and scrape out the seeds. Stir them into the whipped cream.
  • Place the cooled meringues on the serving plate, breaking a few of them up and leaving a few whole. Spoon the cream over the top, then drizzle the compote on top of the cream.
  • Lightly toast the almond slivers in a dry frying pan and sprinkle them over the top.
Categories: Kitchen Garden, Recipe | Tags: , , , , , , , , , | Leave a comment

Red onion, smashed olive and rocket pizza

Pizza dough is easy and fun to make – and you can always freeze any leftover dough…

ourkitchengarden.net

Fresh from the garden: olives, rocket, onions, garlic, marjoram, parsley, thyme
Recipe source: Melissa
Serves: 8 or 24 tastes

Equipment:

  • Chopping boards & knives
  • Bowls – large, med
  • Salad spinner
  • Measures: cup, tablespoons, teaspoons
  • Colander, grater
  • Scales
  • Paper towel
  • Wooden spoon
  • 2 pizza trays
  • Rolling pins
  • Metal tablespoons
  • Wide egg lifter
  • Pizza cutting wheels
  • Serving plates


Ingredients:

Tomato sauce:

  • 1 brown onion
  • 2 cloves garlic
  • 3 sprigs marjoram
  • 3 sprigs thyme
  • A small handful parsley
  • Extra-virgin olive oil
  • 1 tin diced tomatoes
  • Flaked salt and black pepper

For the pizza topping:

  • A jar of olives in olive oil
  • 1 tub bocconcini
  • 1 red onion
  • 50g parmesan
  • A large handful rocket
  • Preheat the oven to 220C.

What to do:

For the tomato sauce:

  • Peel and finely chop the brown onion and garlic.
  • Heat 2 tablespoons of olive oil in the frying pan & gently cook the onion until translucent for a minutes, and then add the garlic.
  • Open the tin of tomato and add to the frying pan with a pinch of salt and a grind of pepper.
  • Wash, dry and pick the herbs. Roughly chop if needed then add to the tomatoes.
  • Simmer gently for 10 minutes, stirring occasionally, until quite reduced.

For the topping: 

  • Placing one olive at a time on the chopping board, smash down on it with the flat base of the smallest bowl to dislodge the pip. Discard the pip into compost and reserve the olives in a small bowl.
  • Open the tub of bocconcini and cut or tear each ball in half. Grate the parmesan.
  • Wash and spin the rocket dry and then reserve in another large bowl.
  • Peel the red onion and cut it in half, then cut into thin slices. Place in a medium bowl and drizzle with a tablespoon or two of the olive oil from the jar with a few spices.

Assembling the pizza:

  • Scatter some flour on the workbench, divide the dough into four and roll to form 4 ovals.
  • Once rolled, lightly flour the baking trays and place 2 ovals on each tray, side by side.
  • Assemble the pizzas directly onto the trays, flouring the trays first.
  • Using the metal spoon, swirl a couple of spoonfuls of tomato sauce onto the pizza bases, spreading so that they become totally covered with a clean border.
  • Layer the bocconcini on top, spoon on the smashed olives and the red onion slices, drizzle some extra spiced olive oil if needed, then slide the pizzas into the oven.
  • Wash and dry the wooden chopping boards and set them out ready.

 Baking the pizza:

  • Bake the pizzas for 12 minutes or until the edges are very crusty and the cheese is bubbling.
  • Use this time to make the dough for the next class if needed.
  • You may want to slip the pizza off the tray onto the rack for the last few minutes, so that you get a really crusty base.
  • Once the pizzas are done, transfer them to the wooden boards using the wide egg lifter.
  • Cut the pizzas in half first, and then each half into small squares for each plate.
  • Lift onto serving plates and sprinkle with the rocket and parmesan.
  • Eat!

Notes: Where does pizza come from? What other sort of vegetables could you use in a pizza? What sort of other pizza could we make? What other cheeses could we use?

Categories: Kitchen Garden, Recipe | Tags: , , , , , , | Leave a comment

Beetroot pasta

This is the basic recipe for the pasta dough mixture as well as instructions on how to use a pasta machine.

ourkitchengarden.net

 Serves: 6 at home or 12 substantial tastes

Equipment:

  • Scales
  • Bowls
  • Pasta machines
  • Plastic wrap
  • Chopping board & knife
  • Pastry brush
  • Poles and somewhere to rest them
Ingredients:

  • 500g typo ‘00’ plain flour
  • 4 free-range eggs
  • 70g pureed beetroot

What to do:

To make the pasta:

  • Place the large bowl on the scales, reset to zero then measure the flour in to it. Add the beetroot.
  • Crack the eggs carefully into the small bowl, discarding any shell, then add them to the flour. Mix thoroughly with the wooden spoon, then tip the dough onto a clean, dry workbench.
  • Knead the dough for a few minutes, then wrap it in plastic film and let it rest for 1 hour at room temperature.

_____________________________________________________________________________________________

  • Fix the pasta machine to a suitable bench or table – if the surface is not thick enough you may need to place a thick book under the machine. Screw the clamp very tightly.
  • Clear a large space on the workbench alongside the pasta machine. All surfaces must be clean and dry. Press or roll the dough into a rectangle about 8 cm wide.
  • Set the rollers on the pasta machine to the widest setting and pass the dough through. The dough will probably look quite ragged at this stage. Fold it in 3, turn it 90 degrees and roll it through again. Go to the next-thickest setting and pass the dough through 3-4 times.
  • Continue in this manner (changing the settings and passing the dough through) until the dough has passed through the second thinnest setting. Don’t use the very thinnest setting, as the dough gets too fine and is hard to manage. If the dough gets too long to handle comfortably, cut it into 2-3 pieces using the large knife, and roll each piece separately.
  • Lay the pasta strips on a lightly floured surface & dust with a little more flour.
  • Attach the pasta cutter to the machine and pass through the largest rollers for linguine or the thinnest rollers for angelhair pasta, draping it in your hands to catch.
  • Carefully separate each strip and hang over a pole to dry.
  • Clean the pasta machine by brushing it with a dry, wide pastry brush & putting back in its box.

To cook the pasta:

  • When the stockpot has started a fast boil, gather your drying pasta on a large baking tray. Add a tablespoon of cooking salt and then the pasta to the pot, stir once and quickly put the lid back on.
  • As soon as the pot begins to boil again, take the lid off. The pasta should only take 1 or 2 minutes to cook from boiling. Taste to check – it’s important that the pasta remains al dente and is not overcooked!

Notes: Never wash the pasta machine – it will rust! Just brush down with a strong brush to remove the leftover dough.

ourkitchengarden.net

Categories: Kitchen Garden, Recipe | Tags: , , , , , , , , , | 1 Comment

Braised greens with harissa, preserved lemon and fried egg

Comfort food indeed! Spicy, yolky and slippery… everything I love in a dish. And don’t even talk about the vitamins!!

ourkitchengarden.net

Fresh from the garden: kale, silverbeet, spinach, garlic, eggs, lemons, capsicum
Recipe source: Melissa
Serves: 4 at home or 20 tastes

Equipment:

  • Chopping board and knife
  • Measures – cup, tablespoon
  • Thick-bottomed frying pan (or casserole dish) with lid
  • Wooden spoon, tongs
  • Egg slice
  • Serving bowls
Ingredients:

  • 1 big bunch of kale, silverbeet & spinach (about 500g in total)
  • Olive oil
  • 2 cloves garlic
  • 1 tablespoon harissa
  • 1 cup water
  • 1 preserved lemon
  • Flaked salt and pepper
  • 4 organic free-range eggs

What to do:

  • Wash all the leaves thoroughly and shake dry, then trim the kale of its stalks and your other greens of any tough or dry stems. Chop the greens into thick ribbons.
  • Peel the garlic and thinly slice.
  • With tongs, remove a preserved lemon from the jar and rinse under running water to remove the salt. Cut into quarters and carefully slice out the pith and seeds and discard. Finely slice the rind into slithers and reserve.
  • In the frying pan or casserole, heat 3 tablespoons of olive oil over medium heat. When it shimmers, add the greens. Use tongs to toss and coat in the oil.
  • After about 4 minutes, the greens should start to wilt, brown in spots, and cook down. Add the garlic and continue to sauté, tossing or stirring occasionally, another 2 minutes. Do not allow the garlic to brown.
  • Add the harissa and toss to distribute. Then add the cup of water. Bring the pan to a boil, scraping up any browned bits on the bottom. Cover, and simmer for about 10 minutes, until the thickest parts of the veggie stems are very tender and easily pierced with a knife.
  • In the final several minutes of cooking, add the slices of preserved lemon, tossing to incorporate them in the cooking liquid. You may need to add a little more water as you go.
  • Taste for salt and pepper and season, if necessary. Remove the greens from the heat and divide among your bowls.
  • Heat a little more oil in the pan and fry your eggs one or two at a time, placing one on top of each bowl of greens. Serve immediately!

Notes: What are preserved lemons and when did we make them? What is harissa? What other greens could you use?

Categories: Kitchen Garden, Recipe | Tags: , , , , , , , , , | Leave a comment

Harissa

Bondi kids are brave when it comes to chilli but we still sunstituted the sightly less-spicy green chillies here  – and this paste is a perfect accompaniment to so many dishes: braises, soups, stews, roasts, sandwiches… and so much better made than bought!

ourkitchengarden.net

Fresh from the garden: capsicum, red onion, garlic, chillies, lemon
Recipe source: Yotam Ottolenghi in Plenty
Makes: 1 small jar

Equipment:

  • Chopping boards & knife
  • Citrus juicer
  • Measures: tablespoon, teaspoon, ½ teaspoon
  • Skewer, tongs
  • Frying pan
  • Mortar & pestle
  • Food blender
  • Jar & lid
  • Bowls to serve
Ingredients:

  • 1 red capsicum
  • ½ teaspoon each coriander seeds, cumin seeds and caraway seeds
  • 1 tablespoon olive oil
  • 1 red onion
  • 3 garlic cloves
  • 2 red chillies
  • 1 lemon
  • ½ tablespoon tomato purée
  • ½ teaspoon coarse sea salt

What to do:

  • Peel and dice the onion. Peel and chop the garlic cloves. Slice the chillies in half lengthways and scrape out the seeds and white membranes. Chop the chillies, taking care to wash your hands properly afterwards!
  • Cut the lemon in half and juice to yield 2 tablespoons.
  • To blacken the capsicum, skewer the whole capsicum and roast it directly on the gas flame of the stove, turning every minute or two until the entire surface is blackened. The metal skewer will get hot – be careful! Once charred, set aside to cool.
  • Place a dry frying pan on a low heat and carefully toast the coriander, cumin and caraway seeds for two minutes. Transfer to a mortar with the salt and grind to a powder. Set aside.
  • Peel the charred skin from the capsicum under cool running water. Core and remove seeds, drain and dice.
  • Heat the oil in the frying pan and fry the onion, garlic and chillies over medium heat until dark and smoky for about six minutes.
  • In a food processor or blender, combine the capsicum, ground spices, onion, garlic and chillies with the lemon juice and tomato puree and process until smooth.
  • Set aside until needed or spoon into a sterilised jar and keep for 2 weeks in the fridge.

Notes: Where does harissa originate? What could you serve it with? Can you name any other accompaniments?

Categories: Kitchen Garden, Recipe | Tags: , , , , , , , , , | Leave a comment

Blog at WordPress.com.

%d bloggers like this: