Monthly Archives: November 2015

Kitchen News 18th November 2015

ourkitchengarden.net

Ok so here we really are in spring. Finally! With pelting November rain again and burst of brilliant sunshine the garden is finally giving up its gorgeous primavera prizes… In class we’ve been discussing why it is that a lot of our veggies have bolted to seed without forming properly, like the onions that have flowers but no bulb, and the non-bulbous fennel bulbs shooting out with towering fronds: we know it’s the hot crazy October sun, great for swimming in the ocean early but havoc for the plants. Anyway at least now the winter veg is gone and we are totally seasonal baby! If you walk through at the garden now you’ll be amazed at all the activity and sprouting green stuff everywhere. Hallelujah!

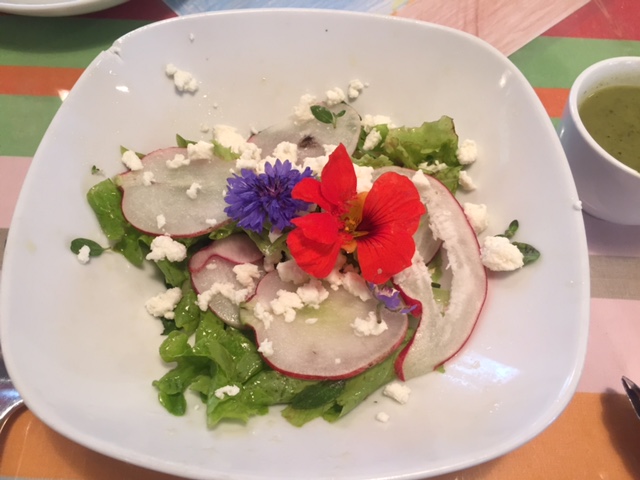
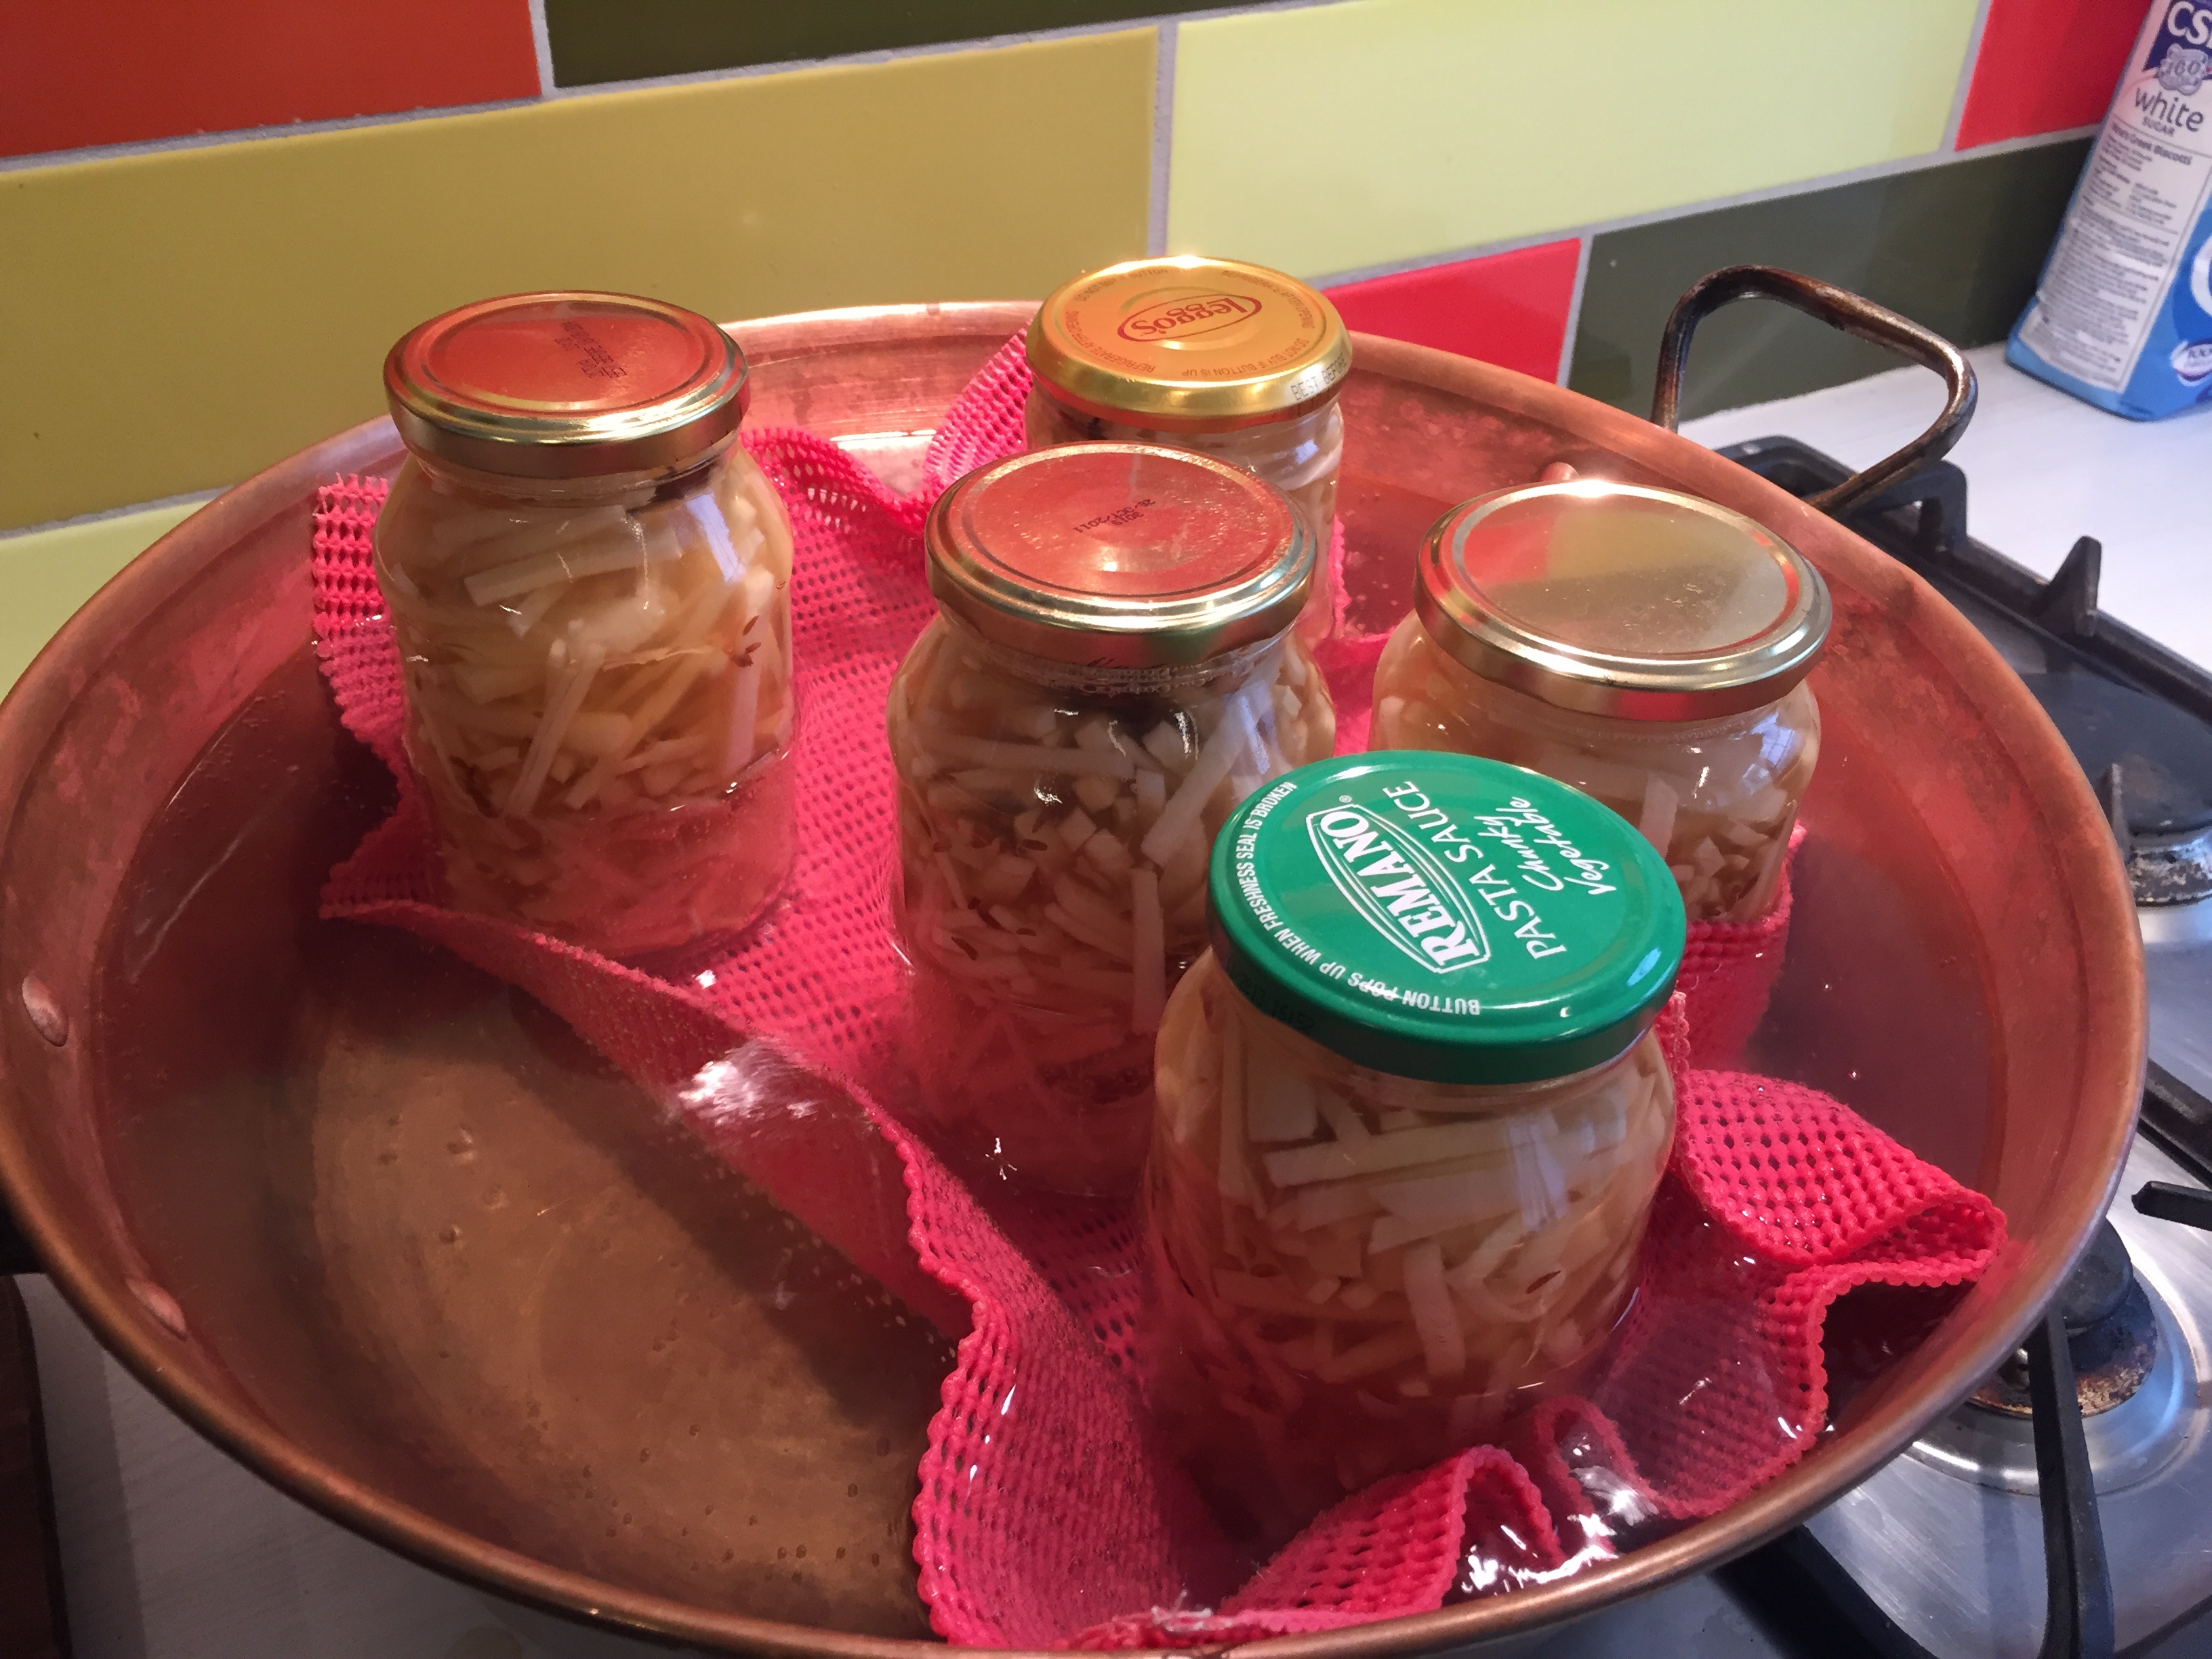
So to our menu reflecting the hues and tones of green, green and green (with some orange bits thrown in too): a brand new orange and fennel salad with (the last of the) blood orange vinaigrette, slinky silverbeet and home-made garam masala soup with coriander, a burstingly spring salad of broad beans, radishes and goats cheese, and then to top it all off, some comfort food for the odd wintry day where you need something soulful: creamy polenta with poached eggs and sage. And we even found time to bottle up some of our famous rhubarb and vanilla jam too in some classes. So there you go. All these recipes up on this blog, so clink the links if interested…

Only a few weeks left of Kitchen Garden so make the most of us! And we still have lots of Chicken spots to fill over the holidays so please sign up if you can help 🙂

To Volunteer for Classes or Chickens: click on VolunteerSpot at http://vols.pt/8qCfEY

Peace

Advertisement
Categories: Kitchen Garden, News | Tags: , , , | Leave a comment

Rhubarb and vanilla jam

This must be the easiest jam to make in the whole wide world! And, as with all jam-making, small quantities are best: quickest to prepare and also to bring up to that all-important setting point. And if you find you don’t have the exact kilo of prepared fruit, just weigh out the equivalent amount of sugar.

Fresh from the garden: rhubarb, lemon

Recipe source: Melissa

Makes: 3 or 4 medium jars

Equipment:

  • 4 medium jars with good lids
  • Oven tray
  • Paper towel
  • 3 small saucers
  • Chopping boards and knives
  • Scales
  • Citrus juicer
  • Heavy-based wide stockpot
  • Wooden spoon with flat edge
  • Spatula
  • Small serving bowls
Ingredients:

  • 1kg rhubarb
  • 1kg sugar
  • 1 vanilla pod
  • 1 large lemon

What to do:

To sterilise jars:

  1. Wash your jars in hot, soapy water, rinse and then drain them upside-down.
  2. Place on an oven tray right-side-up and slide them into the oven. Turn on the oven to 160C. Leave them there until
  3. Wash the lids, rinse and drain them. Wipe them dry with a piece of paper towel and keep your fingers away from the inside of the lid!

To make the jam:

  1. Put 3 small saucers in the freezer.
  2. Wash the rhubarb stalks and trim the edges. Slice each stalk into 3cm pieces and weigh to make sure you have 1kg.
  3. Slice the vanilla pod lengthways and scrape out the seeds, then cut each pod half into two.
  4. Cut the lemon in half and squeeze out the juice.
  5. Put the rhubarb into a preserving pan or a heavy-based wide stockpot with the measured sugar, vanilla seeds and pods. Heat gently, stirring, until all the sugar has dissolved, then squeeze in the lemon juice and increase the heat.
  6. Boil for about 10 minutes until the fruit is soft, stirring with the flat-ended wooden spoon every minute or so. Test for the setting point by spooning a little onto your chilled plate. After 1-2 mins, push your finger through the jam – if the surface wrinkles it is ready, if not, keep cooking for 2 minute intervals, testing in between.
  7. Once the jam is ready, let it cool for about 10 mins before ladling into your warm sterilised jars and sealing with the clean, dry lids.
  8. Label with the name and date when cool. Will keep for at least 12 months in a cool, dark place.

Notes: What does to sterilise mean? What is the setting point?

Categories: Kitchen Garden, Recipe | Tags: , , , , , , , , , | Leave a comment

Silverbeet and garam masala soup

Garam is the Hindi word for hot, and masala, spice mixture. We often make our own garam masala blend of ground cumin, coriander, ginger and turmeric, cayenne and mustard seeds at school but it is commonly available in the spice section of any supermarket, already blended.

IMG_0520

Fresh from the garden: silverbeet (Swiss chard), onion, potatoes, garlic, coriander

Recipe source: Melissa

Serves: 6 or 24 tastes

Equipment:

  • Kettle
  • Chopping boards and knives
  • Selection of mixing bowls
  • Paper towel
  • Stockpot
  • Flat-ended wooden spoon
  • Measures: jug, tablespoon, teaspoon
  • Garlic press
  • Ladle
  • Stick blender
  • Serving bowls
Ingredients:

  • 1.5 litres boiling water and 2 tablespoons bouillon (or 1.5 litres vegetable stock)
  • 2 medium potatoes
  • 1 brown onion
  • 4 garlic cloves
  • A large bunch of silverbeet
  • Olive oil
  • A heaped teaspoon garam masala
  • Freshly ground black pepper
  • Flaked salt
  • A small handful of coriander

What to do:

  1. Fill the kettle to 1.5 litres and set it to boil.
  2. Wash or scrub the potatoes under running water (but don’t peel!) and then coarsely chop into 2cm cubes.
  3. Peel the onion and slice into two halves, then finely chop. Peel and chop the garlic.
  4. Wash the silverbeet & shake over the sink. Finely chop the silverbeet, using the whole stalk and leaves as well.
  5. Pour olive oil to cover the base of the stockpot and heat over medium heat for 30 seconds. Add the chopped onion and cook on low, stirring every now and then, for 5 minutes and then add the potato and cook for another few minutes.
  6. Add in the garlic, chopped silverbeet and the garam masala and stir together. Cook very gently for a minute until aromatic.
  7. Increase heat to high. Add the 1½ litres of hot water and the 2 tablespoons of bouillon and bring to the boil, then simmer gently, uncovered, for 10 minutes or until the potato is almost tender.
  8. Meanwhile wash and pat the coriander dry and finely chop.
  9. When the soup is ready and the potato is soft, grind a little bit of pepper in too and taste to see if you need to add any extra salt.
  10. Add in the coriander and then blitz the soup with the stick blender until it’s really smooth.
  11. Taste and add more salt if you need to.
  12. Ladle soup among serving bowls and serve!

 Notes: What do is silverbeet also known as? What is in the garam masala blend? Why do potato-based soups need more salt?

Categories: Kitchen Garden, Recipe | Tags: , , , , , , , , , , | Leave a comment

Creamy polenta with poached eggs and sage

This is comfort food at its creamiest, with the frizzled sage leaves giving everything a crispy, savoury lift. Just be sure the eggs are very fresh and that the yolks are intact when they go in to poach!

IMG_0521

From the garden: eggs, sage, bay

Recipe source: Melissa

Serves: 4 or 24 tastes

Equipment:

  • Chopping board & small knife
  • 1 heavy-based saucepan & lid and 1 small saucepan
  • Scales
  • Measures: jug, cup, 1/3 cup
  • Grater
  • Salad spinner & paper towel
  • Flat ended wooden spoon
  • Mixing bowls: 2 med, 4 small
  • Deep-sided frying pan
  • Serving bowls
Ingredients:

  • 400ml milk
  • 600ml water
  • 1 bay leaf
  • 1 cup polenta (cornmeal)
  • Cooking salt
  • 1/3 cup mascarpone
  • 50g grana padano parmesan
  • 50g butter
  • 4 very fresh large eggs
  • A branch of sage leaves
  • Flaked salt and black pepper

What to do:

  1. Measure the milk and water into the larger saucepan and pop in the bay leaf. Heat until almost boiling and then turn off and allow to infuse for 10 or 15 minutes.
  2. Meanwhile grate the parmesan, measure out the mascarpone and get the eggs ready by carefully and gently cracking each egg into its own separate small bowl – without breaking them!
  3. You can also wash and spin the sage leaves dry, separating if needed, and place them in the smaller saucepan. Weigh out the butter and place with the sage leaves.
  4. Removing the bay leaf from the milk mixture, heat the saucepan again and then sprinkle in the polenta and a teaspoon of cooking salt. Using the flat-ended wooden spoon stir continuously until it thickens and is not too grainy, about 10-20 minutes, depending on the variety of polenta.
  5. When the polenta is cooked, add the mascarpone and grated parmesan and mix until well combined. Taste for seasoning and add a little more salt if necessary. The polenta should be soft and creamy and only just hold its shape – you want a sloppy, porridge type consistency.
  6. About 5 mins before the polenta is ready, poach the eggs. Fill the deep-sided frying pan almost to the top with water and bring to a simmer. and then carefully slide into the water until they’re all in. Let the pan sit on a simmer for 4 minutes.
  7. When the eggs are almost ready, heat the butter and sage over medium heat until the butter is bubbling up and starting to turn brown and the leaves are crispy.
  8. To serve, pour out the polenta into serving bowls. Lift the eggs out of the water, drain, and then place one on top of each bowl. Season generously and scatter with the frizzled sage leaves & browned butter.

Notes: What is polenta? What is cooking by ‘absorption’ method? Why should we not break the egg yolks when poaching them? What is to simmer?

IMG_0519

Categories: Kitchen Garden, Recipe | Tags: , , , , , | Leave a comment

Spring salad of broad beans, radish and goats cheese

This salad is a beautiful celebration of spring, with lots of lovely texture from the broad beans, crunch from the radishes and creaminess from the goats cheese. At school the children love to run out and find edible flowers like nasturtiums or borage to garnish their salads. And if the broad beans are particularly small or very young, we don’t both to double-pod them.

IMG_0522

Fresh from the garden: lettuces, broad beans, radishes, marjoram, edible flowers

Recipe source: Melissa

Serves: 6 or 24 tastes

Equipment:

  • Saucepan & lid
  • Bowls – 2 large, 2 med, 2 small
  • Colander
  • 2 salad spinners
  • Paper towel
  • Mandoline slicer
  • Potato peeler
  • Measuring – 1/4 cup, tablespoon, teaspoon
  • A small jar with lid
  • Plates or bowls to serve
Ingredients:

  • A handful of lettuce leaves
  • A large handful broad beans in pod
  • A small handful of radishes
  • 2 sprigs marjoram
  • A small log of goats’ cheese
  • 1 tablespoon red wine vinegar
  • A teaspoon of honey
  • 1/4 cup extra-virgin olive oil
  • Flaked salt & black pepper
  • Edible flowers

What to do:

  1. Fill the saucepan with water & set to boil on high heat.
  2. Pod the broad beans, discarding the outer shell into the compost and add beans to the boiling water. Fill a large bowl with cold water and have ready.
  3. Boil the broad beans for 3 minutes, drain and then immediately refresh in the bowl of cold water. Drain again and double-pod by slipping the outer shell off into the compost. Reserve beans.
  4. Wash the lettuce leaves really well and spin dry in sections, reserving in a large clean, dry bowl. Wash & dry the marjoram sprigs, picking the leaves and leaving whole.
  5. Wash the flowers gently in a small bowl of cold water and reserve on a piece of paper towel until ready to use.
  6. Scrub the radishes clean, wipe dry and using the mandoline or a peeler, carefully slice into thin discs.
  7. For the dressing, measure the olive oil, red wine vinegar and honey and pour them into the jar. Add a sprinkle of salt and pepper, and then put the lid on & give the jar a good shake.
  8. Drizzle the dressing around the large lettuce bowl and gently turn the leaves with your fingers.
  9. Place the leaves in the serving bowls, then pour the broad beans, radish slices and snap peas into the bowl and mix to cover in the residual dressing. Then sprinkle over each bowl of leaves.
  10. Break the goats cheese into small chunks with your fingers and divide over the salads with the marjoram leaves.
  11. Finish by carefully placing the flowers on top of the bowls of salad. Serve immediately!

Notes: What does residual mean? Why do we use honey vinaigrette here instead of our usual lemony dressing? Can you name some edible flowers?

IMG_0426

Categories: Kitchen Garden, Recipe | Tags: , , , , , , , | Leave a comment

Orange and fennel salad with blood orange vinaigrette

This salad is a fresh and gorgeous, with contrasting flavours of orange and aniseed from the fennel. The lesson focusses on slicing oranges without squashing the juice out of them in the process!

ourkitchengarden.net

Fresh from the garden: oranges, blood oranges, fennel, red onion, parsley

Recipe source: Melissa

Serves: 6 or 24 tastes

Equipment:

  • Chopping boards and knives
  • Microplane grater
  • A medium jar with lid
  • Measures: jug, 1/3 cup, 1/4 cup, teaspoon
  • Selection of mixing bowls
  • Colander
  • Salad spinner
  • Paper towel
  • Bowls to serve
Ingredients:

  • 3 oranges
  • 2 small fennel bulbs
  • 1 medium red onion
  • A small handful parsley or coriander

Blood orange vinaigrette

  • 1 blood orange
  • 100mls olive oil
  • 1 teaspoon wholegrain mustard
  • Flaked salt & ground black pepper 

What to do:

To make the blood orange vinaigrette:

  1. Finely grate the rind from the blood orange using the microplane grater and reserve in a screw-top jar.
  2. Cut the blood orange in half and juice to make about 1/3 cup juice.
  3. Measure and add in the olive oil, blood orange juice, mustard and a pinch of salt and grind of pepper. Screw lid on securely and shake well.

To make the salad:

  1. Wash the fennel and trim it. Finely slice the fennel very carefully using a sharp knife.
  2. Peel the red onion and cut in half. Finely slice each half to form little half-moons.
  3. Peel the remaining oranges and cut in half. Place each half on the chopping board and very thinly slice them, without squashing the orange!
  4. Wash the parsley or coriander and spin-dry. Pick off the leaves, discarding the stalks and chop if needed.
  5. Toss the orange slices with the fennel and red onion in a bowl to combine. Place in a large mixing bowl, sprinkle with the parsley or coriander and pour over the orange vinaigrette.
  6. Toss to combine and then divide into your serving bowls.

Notes: Why is it called a blood orange? What does fennel smell like?

Categories: Kitchen Garden, Recipe | Tags: , , , , , , | 1 Comment

Kitchen News 4th November 2015

ourkitchengarden.net

Potato gnocchi with parmesan, burnt butter and crispy sage. Rosemary and thyme grissini. Creamy hummus made with a recipe adapted from Ottolenghi’s Jerusalem book… these are some of the dishes our clever kids whipped up last week in the cottage! A major focus for one group was handling fragile lettuce: washing and spinning it dry and then rolling it up to store in the fridge until ready to compile a deliciously fresh and gorgeous looking Master salad with lemon vinaigrette. And we even made crispy herbed potato skins with leftovers from the gnocchi!

The Year 2 students continue their attack on Kitchen Garden – enthusiastically displaying their knife skills amongst other fabulous talents – and one class even got to sample one of our programs most successful and asked-for dishes ever: Globe artichokes with lemon and garlic vinaigrette. They’re very lucky as we’ve had a lot of trouble growing them in these last few years – the last ones we harvested in 2012! Hopefully we’ll have a few more popping up in the next few weeks. And I’m looking forward to seeing the Year 5 and 6 kids back next week too!

ourkitchengarden.net

Tea towel sales went through the roof so thank you to all who bought early. Year 2 and Kindergarten is SOLD OUT! We have other age groups but I am reclaiming my Monday and Friday mornings for a while so will be back in December – anybody wishing to buy some before then can see me in the cottage at 8.30am or 2.30pm Tuesdays, Wednesdays or Thursdays in the meantime.

Thanks Mx

And thanks for the little mufti Melissas last Friday! Loved all of you!

Categories: Kitchen Garden, News | Tags: , , , , , , | 2 Comments

Honey pickled kohlrabi

Kohlrabi has to be the ugliest veg in the whole world, but its taste is somewhere between cabbage and apple! This is a great preserving recipe. Keep in the pantry for up to a year but once opened keep in the fridge and eat within 2 weeks.

ourkitchengarden.net

Fresh from the garden: kohlrabi

Recipe source: adapted from a recipe on puttingupwitherin.com

Makes: 4 large jars

Equipment:

  • Chopping boards and knives
  • Peelers
  • Measures: cup, tablespoon, teaspoon
  • Scales
  • Medium stockpot
  • Ladle & wooden spoon
  • Funnel
  • Paper towel
  • 4 x 470ml jars with lids
Ingredients:

  • 4 large kohlrabi heads
  • 1 litre apple cider vinegar
  • 1 litre water
  • 120g honey
  • 4 star anise
  • 2 teaspoons whole caraway seed
  • 1 tablespoon non-iodized sea salt

What to do:

To sterilize the jars:

  1. Wash the jars and lids in hot soapy water, rinse well and drain upside down.
  2. Place all the jars onto an oven tray, the right way up, and slide into the cold oven. Heat oven to 160C and leave to sterilize for 15 mins.
  3. Drain lids into the colander, then dry them with clean pieces of paper towel, taking care not to touch the inside of the lid.

To prepare the recipe:

  1. Wash the kohlrabi and then peel off the skin. You may need to ask an adult to help you slice the skin off if it is tough. Carefully cut into thin slices, then each slice into thin matchsticks.
  2. In a medium-sized stockpot combine vinegar, water, honey, star anise, caraway seeds and salt. Bring to a boil.
  3. Bring out the jars and leave to cool for a few minutes, then using tongs carefully pack the sterilized jars with kohlrabi matchsticks, leaving a bit of space at the top and not touching the inside of the jar.
  4. Then place the funnel into jar and ladle the hot honey brine (including caraway seeds) over kohlrabi leaving approx. 1cm headspace and including one star anise per jar.
  5. Using a clean piece of paper towel, wipe the rims, apply the dry lids and then process in hot water bath for 20 minutes (see Melissa).
  6. Let pickles sit a cool dry place for at least 3 weeks before consuming. 

Notes: What does kohlrabi look & smell like? Do you like pickles?

Categories: Kitchen Garden, Recipe | Tags: , , , , | Leave a comment

Green tabule salad for spring

Sarit Packer and Itamar Srulovich used to be the head chefs for Yotam Ottolenghi and now own their own restaurant in London called Honey and Co. They wrote a book of their delicious recipes, and this tabule is one of their favourites. They say: This (recipe) is the closest to original tabule salad. The dominant flavours are herby and green, and the taste of the olive oil should really shine through, so use the good stuff here.

We say: Get the kids chopping their little hearts out! Smart strong chops, no fiddling around. You want the parsley cut, not tickled!

ourkitchengarden.net

Fresh from the garden: cucumbers, spring onions, parsley, mint, lemon

Recipe source: adapted from a recipe in Honey and Co, Food From the Middle East

Equipment:

  • Kettle
  • Scales
  • Selection of mixing bowls
  • Plastic wrap/ cling film
  • Fork
  • Measures: jug, tablespoon, teaspoon
  • Salad spinner
  • Chopping boards and knives
  • Citrus juicer
  • Serving bowls
Ingredients:

·       75g bulgar wheat

·       2 spring onions

·       2 Lebanese cucumbers

·       1 bunch of parsley

·       6 sprigs of mint

·       1 teaspoon cooking salt plus a pinch

·       4 tablespoons best quality olive oil

·       1 lemon

What to do:

Basic bulgar wheat:

  1. For every 75g of bulgar wheat you will need a pinch of cooking salt, a splash of good olive oil and 75ml of boiling water (90ml for coarse bulgar wheat).
  2. Place the bulgar wheat, oil and salt into a bowl and stir well til the grains are all coated in the oil. Pour over the just boiled water and quickly cling-film the bowl to seal in the steam.
  3. Leave for 5 minutes and then carefully uncover. Use a fork to fluff the bulgar wheat up and break the mass into individual grains (or rub it between your palms to break it up). Allow to cool uncovered and then it is ready to use. It will keep like this for 3 days in an airtight container in the fridge.

To prepare the salad:

  1. Wash the spring onions and then peeling the first layer off, trim off the roots and discard. Finely chop.
  2. Wash the cucumber and then finely dice it.
  3. Wash the parsley and spin it dry, and finely chop the leaves and soft stalks.
  4. Wash the mint, spin it dry and pick off the leaves and finely chop them. You should have about 3 tablespoons’ worth.
  5. Cut the lemon in half and juice one half.

To finish the salad:

  1. Mix everything together as close to eating as possible for the best flavour and to stop it going soggy.
  2. They say: I recommend that you just add the juice of half the lemon to begin with and taste to see what you think. We love this sharp and would always add more lemon, but you may find that this is enough for you.

Notes: What is bulgar wheat? How many other ways can you spell tabule?

Categories: Kitchen Garden, Recipe | Tags: , , , , , , | Leave a comment

Leafy salad with poached eggs, kale and herby mayo

ourkitchengarden.net

The list of ingredients we can add to a salad is endless… here at Bondi we base our salads on lettuce leaves, fresh herbs and then seasonal additions. This one is a favourite with just-poached eggs and a wonderfully creamy and tangy dressing, but the key is to show the children how to handle delicate lettuce leaves without crushing or bruising them (the lettuce, not the kids…) and the gentle art of cracking an egg without destroying the yolk!

Fresh from the garden: Lettuce, eggs, kale, edible flowers, spring onions, garlic, lemon, herbs

Recipe source: Melissa

Serves: 6 or 24 tastes

Equipment:

·       Mixing bowls – large, medium, small

·       2 salad spinners

·       Tea towels and paper towel

·       Chopping boards & knives

·       Saucepan and lid

·       Deep-sided non-stick frying pan

·       Slotted spoon

·       Stick blender &its cup

·       Measuring: jug, ½ cup, teaspoon

·       Scales

·       Scissors

·       Garlic press

·       Citrus juicer

·       Serving bowls

Ingredients:

  • 4 freshest eggs (plus two for the mayo)
  • A bunch of salad leaves & kale
  • A large handful of herbs
  • A few garnishing flowers
  • Any extras like radishes
  • White wine vinegar & olive oil

For the herby mayonnaise:

  • A small handful fresh herbs
  • 1 juicy lemon
  • 1 small garlic clove
  • 2 eggs
  • 1 teaspoon Dijon mustard
  • 1/2 cup rice bran oil
  • Flaked salt & black pepper

What to do:

For the salad:

  1. Fill up the 2 big bowls with cold water & wash the salad leaves in several changes of water. Spin the leaves dry and wipe the bowls dry.
  2. Lay out the tea towel and line it with kitchen paper. Spread the salad leaves over the paper and roll the whole lot up like a log. Keep the rolled parcel of leaves in the fridge until needed.
  3. Reserve the small garnishing leaves and flowers in a separate little bowl of cold water.
  4. Wash the kale and shake dry. Snip the leaves from the stalks and discard the stalks. Spin dry thoroughly, then put in a clean dry bowl, drizzle a little olive oil and a pinch of salt, and then massage the salty oil into the leaves with your fingers for 5 minutes.
  5. Fill up another bowl with water and wash the herbs. Spin the herbs dry and pick leaves, reserving in their own small bowl, discarding stalks into compost.
  6. Scrub the radishes and then finely slice using a sharp knife or a mandoline slicer. 

For the mayo:

  1. Meanwhile for the mayo, wash the herbs in a few changes of water, spin them dry and finely strip off leaves from the stalks (coriander stalks you can leave in).
  2. Cut the lemon in half and juice the halves. You will need 2 tablespoons lemon juice in total.
  3. Smash the garlic clove, peel it and squeeze it through the garlic press.
  4. Carefully separate the eggs and reserve the yolks in a small bowl.
  5. Into the stick blender cup add the egg yolks, the mustard and 2 teaspoons only of the lemon juice. Whizz together until all is combined.
  1. Measure the rice bran oil, then get a friend to help measure in the oil a tablespoon at a time every 30 seconds into the egg mixture while you are whizzing (this takes a few minutes so don’t rush it).
  2. Then slowly add in another 2 teaspoons of lemon juice, the pressed garlic, the herbs and a good sprinkle of salt and pepper. Blend until smooth. Taste and check if it needs any more lemon juice or salt and adjust if needed.

To poach the eggs:

  1. Fill the deep-sided frying pan with water to a depth of about 10cm, then bring it to the boil and then turn down to a bare simmer.
  2. Then break the eggs into separate little bowls, then slide them into the simmering water, one at a time until they’re all in, and let them cook, uncovered, for 4 minutes. Fill a large bowl with cold water.
  3. Then use a draining spoon to lift them from the water and transfer them to the bowl of cold water if you’re not ready to use them just yet.

To serve:

  1. Strip the kale leaves into smaller pieces and add them to the separate bowl. Drizzle over a little olive oil and pinch of flaked salt and then using your fingertips, rub it all in to the kale leaves to make them soft.
  2. Take the lettuce from the fridge and chop into smaller strips. Pop them into a big bowl, then drizzle about a teaspoon of olive oil, a teaspoon of white wine vinegar & a sprinkle of flaked salt over the whole lot.
  3. Add the kale into the lettuce and using your hands, turn the leaves to coat in the dressing and then divide the lot among your serving bowls.
  4. Spoon an egg at a time out of the water and dry off with some paper towel or a clean tea towel, and then carefully arrange one egg on the top of each salad.
  5. Drizzle the mayo over the top of each salad, followed by a sprinkle of herbs and the flowers and serve immediately!

Notes: What is mayo short for? What other salad dressings could you use? Why do we need to wash the leaves so well? Why do we roll the leaves up to put them in the fridge? Why don’t we always need to use vinegar to poach the eggs? Why do we put the eggs into cold water?

ourkitchengarden.net

Categories: Uncategorized | Tags: , , , , , , , | Leave a comment

Create a free website or blog at WordPress.com.

%d bloggers like this: