Monthly Archives: August 2016

Kitchen news 3rd August 2016

IMG_2406

(This article first appeared on the School Newsletter on 5th August).

With NAIDOC Week we have been exploring bush tucker in our recipes: what it is, where it comes from and what we would have eaten in Bondi before the shops and houses and fast food places arrived. We talked about the planning needed to hunt, catch, prepare and eat a large animal like a kangaroo or crocodile, and the fact that none of the animal would have been wasted.

We discussed the similarities between bush tucker and the Kitchen Garden philosophies of eating local and seasonal foods, and most importantly about the knowledge passed on to recognise which plants, animals and fish were safe to eat.

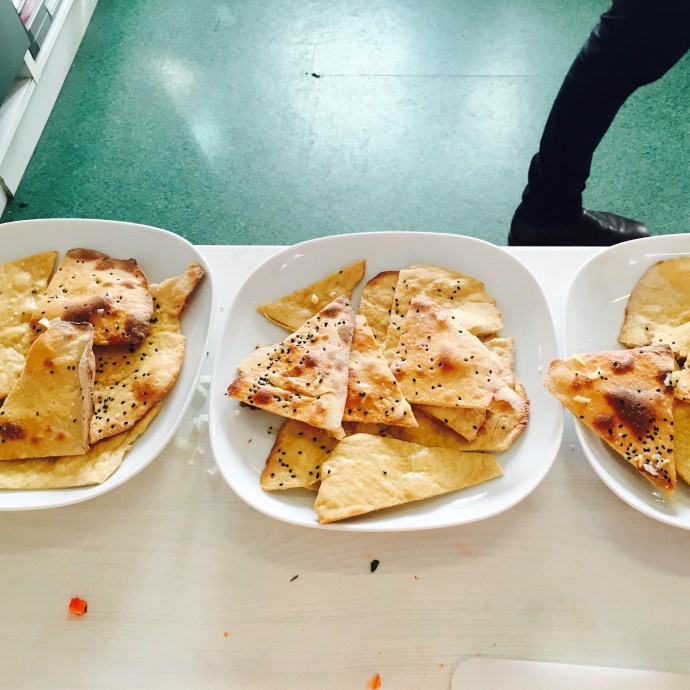
I asked the children to smell the roasted and ground wattleseed I brought in and to tell me what they thought: Chocolate, coffee, Digestive biscuits, bread, peanuts and malt were some of the great suggestions. And so then the Carrots made some Wattleseed damper.

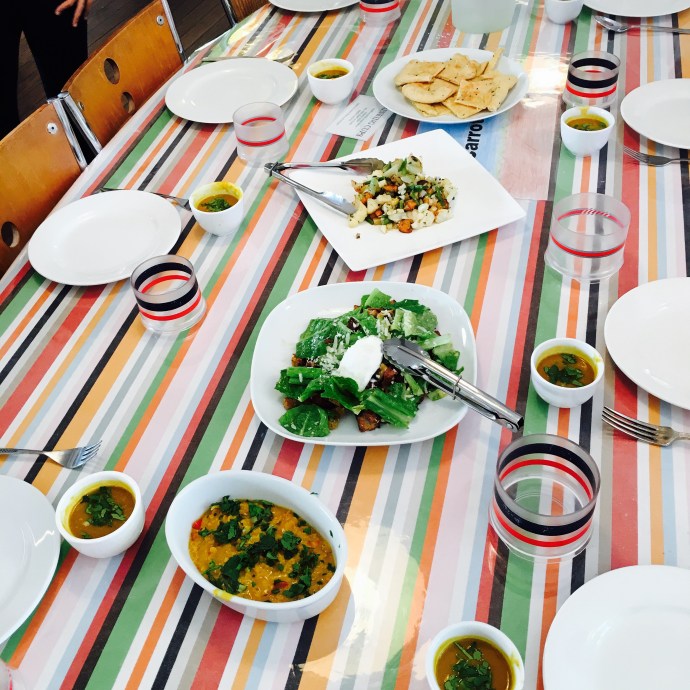
And I cut the finger limes we had in half and squeezed out the little lime ‘caviar’ balls for them to try. “WARHEADS!’ was the cry in most of the classes, sour as they were. The Artichokes made a Tom yum soup with finger limes with bok choi from the garden and mushrooms, and then squeezed in the little baubles as a citrusy garnish.

Paul brought us in some branches of lemon myrtle from his garden and we used them in three of the recipes: the Tomatoes made Risotto of broccoli and lemon myrtle, with the leaves infusing in the hot stock, and the Olives made Lemon myrtle shortbread – blending up caster sugar with dried lemon myrtle leaves for a lovely lemony oil flavour – and we also made some Lemon myrtle tea by simply steeping the leaves in hot water. Delicious and very easy! Not like catching a kangaroo…

A pity that we’ve needed to postpone The Rocket movie fundraiser. We’ll wait until warmer weather and try again then.

Melissa
To volunteer for classes or weekend chicken duty: http://signup.com/go/n5ciGB

Advertisement
Categories: Kitchen Garden, News | Tags: , | Leave a comment

Lemon myrtle tea

IMG_2401

We make all sorts of herbal tea variations at Bondi, using aromatic lemongrass leaves, lemon balm, lemon verbena, mint, lemon thyme, chamomile, citrus rind and ginger… The tea is easy to make and lovely chilled from the fridge overnight too, once the tea has brewed just remove the leaves so that it doesn’t stew.

Foraged bush tucker: lemon myrtle leaves
Recipe source: Melissa Moore
Makes: 3 litres

Equipment:

  • Stockpot
  • Serving jugs


Ingredients:

  • A bunch of lemon myrtle leaves
  • 3 litres water


What to do:

  • Fill the stockpot with water and set it on high to boil with the lid on.
  • Rinse the bunch of leaves well in cold water and shake dry. Remove the leaves from the branch, discarding the branch.
  • Once the water is boiling, turn the pot off and carefully drop the herbs in.
  • Let the tea steep for several minutes and serve, ladling the tea carefully into jugs.

Notes: What else is herbal tea know as? What other herbs or spices could you use? What does aromatic mean?

IMG_2360

Categories: Kitchen Garden, Recipe | Tags: , , , , , , , , | Leave a comment

Broccoli and lemon myrtle risotto

IMG_2414

This lovely risotto is textural and beautifully herby – especially with the subtle lemony tang of the lemon myrtle leaves – and very easy once you get past all the stirring! Serve just before eating while it’s still slightly soupy.

Foraged bush tucker: lemon myrtle leaves
Recipe source: Melissa Moore
Serves: 6 or 24 tastes

Equipment:

  • Saucepan
  • Measures: scales, jug, cup, ¼ cup, tablespoon
  • Salad spinner
  • Garlic press
  • Mixing bowls
  • Chopping boards & knives
  • Grater & microplane zester
  • Ladle
  • Wooden spoon with a straight end
  • Heavy based stockpot
  • 4 soup plates or bowls to serve
Ingredients:

  • 1.5 litres water with 2 tablespoons bouillon (or 1 litre stock)
  • 3 lemon myrtle leaves
  • 1 brown onion
  • 3 garlic cloves
  • 1 large stalk broccoli
  • 3 tablespoons extra-virgin olive oil
  • 20g butter
  • 300g Arborio rice
  • 40g parmesan or grana padano
  • A small handful marjoram
  • Flaked salt & black pepper

What to do:

  1. Pour the water and bouillon into a saucepan, and bring it to a boil. When boiling, turn down to bare simmer and add the lemon myrtle leaves.
  2. Peel and finely chop the onion. Squeeze the garlic cloves through the press into a small bowl.
  3. Wash the broccoli & shake dry. Chop the stems into ½ cm pieces and add stems to the stock, reserving the florets. Wash the leaves, strip from the stalks and finely slice the leaves.
  4. Heat the olive oil and butter over medium heat in the stockpot. Add the chopped onion and cook gently for about three minutes until translucent but not brown. Add the garlic and cook gently for another few seconds.
  5. Stir in the rice until the grains separate and begin to crackle.
  6. Begin adding the simmering stock, a ladle at a time, and stir in. The stock should just cover the rice and bubble. Stir every minute or so for about 15 minutes.
  7. After about 10 minutes, add the broccoli florets & sliced leaves to the rice and keep stirring for about another 5 minutes. When the rice is just tender all the way through but still slightly firm, usually in about 20 minutes all up, it is done.
  8. Meanwhile, weigh and cut the parmesan & grate it. Wash and spin dry the marjoram, strip and discard the stems.
  9. Add the last ladleful of stock and the rest of the broccolini in to the rice. Stir in the marjoram and parmesan, and remove from the heat. Taste now and check the seasoning. The mixture should be creamy and lose.
  10. Serve into the bowls and eat right away!

Notes: What sort of rice is Arborio? Why do we use this sort of rice? Why do we fry the rice off first? What does ‘yield’ mean? What do lemon myrtle leaves look like?

Categories: Kitchen Garden, Recipe | Tags: , , , , , , | Leave a comment

Tom yum soup with finger limes

IMG_2355

The finger lime is a unique and ancient Australian native – citrus australasica – found in the wild around the rainforest areas of SE Queensland and the northern rivers region of New South Wales. Inside the finger lime’s skin are hundreds of juice filled pearls or ‘lime caviar’ that burst in the mouth with a rare and exciting explosion of flavour. The finger lime’s lime caviar is rich in vitamin C and antioxidants. The colour varies according to the variety: it can be opaque, yellow, green, pink or red.

Foraged bush food: finger limes
Recipe source: Melissa Moore
Serves: 6 or 24 tastes

Equipment:

  • Kettle
  • Chopping boards and knives
  • Paper towel
  • Salad spinner
  • Measures – tablespoon, teaspoon
  • Mixing bowls – selection
  • Serving bowls
  • Ladle


Ingredients:

  • 1.5 litres water
  • A clove of garlic
  • 3 stalks lemongrass
  • A small handful assorted mushrooms
  • A head of bok choi
  • 1 bunch fresh coriander
  • 1 lime
  • 1 tablespoon bouillon
  • 1 quantity tom yum paste (see recipe)
  • 2 kaffir lime leaves
  • 1 tablespoon fish sauce (optional)
  • A small handful finger limes

What to do:

  1. Make the paste recipe first (see separate tom yum paste recipe).
  2. Fill the kettle to the 1.5 litre mark and set it to boil.
  3. Peel and finely chop the clove of garlic.
  4. Cut or strip the leaves from the lemongrass (reserving the leaves for another time) and wash the stalks. Chop them into 10cm lengths and bash lightly.
  5. Wipe the mushrooms clean with a piece of paper towel, then slice them into very thin slices.
  6. Wash the bok choi, separating out the leaves and cleaning, and slice into thin strips.
  7. Cut the lime into quarters.
  8. Pour the hot water into the large saucepan and add the bouillon. Bring back to the boil and stir in all the tom yum paste and garlic and cook for about 2 minutes.
  9. Stir in the lemongrass batons and whole kaffir lime leaves.
  10. Mix in the mushrooms and sliced bok choi. Add the fish sauce if using and a squeeze of the lime quarters and simmer for another 5 minutes.
  11. Wash and spin the coriander and basil dry, then finely chop.
  12. Remove from heat, sprinkle in the chopped coriander and ladle into bowls.
  13. Cut the finger limes in half and squeeze out the little globes into bowls as garnish.

Notes: What do finger limes look like? What is inside a finger lime?

IMG_2411

Categories: Kitchen Garden, Recipe | Tags: , , , , , , , | Leave a comment

Wattleseed damper

IMG_2363

Probably the most widely recognized bush tucker recipe is damper, a simple type of bread made of water and flour. Although the Aborigines originally baked this bread, it was the Europeans that gave it the name damper. Originally made with flour, salt, and water, it was baked in the hot coals of an open campfire. During colonial times it was a staple food in the bush because stockmen and drovers in remote areas could easily carry the dry ingredients. They needed to add only water to make the damper, and often served it with tea made in a cylindrical billy or billycan, a lightweight hanging pot with a close-fitting lid.

Bush tucker: wattleseed
Recipe source: adapted from australianflavour.net
Serves: 4 or 24 tastes

Equipment:

·       Bowls – large

·       Measures – cup, ½ cup, tablespoon, ½ teaspoon

·       Sifter or sieve

·       Table knife

·       Oven tray

·       Sharp knife

·       Pastry brush

·       Chopping board and knife

·       Serving plates

Ingredients:

  • 1/2 cup milk
  • 1/2 cup water
  • 20g ground roasted wattleseed
  • 3 cups plain flour
  • 3 teaspoons baking powder
  • 1 teaspoon salt
  • 60g butter


What to do:

  1. Preheat oven to 200°C.
  2. Measure the milk and water into a small saucepan and set to heat on low. Weigh out the ground wattleseed and then add in to the milk. Bring to a simmer and then turn off the heat, then leave for 10 minutes to infuse.
  3. Sift the flour, baking powder and salt into a bowl, then rub in butter until mixture resembles fine crumbs.
  4. Make a well in the centre, add the combined milk and water and mix lightly with a knife until the dough leaves the sides of the bowl.
  5. Gently knead on a lightly floured surface and then shape into a round, put on a greased oven tray. Pat into a round 15-16cm diameter.
  6. With sharp knife, cut two slits across dough like a cross, approximately 1cm deep.
  7. Brush top of dough with milk. Sift a little extra flour over dough.
  8. Bake for 10 minutes, or until golden brown.
  9. Reduce heat to 170°C. and bake another 20 minutes.
  10. Using oven mitts, carefully slide the damper out of the oven and check that it is done: if you knock the loaf it should sound hollow inside – or you can poke a fork into the centre and see if it’s clean when pulled out.
  11. We divided our loaf into 4 and served each quarter whole, for each table to pull apart their own piece.

Notes: How would you adapt the recipe if you had no access to refrigeration?

Categories: Kitchen Garden, Recipe | Tags: , , , , , , , , | Leave a comment

Kitchen news 22nd June 2016

IMG_1881

(This article originally appeared in the School Newsletter on 24th June.)

We’ve had an all-star cast of helpers these last few weeks – some of my original Kitchen Garden kids from 2011 have been in to assist the classes in the Cottage! It’s been great to see how beautifully they instruct the younger children and how far their cooking skills have come along after all these years. Taye, Mimi and Chandy (and their friend Elvenie) have taken care of quite a few groups over many lessons and we really appreciate it! And of course the food has been even more delicious than usual…

They have been helping some of the groups prepare the freshly picked cos lettuces, tossing them into a classic Caesar salad with anchovy and garlic-drenched crunchy baked croutons, and perfectly poached eggs plopped on top of it all.

Pumpkins are plentiful at this time of year – and really cheap at the shops: I saw some for 80c a kilo! So the big girls and the children have been carefully preparing chunks to add to sautéing leeks, thyme, ground cumin and coriander and then blending up into the Best pumpkin soup ever!

Mish and the garden crew have been harvesting carrots – and what crazy carrots they are! In class we’ve been laughing at the three-legged creatures, ugly as all get-out, and some looking like they desperately need to go to the loo! But of course they’re as delicious as can be, in Roasted winter veggies with rosemary and honey drizzle and crispy fennel bits, cauliflower florets and potato chunks.

We’ve also been experimenting with a different sort of bread too: Indian Garlic naan dough made with yoghurt and egg, baked briefly in the oven and then brushed with the garlic. Different from the usual magic dough we use, and fabulous served with Kerry’s tasty daal that some of the Broad Bean groups have made, with red lentils, mustard seeds and cumin, coconut milk, onion and capsicum. Creamily good indeed!

Next week we have the Year 1 kidlets coming to visit. Brace! Brace! Brace! Only joking – it will be lovely to see their little grobbley faces again – I’ve missed them since they moved up away from the kindy playground!

And then the week after that, holidays. A chance to recalibrate, fire up the oven and chill out a bit. Hopefully! And also Carolyn, Mish and I are running a school Kitchen Garden holiday program 13th to 15th July in the Cottage – check back for more details!

Keep safe! Mx

Categories: Kitchen Garden, News | Tags: , , , | Leave a comment

Roasted winter veggies with rosemary honey drizzle

IMG_1820

The colder weather brings us fennel, cauliflower and carrots and they’re delicious drizzled in buttery honeyed goodness!

Fresh from the garden: fennel, cauliflower, carrot, potato, rosemary
Recipe source: Melissa Moore
Serves: 6 or 24 tastes

Equipment:

  • Large rimmed baking tray
  • Baking paper
  • Paper towel
  • Chopping boards and knives
  • Colander
  • Salad spinner
  • Mixing bowls
  • Spatula
  • Scales
  • Measures: ¼ cup, tablespoon, teaspoon
  • Small saucepan
  • Serving bowls
Ingredients:

  • 3 or 4 large carrots
  • Half a small cauliflower
  • A couple of fennel
  • 2 large potatoes
  • 1/4 cup olive oil
  • 1½ teaspoons coarse salt
  • 25g unsalted butter
  • 1 tablespoon honey
  • 1 sprig fresh rosemary


What to do:

  1. Preheat oven to 220C. Line a large rimmed baking sheet with baking paper and set aside.
  2. Scrub the potatoes under running water and wipe dry. Without peeling, chop them into 2cm cubes by cutting into slices first, then rods, then cubes.
  3. Wash and shake dry the cauliflower and chop into small florets and cubes.
  4. Scrub the carrots and peel, then slice into small chunks.
  5. Wash the fennel, taking care to rinse out any hidden dirt. Chop into smallish pieces.
  6. In a large bowl, toss together all the veggies with the oil and salt until well combined. Place in an even layer on prepared baking sheet.
  7. Transfer to oven and roast, turning with a spatula once or twice during cooking, until browned and turnips are easily pierced with a paring knife, for about 25 minutes.
  8. Meanwhile, wash the rosemary sprig and wipe dry with paper towel. Strip the needles from the stalk and finely chop using a large knife. We will need about a tablespoon worth.
  9. Melt the butter in a small saucepan over medium heat. Add honey and rosemary, let simmer for a few seconds and remove from heat.
  10. Transfer veggies to serving bowls and drizzle with butter mixture. Toss to combine and serve.

Notes: What other winter veggies can you name? What does fennel smell like?

Categories: Kitchen Garden, Recipe | Tags: , , , , , , | Leave a comment

Kerry’s Tasty Daal

IMG_1824

This is easy to make and delicious! Add a few flakes of chilli if you like it spicy.

Fresh from the garden: onion, garlic, capsicum, ginger, tomato, coriander
Recipe source: Melissa’s friend Kerry
Serves: 4 or 24 tastes

Equipment:

  • Kettle
  • Measures: jug, cup, tablespoon, teaspoon
  • Potato peeler
  • Chopping boards and knives
  • Food processor
  • Stockpot
  • Flat-edged wooden spoon
  • Serving bowls


Ingredients:

  • 500ml water and a tablespoon of bouillon (or 500ml veggie stock)
  • 1 small onion
  • 2 cloves of garlic
  • ½ red capsicum
  • 2cm knob of ginger
  • 1 large tomato
  • Rice Bran oil
  • 1 teaspoon mustard seeds
  • 1 cup red lentils
  • 1 teaspoon turmeric
  • 1 teaspoon cumin powder
  • 1 small can of coconut milk
  • Salt & pepper to taste
  • Small bunch of fresh coriander

What to do:

  1. Fill the kettle with half a litre of water and set it to boil. When boiled pour it into the measuring jug, add the tablespoon of bouillon and stir.
  2. Peel and finely chop the onion and garlic. Wash and finely chop the half capsicum. Peel the skin from the ginger and finely chop.
  3. Wash and finely chop the tomato. Wash the coriander and spin dry. Chop stems and leaves.
  4. Heat a couple of tablespoons of oil in the stockpot and add the mustard seeds. Once they start popping add the chopped onions and capsicum and fry for 5 minutes, stirring occasionally. Add the garlic and ginger, then fry for another minute.
  5. Add lentils and fry for 2 minutes, then add turmeric & cumin powder.
  6. Add a bit of the bouillon water and half the tin of coconut milk, then just keep adding little bits of each until all absorbed, stirring as you go.
  7. After 5 minutes add the chopped tomato and a sprinkle of salt and pepper.
  8. Once lentils are soft (usually 20 minutes or so) divide into serving bowls and garnish with the chopped coriander. 

Notes: What is turmeric? What family do lentils come from?

Categories: Kitchen Garden, Recipe | Tags: , , , , , , | Leave a comment

Garlic naan

IMG_1825

We use a number of different dough recipes at Bondi Public, but this one is perfect to mop up sloppy sauces! We use the dough made by the previous class, and then make the new dough for the next.

Fresh from the garden: garlic
Recipe source: adapted from a recipe on taste.com.au
Serves: 8 or 24 tastes

Equipment:

  • 2 or 3 baking trays
  • Scales
  • Chopping board & knife
  • Small saucepan
  • Mixing bowls
  • Measures: jug, 1/2 cup, tablespoon, teaspoon
  • Plastic wrap
  • Pastry brush
  • Serving plates


Ingredients:

  • 80g butter or ghee at room temperature
  • 2 garlic cloves
  • 2 teaspoons nigella seeds
  • 450g plain flour
  • 1 teaspoon dried yeast
  • 1 teaspoon salt
  • 1 teaspoon caster sugar
  • 1/2 cup warm water
  • 1/2 cup natural yoghurt
  • 1 egg

What to do:

  1. Preheat oven to 180°C. Place oven trays into the oven to preheat.
  2. Use your fist to punch down the dough. Weigh the butter or ghee, and then add half to the dough and knead for a further 5 minutes or until ghee is well incorporated into the dough.
  3. Meanwhile, peel the garlic and finely chop. Melt the remaining ghee in a small saucepan over low heat. Add the garlic and cook for 30 seconds or until aromatic. Remove from heat.
  4. Divide dough into 8 even portions. Press or roll each portion into a 15 x 20cm tear shape, about 3mm thick.
  5. Sprinkle with the nigella seeds and gently push into the dough. Bring the preheated trays out of the oven and carefully place the naan onto them, and bake in oven for 6-8 minutes or until slightly puffed and golden brown.
  6. Use this time to make the dough for the next class: Combine the flour, yeast, salt and sugar in a large bowl. Whisk the egg lightly and then add to water, yoghurt and egg in a small jug. Add to the flour mixture and stir until mixture just comes together. Turn onto a lightly floured surface and knead for 5 minutes or until mixture is smooth. Place in a bowl and cover with plastic wrap. Set aside in a warm, draught-free place for at least 30 minutes to rise or in the fridge overnight.
  7. Remove the baked naan from oven and immediately brush with the ghee mixture. Cut into chunks and serve immediately.

Notes: Where does naan bread originate? What is ghee?

Categories: Kitchen Garden, Recipe | Tags: , , , , , , , | Leave a comment

Create a free website or blog at WordPress.com.

%d bloggers like this: