Posts Tagged With: vegan

Cannellini bean, kale and rainbow chard soup

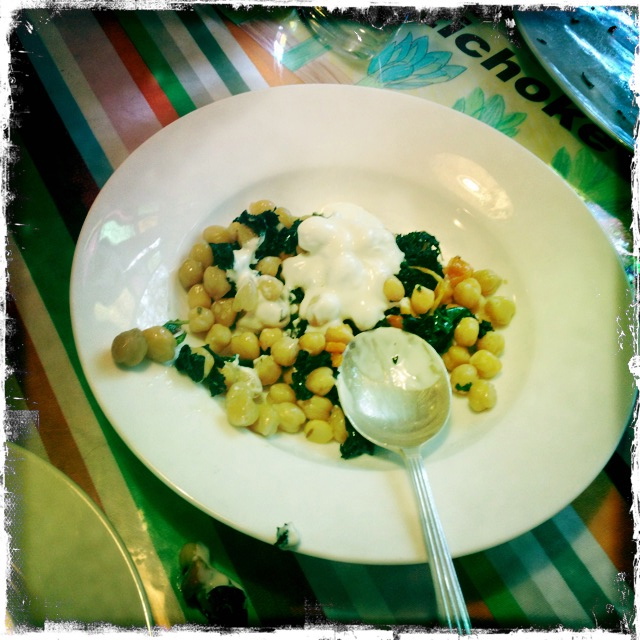
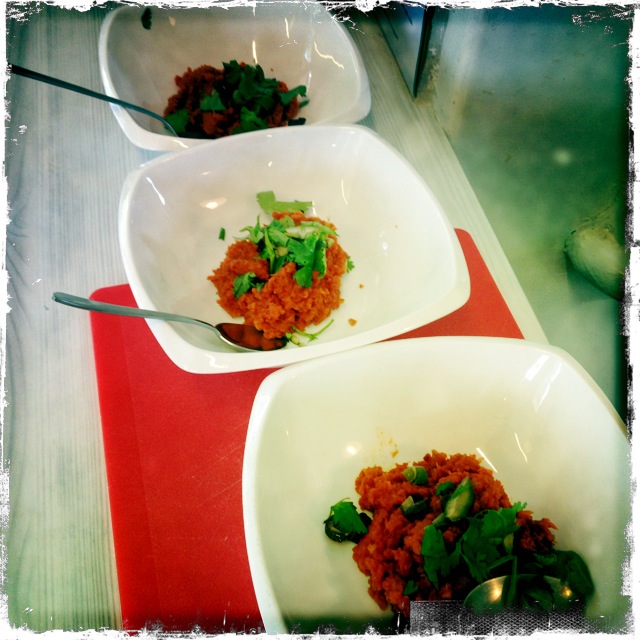
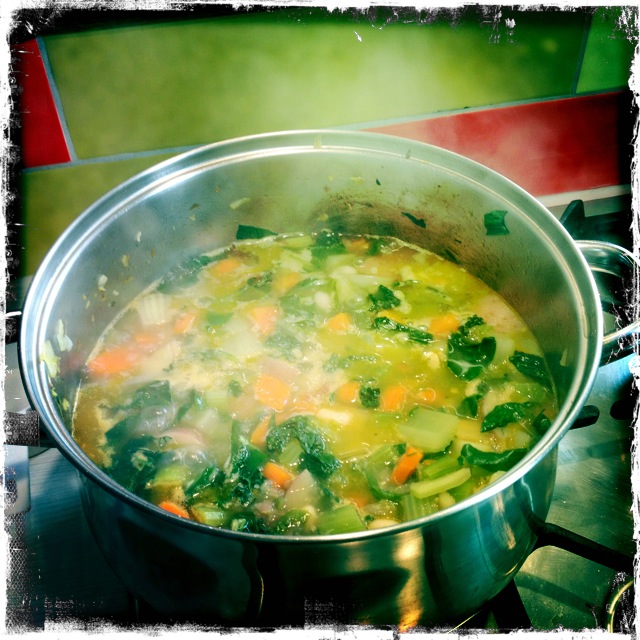
Our kids love soup – blended and smooth or chunky and funky – and this one makes the most of our winter garden veg. At home please add some toasted buttery sourdough rubbed with garlic!

ourkitchengarden.net

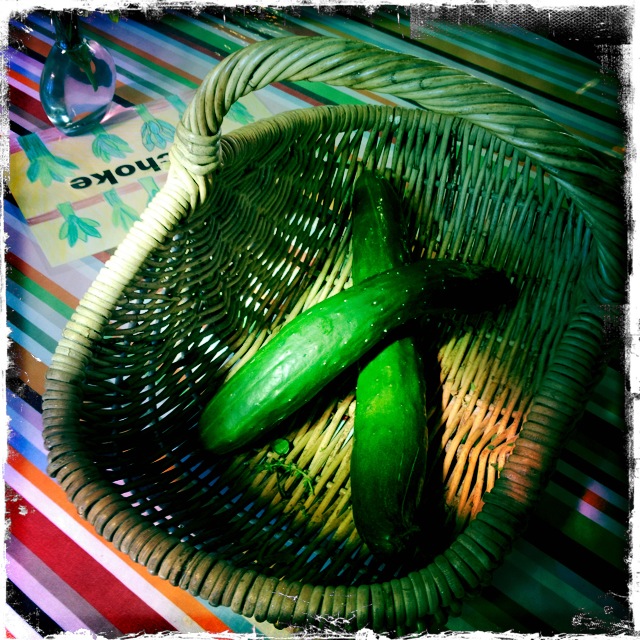
Fresh from the garden: celery, carrots, onion, garlic, potatoes, kale, rainbow chard
Recipe source: Melissa
Serves: 8 or 24 tastes

ourkitchengarden.net

Equipment:

  • Bowls – glass, large, small
  • Kettle
  • Measures: cup, tablespoon
  • Colander, sieve
  • 2 saucepans, med and large
  • Chopping boards and knives
  • Peelers & garlic press
  • Wooden spoon
  • Ladle
  • Serving bowls


Ingredients:

  • 150g dried cannellini beans
  • 1 teaspoon bicarb soda
  • 2 tablespoons extra-virgin olive oil
  • 2 stalks celery
  • 2 carrots
  • 1 brown onion
  • 5 cloves garlic
  • 1.5 litres boiling water & 1.5 tablespoons bouillon (or 1.5 litres vegetable stock)
  • 2 Desiree or other red potatoes
  • One large bunch kale
  • A couple of stalks of rainbow chard
  • Flaked salt and black pepper

What to do:

  • The night before, soak the cannellini beans in plenty of cold water with a teaspoon of bicarb.
  • At the beginning of the lesson, drain and rinse the beans. Add them to the smaller saucepan with plenty of water to cover and the bay leaves. Peel 2 of the garlic cloves and add them whole to the pan. Heat on high to boil and cook for about 20 minutes, stirring every now and then.
  • Fill the kettle and set it to boil.
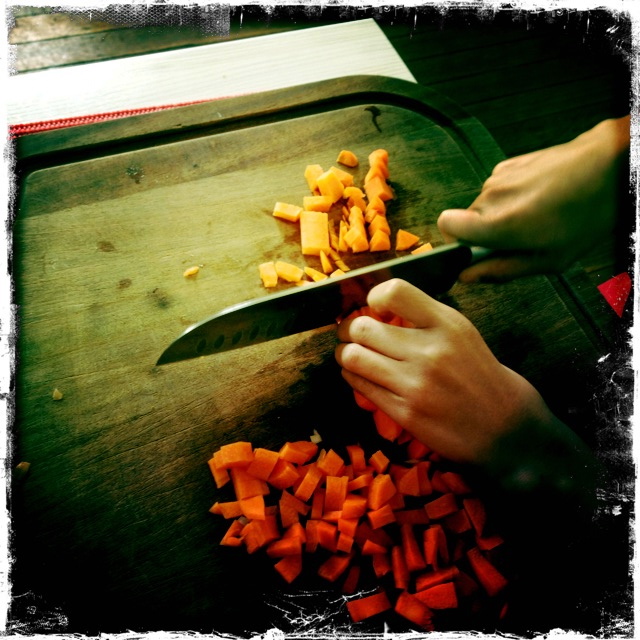
  • Wash and shake the celery dry and chop into small pieces. Wash and peel the carrots and chop into small pieces.
  • Wash and chop the potatoes into 2cm cubes, leaving the skin on.
  • Peel and finely dice the onion. Peel and squeeze the remaining 3 cloves of garlic through the press.
  • Wash the kale and chard in several changes of water, and then shake dry. Trim the stalks from the kale and discard. Trim the stalks from the chard and chop into 5mm pieces, keeping separate. Roll up the kale and chard leaves and slice or tear into 1cm strips.
  • In the larger saucepan over medium heat, heat the olive oil until shimmering.
  • Add the celery, carrots, and onion, and cook, until the onions are softened, about 5 minutes.
  • Add the garlic and cook, stirring constantly, for another minute or so, and then add the potatoes and stir to coat.
  • Using caution, measure the litre of boiling water into the jug and stir the bouillon in. Add to the vegetables and simmer for about 15 minutes.
  • Strain the beans & garlic and add to the vegetables with the kale and chard stalks and simmer for another 10 minutes, then add the chopped chard and cook for another 5 minutes.
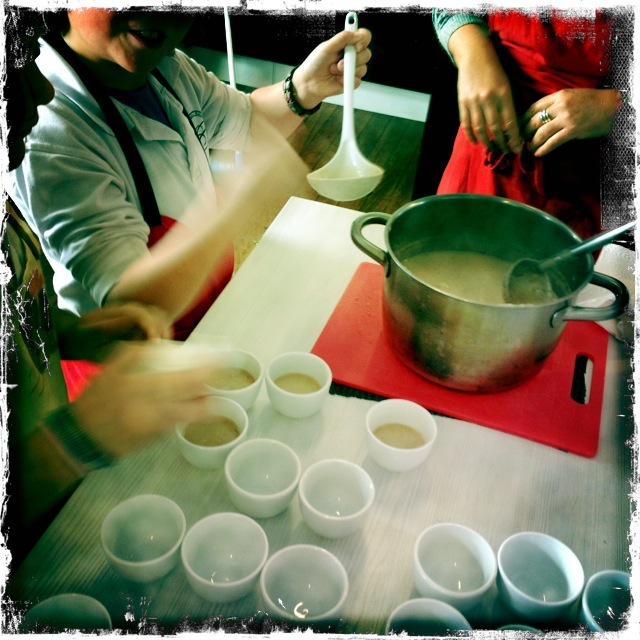
  • Check for correct seasoning, then ladle out into serving bowls.
  • ourkitchengarden.net
Categories: Kitchen Garden, Recipe | Tags: , , , , , , , , , | 2 Comments

Warm salad of Nolans Road chickpeas, kale and Greek yoghurt

We love our Nolans Road organic Kabuli chickpeas – they’re so fresh they only need about half the cooking time of normal chickpeas – and so worthwhile doing from scratch! Dee Nolan suggests soaking and cooking heaps more than you need, then freezing the rest for another time as they’re easily resurrected!

ourkitchengarden.net

Fresh from the garden: kale, carrots, garlic, mint, coriander, lemon
Recipe source: inspired by the recipes of Yotam Ottolenghi

Equipment:

  • Bowls – glass, large, small
  • Saucepans – med, large & heavy
  • Sieve & colander
  • Chopping board & knife
  • Salad spinner
  • Peeler
  • Garlic press
  • Measures – ½ cup, 1/3 cup, tablespoon, teaspoon
  • Scales
  • Mezzaluna
  • Citrus juicer
  • Serving bowls
Ingredients:

  • 200g dried chickpeas
  • 1 teaspoon bicarbonate of soda
  • A large handful kale leaves
  • 1/3 cup olive oil, plus extra to finish
  • 3 medium carrots
  • 1 teaspoon caraway seeds
  • 1 garlic clove
  • A small handful mint
  • A small handful coriander
  • 1 lemon
  • Cooking salt, flaked salt and black pepper
  • 1/2 cup Greek yogurt

What to do:

  • Soak the chickpeas overnight in plenty of cold water with a teaspoon of bicarb.*
  • Next day, drain, rinse and simmer them in a big saucepan or about 25 minutes in fresh ­water until tender, then drain.
  • Meanwhile, half-fill the smaller saucepan with water and a teaspoon of salt and set it to boil.
  • Strip the kale leaves from the stalks, discarding the stalks. Roll the leaves up and cut into fine ribbons, then blanch them in the boiling water for 5 minutes. Drain then refresh under cold running water and squeeze dry.
  • Meanwhile peel then chop the carrots into small dice.
  • Wash and spin the mint (picking the mint leaves) and coriander, then finely chop.
  • Cut the lemon in two and squeeze one half. Peel then crush the garlic clove.
  • Heat up the olive oil in a large saucepan. Add the carrots and caraway seeds and sauté for 5 minutes on medium heat. Add the kale, the drained chickpeas and continue cooking for another 5 minutes.
  • Now add the garlic, herbs, a tablespoon of lemon juice and a sprinkle of salt and pepper. Remove from the heat and leave to cool for a few minutes. Taste and adjust the seasoning.
  • To serve, mix together the yogurt with a tablespoon of olive oil and another sprinkle of flaked salt and pepper. Pile the vegetables on serving dishes and spoon the yogurt on top. Sprinkle with freshly ground pepper and serve.

 Notes: Why do we soak the chickpeas overnight? What are other names for chickpeas?

*If you forget to soak the chickpeas the night before (as I have done in the cottage on more than one occasion (!) then boil the chickpeas for an hour and then leave them to soak in that same liquid for another hour. Drain, rinse, and then cook as above…

Categories: Kitchen Garden, Recipe | Tags: , , , , , , , , , , , | 1 Comment

Rosemary and olive focaccia

We love preparing dough at Bondi, and this soft focaccia studded with olives and rosemary is fantastic as part of an antipasto plate or with a hearty soup. We used Our Bondi Olives that were picked in February then brined over the course of two months, marinated (olive oil, orange peel, garlic, fennel seed, bay, thyme) and bottled in May, then cupboard-aged for another 2 months… we also used a combination of fresh rosemary, picked from the stalk, with rosemary spines dried over the last 6 months. A variation:  adding halved cherry tomatoes or preserved artichokes or whatever you feel like!

ourkitchengarden.net

From the garden: olives, rosemary
Recipe source: adapted from a recipe on taste.com
Serves: 8 at home or 24 tastes

Equipment:

  • Bowls – small, med
  • Measures – jug, teaspoon, tablespoon
  • Scales
  • Stand mixer & dough hook
  • Pastry brush
  • 20 x 30cm Swiss roll pan
  • Clean tea towel
  • Chopping board
  • Serving plates
Ingredients:

  • 310ml warm water
  • 2 teaspoons dried yeast
  • 2 teaspoons caster sugar
  • 3½ tablespoons olive oil
  • 450g plain flour
  • 2 teaspoons salt flakes
  • 1 large sprig of rosemary
  • A jar of our marinated Bondi PS olives

What to do:

To make the dough:

  • Combine the water, yeast and sugar in a small bowl and set aside in a warm, draught-free place for about 5 minutes until frothy & bubbling. Then add 2 tablespoons of olive oil.
  • Place flour and half of the flaked salt in the bowl of the mixer. Make a well in the centre and pour in yeast mixture. On the lowest setting, mix for 10 minutes.
  • Turn onto a lightly floured surface and knead for another minute or so until smooth and elastic. Brush a medium bowl with a little olive oil to grease. Place dough in bowl and cover with a clean tea towel. Set aside in a warm, draught-free place for about an hour until doubled in size.

 Start of lesson:

  • Preheat oven to 200°C.
  • Brush the pan with 2 teaspoons of remaining oil. Punch down the centre of the dough with your fist. Turn onto a lightly floured surface and knead for 2 minutes or until dough is elastic and has returned to original size. Press into the prepared pan. Cover with the clean tea towel and set aside in a warm, draught-free place to prove for 20 minutes or until doubled in height.
  • Meanwhile wash & carefully dry the rosemary and pick the leaves from the stalks. Pit the olives.
  • Use your finger to press dimples into the dough. Brush with remaining oil and sprinkle over the rosemary and remaining salt. Press the olives into the dough.
  • Bake in oven for 25-30 minutes or until golden and the focaccia sounds hollow when tapped on base. Serve warm or at room temperature, carved into thin slices.
  • While the focaccia is cooking you can make the dough for the next class before cleaning up!

Notes: Why do we wait for the yeast mixture first? What is process of doubling the dough in size called?

Categories: Kitchen Garden, Recipe | Tags: , , , , , , , , | Leave a comment

Hugh’s Magic Dough (for 1 pizza)

The Year 1 kids came to visit and made the pizza dough for the next group, while using the dough that the class before made…

ourkitchengarden.net

Squishing and squashing the dough

Recipe source: Hugh Fearnley-Whittingstall, Veg Every Day
Makes: 1 large pizza

Equipment:

  • Scales
  • Bowls – large, medium
  • Wooden spoon
  • Measures – tablespoon, teaspoon, ½ teaspoon
  • Cling film
Ingredients:

  • 125g plain white flour plus extra to flour
  • 125g strong white flour
  • 1 level teaspoon fine sea salt
  • 1 teaspoon instant dried yeast
  • 1 tablespoon olive oil, plus a little extra for oiling
  • 160ml warm water

What to do:

  • Weigh the two flours into a big bowl and then add the salt and yeast. Mix well using the wooden spoon.
  • Measure out the warm water and then add the water and the oil to the flours and mix to a rough dough. Knead for a few minutes and then turn out onto a lightly floured table and knead again for about 10 minutes, until smooth. This is quite a loose and sticky dough, which is just as it should be – you get better-textured bread this way – so try not to add too much flour if you can help it, it will become less sticky as you knead.
  • Trickle a little oil into a medium bowl, add the kneaded dough and turn it in the oil so it is covered with a light film. Cover the bowl with cling film and leave in a warm place to rise until doubled in size – at least an hour, probably closer to two – or if using the next day, wrap bowl in cling film and put straight into the fridge to prove slowly.
  • When the dough is well risen and puffy, tip it out and ‘knock it back’ by poking it with your outstretched fingers until it collapses to its former size. It’s now ready to be shaped to your will.

Notes: Why do we leave the dough to rise? What is this process called? What does to knock it back mean? What will you make with your dough?

Categories: Kitchen Garden, Recipe | Tags: , , , , , , , , , | Leave a comment

Cabbage, barley and coriander soup

Thick and chunky, perfect for a winter’s day outside in the fields threshing wheat, or even dealing with the Westfield car park… We used Demeter organic pearled barley – super texture, super delish!

ourkitchengarden.net

Fresh from the garden: cabbage, onion, garlic, carrots, bay, coriander
Recipe source: Melissa
Serves: 8 or 24 tastes

Equipment:

  • Kettle
  • Chopping board & knife
  • Bowls – large, med
  • Peelers
  • Colander
  • Salad spinner
  • A large stockpot
  • Measures – jug, ½ cup, tablespoon
  • Wooden spoon
  • Serving bowls
Ingredients:

  • 1 medium onion
  • 4 cloves garlic
  • 4 large carrots
  • 1/2 large head cabbage
  • 2 tablespoons olive oil
  • 1½ litres stock (or 1½ litres boiling water & 1½ tablespoons bouillon)
  • 1 tin diced tomatoes
  • 1/2 cup pearled barley
  • A teaspoon of ground coriander
  • 1 bay leaf
  • Black pepper
  • A small bunch of fresh coriander

What to do:

  • Fill the kettle and set it to boil.
  • Peel and finely chop the onion and garlic.
  • Peel, wash and chop the carrots into small bite-sized chunks.
  • In a large stockpot, heat olive oil over medium heat.
  • Add onion and garlic, and cook until fragrant and translucent, about 3-5 minutes. Stir in carrots and cook until slightly softened, about 5 minutes.
  • Measure out the boiling water & add to bouillon, stir and carefully pour in to the stockpot. Bring to the boil then measure out and add the barley, bay leaf, the ground coriander and a few grinds of pepper.
  • Cut the cabbage into quarters, wash them then chop out the core (good for the chooks!) and roughly chop. Then add the cabbage and tomatoes and return to the boil. Simmer for about 25 minutes all up, stirring occasionally, until the barley is cooked.
  • Meanwhile wash and spin the fresh coriander dry, then finely chop (but not into mush!!!)
  • When the soup is done, divide among bowls, sprinkle on the coriander and eat hot!

Notes: What does fragrant and translucent mean? What is barley? What does pearled barley mean? What else is coriander known as?

ourkitchengarden.net

Categories: Kitchen Garden, Recipe | Tags: , , , , , , , , , , | 2 Comments

Cauliflower and borlotti bean soup

There is something almost saintly about a pureed bean soup – and this has texture and flavour & a wonderful creaminess from the beans. And protein! Although who cares how healthy this is for you when it tastes so good?!

ourkitchengarden.net

Fresh from the garden: onion, garlic, bay, cauliflower, parsley
Recipe source: Melissa
Serves: 6 or 24 tastes

Equipment:

  • Kettle
  • Chopping board & knife
  • Colander, sieve
  • Large saucepan or stockpot
  • Measures – jug, tablespoon, teaspoon
  • Bowls – big, medium
  • Salad spinner
  • Stick blender
  • Mouli
  • Ladle
  • Serving bowls


Ingredients:

  • 1 large brown onion
  • 4 or 5 garlic cloves
  • 1 large head of cauliflower
  • 2 tins of borlotti beans
  • 2 tablespoons olive oil
  • 2 teaspoons fennel seeds
  • 2 bay leaves
  • 1½ litres vegetable or chicken stock (or 1½ litres water and a tablespoon and a half of bouillon)
  • A small handful parsley
  • Black pepper

What to do:

  • Fill the kettle and set it to boil.
  • Peel and finely dice the onion. Peel and slice the garlic. Wash, drain and chop the cauliflower, finely chopping the stalks and discarding the leaves to the chook bin.
  • Open the tins of borlotti beans, drain into the sieve and rinse well under cold water.
  • Heat the olive oil in the saucepan and gently sauté the onion until soft for about 5 minutes and then add the garlic, fennel seeds & bay leaves and cook gently for another minute.
  • Add the cauliflower and the drained beans. Pour in the stock or water and bouillon.
  • Bring to a boil, then reduce the heat and simmer for 10 minutes until the cauliflower is tender.
  • Meanwhile wash and spin the parsley dry. Pick off the leaves, discarding the stalks, and finely chop.
  • Fish out the bay leaves, grind a little pepper in and then carefully whizz until smooth using the stick blender.
  • For a silky smooth finish you may want to pass the soup through the fine setting of a mouli, and then reheat.
  • Taste for correct seasoning and ladle into bowls.
  • Garnish with parsley and serve!

 Notes: We are using tinned beans in this recipe. What would you need to do if you were using dried beans? What other sort of beans are there? What is bouillon?

ourkitchengarden.net

Categories: Kitchen Garden, Recipe | Tags: , , , , , , , , , , , , , | Leave a comment

Our Bondi olives

These olives were picked from our own trees here at Bondi at the end of February and beginning of March this year. They spent about 2 months brining, both black and green, separated by harvest date & slit on two sides – the first week with a daily change of 1/3 of a cup of salt to a litre of water & then a weekly change of the same… In 2013 we harvested about 4.5kg of black and green combined & they have been brining for 2 months. This recipe is for preserving some olives & eating the rest – the jars of olives are even better after a week & will last undisturbed in the cupboard for at least 12 months; once opened will last for about a month in the fridge.

ourkitchengarden.net

Our olives!

Fresh from the garden: olives, rosemary, thyme, sage
Recipe source: Melissa
Makes: 3 jars plus a bowl to eat!

Equipment:

  • Slotted spoon
  • Paper towel
  • 3 small jars with metal lids
  • Knife – small
  • Baking tray
  • Saucepan
  • Oven mitts
  • Small ladle
  • 4 little bowls to serve with separate bowls for pits
Ingredients:

  • 500g black & green olives in brine
  • 1 sprig of rosemary
  • 2 sprigs of sage
  • A small handful of thyme sprigs
  • 4 garlic cloves
  • 1 orange
  • 2 teaspoons fennel seeds
  • 1 teaspoon coriander seeds
  • ½ teaspoon chilli flakes
  • 4 bay leaves
  • 2 or 3 cups extra-virgin olive oil

What to do:

  • Preheat oven to 160°C.
  • Thoroughly wash jars and lids in hot soapy water, rinse well and leave upside down to drain.
  • When the oven is ready, place jars right-side up on the baking tray and slip into the oven for 5-10 minutes until totally dry. Wipe the lids with paper towel to make sure perfectly dry.
  • Meanwhile scoop olives out of the tub and into the colander with the slotted spoon and rinse in cold water, checking each olive and discarding any that are mushy. Pat dry with paper towel.
  • Wash and thoroughly dry all the herbs and strip the leaves from their stalks.
  • Peel the garlic cloves and gently crush each clove with the back of a knife to break.
  • Carefully slice 1 cm-wide strips of zest from the orange, trying to take just the peel and none of the white pith.
  • Pour the olive oil into the saucepan and add the olives, herbs, chilli, bay leaves, fennel seeds, garlic and orange strips. Heat over medium-low heat until warm & smelling lovely.
  • Using oven mitts slide the tray of jars out of the oven. Using the ladle, carefully fill each jar with a good combination of olives, herbs, spices, orange peel, and garlic. Fill right to the top with olive oil and then seal each with its lid.
  • Spoon the remainder into the four little bowls and place each on a plate with a spare to catch the pits.

Notes: Why don’t we use the olives straight from the trees? Why are they green & black? What does ‘marinate’ mean? Why do we heat up the olive oil? What other ingredients could you use?

ourkitchengarden.net

Olives, jarred

Categories: Kitchen Garden, Recipe | Tags: , , , , , , , , , , , , , | Leave a comment

Crispy rosemary flatbread

Smittenkitchen says: Nothing could be easier than making this cracker, but that doesn’t mean you shouldn’t tell people you slaved all day over it because they’re going to be impressed, and I see no reason not to milk it. I think you could easily swap the rosemary for other herbs, such as thyme or tarragon, or punch it up with black pepper or other spices, but personally, I like it just the way it is here.

ourkitchengarden.net

Crispy crispy!

Fresh from the garden: rosemary
Recipe source: adapted by smittenkitchen.com from a recipe in Gourmet magazine
Serves: 8 or about 30 tastes

Equipment:

  • 3 heavy, large baking sheets
  • Paper towel
  • Chopping board & knife
  • Measures: cup, ½ cup, ¼ cup, tablespoon, ½ teaspoon
  • Baking paper
  • Large bowl
  • Rolling pins
  • Pastry brushes
  • Wire racks
  • Serving plates
Ingredients:

  • 3½ cups unbleached plain flour
  • 4 large sprigs rosemary
  • 1 teaspoon baking powder
  • 1 teaspoon cooking salt
  • 1 cup water
  • 1/2 cup olive oil plus more for brushing
  • Flaky sea salt

What to do:

  • Preheat oven to 230°C with 3 heavy baking sheets inside.
  • Wash, dry and chop 1 sprig of rosemary.
  • Stir together flour, 1 tablespoon chopped rosemary, baking powder, and salt in a medium bowl. Make a well in centre, then add water and oil and gradually stir into flour with a wooden spoon until a dough forms. Knead dough gently on a work surface 4 or 5 times.
  • Divide dough into 3 pieces and roll out each piece separately on sheets of baking paper into shapes large enough to fit  each baking tray (shape can be rustic; dough should be thin).
  • Lightly brush the tops with additional oil and then strip the remaining rosemary, scattering small clusters of leaves on top, pressing in slightly. Sprinkle with flaked salt.
  • Slide rounds (still on baking paper) onto the preheated baking sheets and bake until pale golden and browned in spots, 8 to 10 minutes.
  • Transfer flatbread (discard baking paper) to racks to cool.
  • Break into pieces and serve.
  • Flatbread can be made 2 days ahead and cooled completely, then kept in an airtight container at room temperature. 

Notes: Why is this called flatbread? Why is this unleavened bread? What is kneading?

Categories: Kitchen Garden, Recipe | Tags: , , , , , , , , , | 2 Comments

Moroccan carrot dip

Jill says, “Serve this warmly coloured and sweetly spiced Moroccan carrot dip as part of a tabletop spread, along with some olives, flat bread, grills and salad.” We say, “whoa there! This is super-delicious! We used purple as well as normal carrots and with the paprika dye the result was a neon and spiced-up bowl of yum!” And of course I used coriander – not that I’m necessarily anti-parsley – but you just would, wouldn’t you?!

ourkitchengarden.net

Moroccan carrot dip

Fresh from the garden: carrots, garlic, lemon, olives, parsley or coriander
Recipe source: Jill Dupleix
Serves: 6 or 24 tastes

Equipment:

  • Medium saucepan& lid
  • Scales
  • Peelers
  • Chopping board and knife
  • Citrus juicer
  • Measures: tablespoon, ½ teaspoon
  • Bowls – large, small
  • Food processor
  • Spatula
  • Salad spinner
  • Paper towel
  • Serving bowls
Ingredients:

  • 500g carrots
  • 1 garlic clove
  • Half teaspoon ground cumin
  • Half teaspoon paprika
  • Half teaspoon ground ginger
  • Half teaspoon ground cinnamon
  • Pinch of cayenne pepper
  • Flaked salt
  • 1 tablespoon honey
  • Half a lemon
  • 3 tablespoons olive oil
  • 2 tablespoons green olives
  • A small handful flat parsley or coriander leaves

What to do:

  • Fill the saucepan with water and set to boil.
  • Meanwhile peel the garlic clove, then peel the carrots, chop into large chunks and cook in simmering, salted water with the garlic for about 20 minutes or until soft.
  • Squeeze the lemon to yield 2 tablespoons juice.
  • Measure out the cumin, paprika, ginger, cinnamon, cayenne, salt, honey and lemon juice into a small bowl.
  • Drain the carrots into the colander, and return to the hot, dry pan for a minute or two over medium heat to dry them out further.
  • Mash or whiz the carrots and garlic in the food processor until smooth. Add the bowl of spices, salt, honey and lemon juice and mix well or whiz again, scraping down with the spatula when needed.
  • Add the olive oil gradually, while still beating. Allow to cool for a minute or two.
  • Wash, spin-dry and chop the parsley or coriander leaves to yield 2 tablespoons.
  • Spoon into serving bowls, scatter with olives and parsley leaves and drizzle with a little extra olive oil to serve.

 Notes: Where is Morocco? What other spices can you think of? What is cayenne?

Categories: Kitchen Garden, Recipe | Tags: , , , , , , , , , , , , | Leave a comment

Kylie Kwong’s chilled cucumber salad

Kylie describes this dish as taking on whole different tones, being slippery, silky, yet still crunchy. It is very refreshing, and wonderfully easy to make.

ourkitchengarden.net
Fresh from the garden: cucumbers, ginger, garlic
Recipe source: adapted from a recipe by Kylie Kwong in Simple Chinese Cooking
Serves: 6 as a side dish or 24 tastes

Equipment:

  • Peelers
  • Chopping boards and knives
  • Teaspoons
  • Measures – tablespoon, teaspoon, ½ teaspoon
  • Bowls – large, small
  • Teaspoon
  • Serving bowls


Ingredients:For the salad

  • 5 small or 2 large cucumbers
  • 1 tablespoon white sugar
  • 1 teaspoon sea salt
  • 1 pinch of ground black pepper

For the dressing

  • 2 tablespoons light soy sauce
  • 2 cloves garlic
  • 1 small knob ginger
  • ½ teaspoon sesame oil

 What to do:

  • Wash the cucumber, then peel and cut in half lengthways. Scoop out the seeds using a teaspoon. Place cut-side down on a chopping board and cut on the diagonal into 1.5cm pieces.
  • Place cucumber in a bowl, sprinkle with sugar and salt and mix well. Cover and refrigerate for 30 minutes.
  • Meanwhile to make the dressing, peel and finely chop the garlic cloves. Peel and finely dice the ginger to yield 1 tablespoon. Place the garlic, ginger and the rest of the dressing ingredients in a small bowl and stir to combine.
  • When the time is up, drain the cucumbers, and using your hands, gently squeeze out excess liquid.
  • Place back into the bowl, combine the chilled cucumber with the dressing and toss to incorporate.
  • Divide among serving bowls and sprinkle with black pepper. Serve immediately.

Notes: What does the sugar and salt do to the cucumber? Why do we scrape the seeds out? How does it feel the squeeze the cucumber pieces with your hands?

Categories: Kitchen Garden, Recipe | Tags: , , , , , , , , , , | Leave a comment

Blog at WordPress.com.