Posts Tagged With: vegetarian

Pao de queijo

IMG_0453

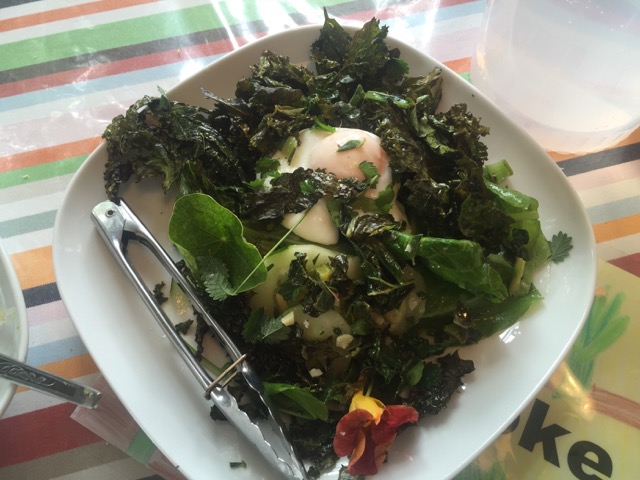
These Brazilian cheeseballs are fun, and although messy, are super-easy to make and are traditionally served with soup or at brekky. Best of all, they are gluten-free so are great for those with Coeliac disease or gluten intolerance.

Recipe source: inspired by Ligia, our Garden Specialist from 2011 to 2013
Makes: 30 cheese balls, give or take

Equipment:

  • 2 large bowls
  • Sieve
  • Blender
  • Measuring jug
  • Scales
  • Metric teaspoon
  • Grater, fork
  • 2 x 12 hole muffin tins
  • Pastry brush
  • Ladle
  • Serving plates


Ingredients:

  • 450g manioc starch*
  • 250ml milk
  • 250ml vegetable oil
  • 3 eggs
  • 1 teaspoon salt
  • 100g grana padano


What to do:

  • Preheat the oven to 180C.
  • Measure out the manioc starch and then sieve into a bowl with the salt.
  • Grate the cheese and add to the bowl.
  • Crack the eggs into the other bowl and lightly whisk with the fork.
  • Measure out the milk and vegetable oil and add to the eggs. Stir to incorporate, then pour into the flour and stir thoroughly.
  • Ladle all the ingredients into the blender and blend until smooth.
  • Grease the muffin tins with a little oil.
  • Ladle out the mixture into the holes of the muffin tins until each hole is just over ½ full.
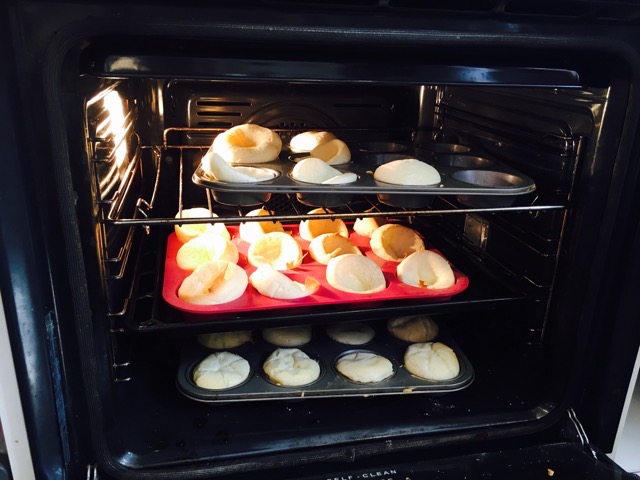
  • Bake for 20 minutes, swapping trays halfway, until golden and cooked through.
  • Carefully tip out onto serving plates.

*this can be found in the Brazilian section of your local exotic grocer! Tapioca flour or arrowroot flour can also be substituted successfully.

Notes: What are arrowroot, tapioca and manioc? What else do we use the blender for? What happens to the balls as they cook? What language do they speak in Brazil?

Image 2

Categories: Kitchen Garden, Recipe | Tags: , , , , , , , | 3 Comments

Garlicky rosemary flatbreads

IMG_0216

The dough needs to prove for at least an hour, so at Bondi, the previous class makes the dough for the current class, and the current class makes the dough for the next class. Simple!

Fresh from the garden: garlic, rosemary
Recipe source: adapted from a recipe by Hugh Fearnley-Whittingstall in Veg Every Day
Serves: 8 or 28 tastes

Equipment:

  • Measures – jug,tablespoon, teaspoon, ½ teaspoon
  • Stand mixer
  • Scales
  • Bowls – large, medium
  • 2 non-stick frying pans
  • Rolling pins
  • Tongs & pastry brush
  • Plate & paper towel
  • Serving plates
Ingredients:

For the magic dough:

·       250g plain white flour
·       250g strong white flour
·       1½ level teaspoons fine sea salt
·       1 teaspoon instant dried yeast
·       1 tablespoon olive oil, plus a little extra for oiling

For the garlic oil:

  • About 120ml olive oil
  • 1 fat garlic clove
  • 1 long branch of rosemary 

What to do:

For the garlic oil:

  1. Wash the rosemary stalk, wipe dry with paper towel and strip the leaves from the stalk. Peel the garlic clove and very finely chop it. Combine the olive oil, rosemary and garlic in a frying pan and place over a medium heat. You’re not going to fry it, just warm it through to take the edge off the garlic. So as soon as you see the first signs of a sizzle, pour the oil and garlic out of the pan into a small bowl to infuse. Wipe the frying pan clean.

For the flatbreads:

  1. Knock back the risen dough, divide it int0 golf-ball sized balls and roll them into flat circles, as thin and round as you can.
  2. Meanwhile heat your non-stick frying pans over high heat until smoking hot.
  3. Carefully lay one flatbread in the pan and cook for about 2 minutes, until bubbly on top and patched with brown spots on the base. Flip over and cook for 1-2 minutes more. Remove immediately to a plate and paint with some of the garlicky rosemary oil. Scatter with a little flaked salt too. Repeat with all the dough. Cut the oiled flatbreads into wedges to serve.

Now make the magic dough for the next class:

  1. Put the two flours into the bowl of the stand mixer with the salt and yeast. Mix well using the dough hook. Add the oil and 325ml warm water and mix to a rough dough. Knead for 5–10 minutes, until smooth. This is quite a loose and sticky dough, which is just as it should be – you get better-textured bread this way – so try not to add too much flour if you can help it, it will become less sticky as you knead.
  2. Trickle a little oil into a clean bowl, add the kneaded dough and turn it in the oil so that the bottom is covered with a light film. Cover with plastic wrap and leave in a warm place to rise until doubled in size – at least an hour, probably closer to two.

Notes: What other recipes can we use the Magic Dough in? What is strong flour?

IMG_0212


Categories: Kitchen Garden, Recipe | Tags: , , , , , | Leave a comment

Rocket soup with curry spices and coriander

IMG_0214

This soup is a great way to use up all the huge rocket leaves left over from the summer break that are too spicy to use in a salad.

Fresh from the garden: rocket, leek, potatoes, onion, garlic, coriander
Recipe source: Melissa
Serves: 6 or 24 tastes


Equipment:

  • Measures: tablespoons, teaspoons, ¼ teaspoon
  • Mortar and pestle
  • Peeler
  • Kettle
  • Mixing bowls: large, med, small
  • Chopping boards and knives
  • Large stockpot
  • Wooden spoon
  • Stick blender
  • Ladle
  • Paper towel
  • Scissors
  • Serving bowls


What to do:

Ingredients:

  • 1 onion
  • 2 tablespoons olive oil
  • 1 leek
  • 4 cloves of garlic
  • 3 potatoes
  • 1.5 litres boiling water
  • 2 tablespoons bouillon
  • A large handful rocket leaves
  • A small handful coriander

Curry paste:

  • A small knob of ginger
  • ½ teaspoon turmeric powder
  • A pinch of flaked salt
  • 2 teaspoons cumin seeds
  • 2 teaspoons coriander seeds
  • Pinch of cayenne pepper
  • 1/4 teaspoon mustard seeds
  1. To make the curry paste: Peel the ginger and finely chop. Measure the rest of the spices into the bowl of the mortar, add the ginger & gently pound to a mash with the pestle.
  2. To make the soup: Fill the kettle to the 1.5 litre mark and set it to boil.
  3. Peel and finely chop the onions. Peel and finely chop the garlic cloves. Wash the leek under running water, peeling off the ugly layers, and checking underneath and trimming roots.
  4. Wash the rocket in several large bowls of cold water and shake dry over the sink. Finely chop the stalks and the leaves and reserve in a large bowl. Wash the potatoes but do not peel them and chop into 2cm dice.
  5. Heat the oil in the large stockpot over gentle heat. Add the curry blend and a grind of pepper and cook for 3 to 4 minutes. Add the onion and leek and cook until soft for about 5 minutes. Add in the chopped rocket, potatoes and garlic, stir in and then sweat for a few minutes with the lid on and the heat low.
  6. Carefully add the boiling water and the bouillon and bring to a boil. Reduce heat, cover and simmer for 10 minutes.
  7. Meanwhile wash the coriander and pat dry, then add into the soup just before blending.
  8. Puree the soup using the stick blender until super smooth and then check if you need to add any more salt. You probably will!
  9. Ladle into soup bowls and serve.
Categories: Kitchen Garden, Recipe | Tags: , , , , , , | Leave a comment

Penne alla Norma

IMG_0236

Tradition has it that this dish was invented in Sicily and was named in honour of Bellini’s famous opera, Norma. You can use any sort of pasta but the best is a chunky, liquid-catching shape like penne to match the sauce.

Fresh from the garden: eggplant, basil, oregano, onion, garlic
Recipe source: from the classics!

Equipment:

·       Large stockpot with lid, saucepan and large frying pan

·       Measures: cup, ½ cup, tablespoon, ¼ teaspoon

·       Chopping boards and knives

·       A selection of mixing bowls

·       Salad spinner

·       Scales

·       Cheese grater

·       Spatula

·       Serving bowls

Ingredients:

·       3/4 cup olive oil & more to drizzle

·       1 onion

·       2 garlic cloves

·       Small handful oregano

·       Cooking & flaked salt & black pepper

·       2 tins of chopped tomatoes

·       ¼ teaspoon dried chilli flakes

·       500g rigatoni or penne

·       500g eggplant – 1 large or several small

·       1/2 cup basil leaves plus a few extra to garnish

·       60g ricotta salata or fresh pecorino

·       45g parmesan or grana padano

What to do:

  1. Fill the stockpot with water and set it to boil with the lid on. When boiling, add in a tablespoon of cooking salt and the pasta, and boil the pasta for 12 minutes until al dente.
  2. Peel and finely chop the onion. Crush the garlic cloves, peel them and finely chop. Wash and spin-dry the oregano, and then strip the leaves off the stalks.
  3. Heat 2 tablespoons of the oil in a saucepan and cook the onion and a few pinches of flaked salt and grind of pepper over gentle heat for 5 minutes until softened. Stir in the garlic and cook for 30 seconds. Add the tomato and chilli flakes. Reduce the heat to low and cook for about 15 minutes until the sauce has thickened and reduced.
  4. Meanwhile, wash the eggplants, wipe them dry and cut lengthways into 1cm thick slices, then 1cm strips, and then 1cm cubes.
  5. Heat the remaining olive oil in a frying pan. When the oil is hot but not smoking, add the eggplant cubes a few at a time and cook for about 3 minutes until lightly browned. Remove from the pan with the slotted spoon and add the cubes to the tomato sauce, stirring over very low heat for 5 minutes.
  6. Wash the basil, and strip off the leaves. Spin them dry, then tear them into small pieces and add to the eggplant sauce, reserving a few leaves for garnish.
  7. Measure the ricotta salata or pecorino and crumble it into a small bowl. Measure the parmesan cheese then grate it.
  8. Drain the pasta, reserving 1/3 cup of the cooking water, then add all to the sauce with half each of the ricotta and pecorino and toss together well.
  9. Serve immediately, sprinkled with the remaining cheeses and extra basil and a little drizzle of oil.
Categories: Kitchen Garden, Recipe | Tags: , , , | Leave a comment

Koosa Ma Laban

IMG_0209

Taking inspiration from the Middle East, this is a dish called Koosa ma Laban and is a delicious zucchini dip for crunchy veggies or garlicky flatbreads.

Fresh from the garden: cucumber, garlic, ginger
Recipe source: adapted from a recipe on thekitchn.com
Serves: 8 or 24 tastes

Equipment:

  • Chopping boards and knives
  • Measures: cup, tablespoon
  • Frying pan
  • Tongs
  • Salad spinner
  • Microplane zester
  • Olive pitter
  • Food processor
  • Flat bowls to serve


Ingredients:

·       2 large zucchini

·       2 cloves of garlic

·       3 tablespoons olive oil

·       1 cup Greek yogurt or labneh

·       A handful of mint

·       A lemon

·       Flaked salt and pepper

·       4 green olives

What to do:

  • Wash the zucchini, then slice lengthwise and cut into 1cm half-moons. Smash the garlic cloves, peel the skin off and finely chop.
  • Heat 2 tablespoons of the oil in a frying pan over medium-high heat. Sprinkle zucchini slices with salt and pepper and add to the pan. Cook for about 5 minutes, turning once, until both sides are nicely browned. Add the garlic in the last minute, then remove from heat and cool for a few minutes.
  • Wash the mint, spin dry, pick off the leaves and chop finely to yield about 2 tablespoons worth. Wash the lemon, dry it and zest the yellow part of the skin only. Pit the olives (use the pitter or you can squash them on a chopping board) and cut in half.
  • Once zucchini have cooled, place in a food processor. Add the mint and lemon zest (reserving a bit of both for garnish), a pinch of salt, pepper and yogurt. Pulse until pureed.
  • Spread dip onto a serving plate, dot on the olive halves, drizzle with remaining olive oil and sprinkle with reserved mint and lemon zest.
  • Serve with flat breads or sliced carrot, cucumber or radish.

 Notes: What is labneh? How does an olive pitter work? What other Middle Eastern dishes do you know?

Categories: Kitchen Garden, Recipe, Uncategorized | Tags: , , , , , , | Leave a comment

Insalata Caprese

IMG_0217

This famous salad from Italy is beautiful in its simplicity, using up all the last of the lovely summer tomatoes and juicy basil and nasturtium leaves.

Fresh from the garden: rocket, baby spinach, young nasturtium leaves, tomatoes, basil
Recipe source: Melissa
Serves: 4 or 28 tastes

Equipment:

  • Mixing bowls – large, med, small
  • Salad spinner
  • Chopping board & knives
  • Paper towel
  • Tea towel
  • Fork or whisk
  • Tongs
  • Serving bowls


Ingredients:

  • A large handful small rocket leaves
  • Some young nasturtium leaves
  • A handful of basil leaves
  • A few handfuls little tomatoes
  • 1 tub bocconcini
  • Extra virgin olive oil
  • Aged balsamic vinegar
  • 1 clove garlic
  • Flaked salt and pepper

What to do:

  1. Wash the leaves very well in a large bowl and several changes of cold water. Dry the leaves very gently in the salad spinner. Repeat this process, working in small batches, until all the leaves and basil (kept separate) have been dried.
  2. Lay out a tea towel and line it with paper towel. Spread the dried leaves over the paper and roll the whole lot up like a log. Keep the rolled parcel of leaves in the refrigerator until needed. Rinse and dry the bowl well.
  3. Peel the garlic and slice in two squashing one half slightly. Into one bowl put this half, tear the basil and drop in, pour in a glug of olive oil and sprinkle some salt. Tear each bocconcini into two and add, then chop each tomato into two – or chunks if larger – and also place these in, turning a few times.
  4. To make the dressing, rub the other garlic half over the inside of the bowl and drizzle ½ cup olive oil and a little stream of balsamic vinegar over. Lightly whisk dressing.
  5. Unwrap the parcel of salad leaves & tip them into the bowl. Gently turn the leaves in the dressing using your hands or tongs
  6. Use the salad servers to transfer the dressed leaves to the serving bowls, then scoop up tomato/ basil/ bocconcini mixture (discarding garlic half) and pop on top of each, making sure to toss well before serving immediately. 

Notes: What is bocconcini and what does it mean?

Categories: Kitchen Garden, Recipe | Tags: , , , , , , , , , | Leave a comment

Paul’s tomatoes, buffalo mozzarella and basil

My uncle Paul has the greenest thumbs I know. He has a big sunny backyard and grows the best veggies – kilos of broad beans, basket-loads of lemons, buckets of zucchini, tubs of  chillies, all different ones, and right now, loads and loads of beautiful tomatoes. We’ve been eating them sliced up every morning for brekky, my aunt Rose and I, on sourdough toast, with lots of unsalted butter and a smear of Promite, and the necessary black pepper and grind of salt…

He gave me some to bring back home after the holidays so I set straight to chopping them up for the simplest but most wonderful salad known to man or woman:

IMG_1402

Paul’s tomatoes with buffalo mozzarella and basil

Ingredients:

  • A large bowl of tomatoes, ideally different shapes and sizes and even colours if you’ve got them!
  • A ball of buffalo mozzarella in a  tub
  • A bunch of basil
  • Some really great olive oil (or at least as fresh as you can get!)
  • Black pepper in a mill

What to do:

  1. Wash and dry the tomatoes and chop into good chunks, discarding any hard cores and place in a  decent shallow bowl.
  2. Open the mozzarella and drain the ball. Pull apart large chunks of the cheese and dot over the tomatoes.
  3. Wash and spin dry the basil leaves then  tear into small pieces and scatter over the salad.
  4. Drizzle over the best olive oil that you can reach. Grind over a few twists of black pepper. Let the salad sit for 20 minutes for the flavours to sink in.
  5. Eat! Crusty bread is great to mop it all up…

As always, the quality of the stuff you use is important, especially when you’re only using so few ingredients. Buffalo mozzarella is expensive but by golly it’s delicious, and perfect for the sweet and acidic brilliance of the home-grown tomatoes. I was also happy to find some Nolan’s Road ‘delicate’ olive oil in the cupboard to use, that stuff’s so good you could drink it neat. Hope you can get in to some soon…

Happy New Year everybody!

Categories: Kitchen Garden, Recipe | Tags: , , , , , | Leave a comment

Rosemary shortbread

Allison was our gardener before Byron and she suggested this recipe to me. I was sceptical at first but lo! she brought some in that she had made and they were deeeeeelish! The rosemary bizarrely makes the biscuits taste of aromatic spices like cinnamon and ginger!

Image 4


Fresh from the garden: rosemary
Recipe source: adapted from a recipe by Yvette Van Boven in Home Made
Serves: 8 at home or 24 tastes

Equipment:

  • Paper towel
  • Baking paper
  • Measures: tablespoon
  • Scales
  • Medium baking tray
  • KitchenAid stand mixer with paddle attachment
  • Bowls – big, med, small
  • Butter knife and fork
  • Chopping board & knife
  • Cellophane bags and ribbon if needed
Ingredients:

  • 150g butter at room temperature
  • 50g caster sugar
  • 1 tablespoon honey
  • 250g self-raising flour
  • 1 pinch salt
  • A medium branch of rosemary with extra sprigs to garnish

What to do:

  1. Preheat the oven to 170C.
  2. Wash the rosemary and wipe dry. Strip the needles from the medium branch and finely chop. You will need about 2 tablespoons worth.
  3. Line the baking tray with a piece of baking paper.
  4. Beat the butter and the sugar and honey into a creamy mass. Stir in the flour, with the rosemary and salt. Do not beat too long, it just has to be well blended. Knead a few times on a countertop dusted with flour until it turns into a smooth dough ball.
  5. Press the dough into the baking tray and even out. Cut the raw slab into small equal fingers with the edge of the butter knife.
  6. Prick holes in the dough with a fork and garnish each wedge with a small sprig of rosemary.
  7. Bake the shortbread in the oven for 15-20 minutes until light brown. Leave to cool in the dish for 10 minutes and then carefully remove it. You can now break it along the scored lines and leave to cool further.
  8. And serve! Or if giving as presents, slip into cellophane bags when cold and tie with ribbon. 

Notes: What other dishes can you use rosemary in? Why should we not beat the ingredients for too long? What other flavourings could you use?

Categories: Kitchen Garden, Recipe | Tags: , , , , , , , | Leave a comment

End of Year salad

This is where we clean out the garden in preparation for the big break… what better to do than throw it all in together?

IMG_1108

Fresh from the garden: all the last veggies of the year…
Recipe source: Melissa

Equipment:

  • Mortar and pestle
  • Citrus juicer
  • Measures: 1/3 cup, teaspoon
  • Teaspoon
  • Scissors
  • Paper towel
  • 2 baking trays
  • Bowls – 2 big, med, 4 small
  • Salad spinner
  • Chopping boards and knives
  • A deep-sided frying pan
  • Slotted spoon


Ingredients:

  • Kale
  • Cucumbers
  • Salad leaves
  • Bok choy or tatsoi
  • Tomatoes
  • 4 eggs

Herby vinaigrette dressing

  • 1 clove garlic
  • Flaked salt & black pepper
  • 1 lemon
  • 1/3 cup extra virgin olive oil
  • A small handful mixed herbs: tarragon, marjoram, thyme, chives, salad burnet

What to do:

  1. For the dressing: Peel the garlic clove and put it in the mortar with a large pinch of salt. Gently pound to a paste. Juice the lemon and add the juice to the mortar (without pips) then stir the lot with the teaspoon and scrape it into the large bowl. Stir in the oil and grind some pepper, then whisk the dressing lightly. Wash and spin dry the herbs, pick off the leaves and snip finely with the scissors. Add to the dressing.
  2. For the crispy kale: Preheat oven to 180C. Wash the kale really well, checking for bugs or cocoons, and using scissors, cut the leaves from the stalks in large pieces. Spin leaves dry in the salad spinner, then dry extra well with paper towel, then place in a bowl and add in a few pinches of flaked salt and drizzle of olive oil. Massage all the flavour into the kale for a minute, then lay out on the baking trays and slide into the oven for 5 to 7 minutes until crispy.
  3. For the salad: Fill up the 2 big bowls with cold water & wash the salad leaves in several changes of water. Spin dry and wipe the bowls dry. Fill the small bowl with water and wash the small garnishing leaves and flowers. Reserve them carefully on a piece of paper towel then keep separate in the bowl.
  4. Wash the tomatoes and drain and then slice any large ones in half without squashing! Wash the cucumbers, peel alternating strips of each one and then slice into thin discs.
  5. To poach eggs: Fill the deep-sided frying pan 5cm deep with water and bring to a simmer. Fill the large bowl with cold water. Carefully crack each egg into a small bowl without breaking it and then carefully slide into the water. Let the pan sit for 4 minutes on the lowest heat before removing each egg into the bowl of cold water with a slotted spoon and reserving until needed.
  6. Add the salad leaves to the bowl with the herbs and the dressing. Gently turn the leaves in the dressing using a clean hand without squishing the leaves.
  7. Pile up the dressed leaves into the serving bowls with the  tomatoes and cucumber, sprinkle over the crispy kale, then carefully drain an egg and place in each bowl with the garnishing petals. Serve immediately.
Categories: Kitchen Garden, Recipe | Tags: , , , , , , , , , , , | Leave a comment

Broad bean, parmesan and pea mash

We love broad beans when they arrive in the spring – they’re a true seasonal and local veg! Our harvest wasn’t huge this year so we added frozen peas in too for bulk and sweetness.

IMG_1107

Fresh from the garden: broad beans, lemon, garlic, fresh herbs
Recipe source: Melissa
Serves: 6 at home or 24 tastes

Equipment:

  • 2 saucepans & lids
  • 2 big mixing bowls
  • Chopping board
  • Grater
  • Garlic press
  • Scales
  • Measures: tablespoon, teaspoon
  • 2 colanders
  • Citrus juicer
  • Mortar & pestle
  • Serving bowls
Ingredients:

  • A large handful of broad beans
  • A cup of frozen peas
  • 50g grana padano or parmesan
  • 3 tablespoons extra-virgin olive oil
  • Half a lemon
  • A clove of garlic
  • Cooking salt
  • Flaked salt & black pepper
  • A small handful tarragon, thyme and marjoram

What to do:

  1. Fill the two saucepans with water & set it to boil with the lid on.
  2. Pod the broad beans into the medium bowl and put the outer shells into the compost.
  3. Wash the lemon and zest it, and then juice the lemon. Peel the garlic clove and squeeze it through the press.
  4. Wash and dry the herbs and pick from stems, and finely chop if needed.
  5. Weigh the parmesan, then grate and reserve in the small bowl.
  6. Fill the big bowl with cold water.
  7. When the water is boiling, drop all the broad beans into one of the saucepans, and the frozen peas into the other saucepan with a teaspoon of cooking salt each and put the lid back on to bring back to the boil quickly. Boil for 3 minutes with the lid off.
  8. Then drain the broad beans into one of the colanders & then immediately refresh in the bowl of cold water. Drain the peas into the other colander and then drop into the big bowl.
  9. Double-pod the broad beans into the peas, discarding the outer skin into the chook bin.
  10. Scoop a few spoons of peas and broad beans into the mortar with a tablespoon of the olive oil and grind them with the pestle with a pinch of salt (you may have to do this in a few batches) until smooth – a few beanie lumps are fine!
  11. Stir in the lemon juice bit by bit, and taste – and add in the grated parmesan, garlic and herbs with a grind of pepper into the broad bean mixture. Taste again to check if enough salt.
  12. Spoon the mash into serving bowls and serve with some lovely bread or crispy flatbread.

Notes: What does ‘double-pod’ mean? Why do we do this to the broad beans? What other name are broad beans known by?

Categories: Kitchen Garden, Recipe | Tags: , , , , | Leave a comment

Create a free website or blog at WordPress.com.