Author Archives: melhm

Steamed eggplant siu mai with ginger and chilli dipping sauce

We love making any sort of dough here but if you’re not up to it or are short of time you can always substitute gyoza, gow gee or wonton wrappers…

ourkitchengarden.net

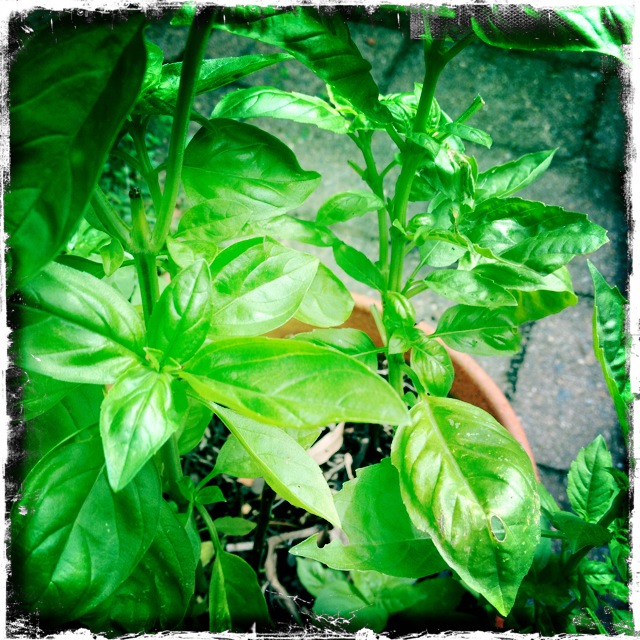
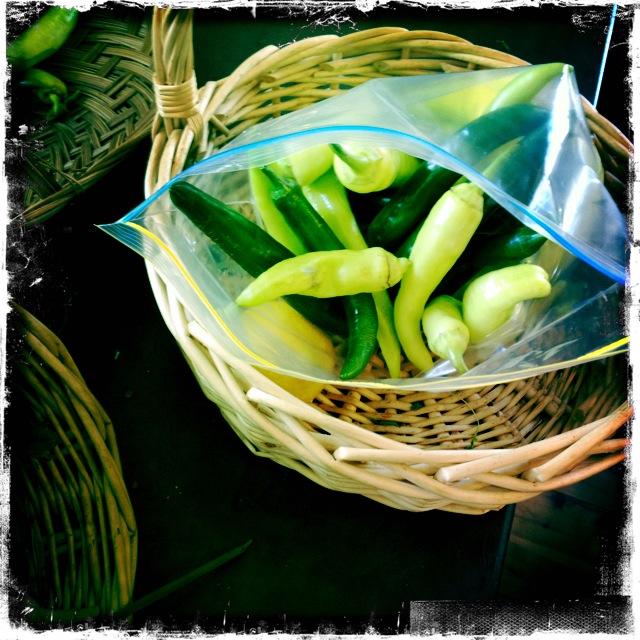
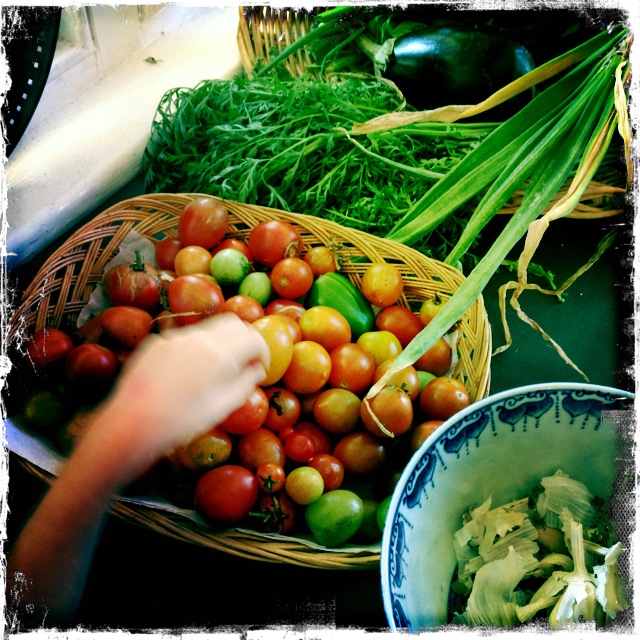
Fresh from the garden: eggplant, coriander, ginger, garlic, chilli, lemon
Recipe source: adapted from vegetariantimes.com
Makes: about 30 dumplings

Equipment:

  • Bowls – large, small
  • Fork or chopsticks
  • Scales
  • Kettle
  • Measures – jug, tablespoons, teaspoons
  • Tea towels
  • Salad spinner
  • Chopping boards and knives
  • Peeler & ruler
  • Garlic press
  • Rolling pins
  • Large baking trays
  • 2 large woks
  • 2 large steamer baskets
  • Baking paper
  • Serving plates & small sauce bowls
Ingredients:For the dough

  • 280g plain flour plus extra for dusting
  • 250ml very hot water

Dumplings

  • 2 eggplants
  • 4 garlic cloves
  • A small knob ginger
  • A bunch of coriander
  • 2 teaspoons vegetable oil
  • 2 tablespoons soy sauce
  • 1 tablespoon black bean sauce
  • 1 teaspoon dark sesame oil
  • Cornflour for dusting pan

Chilli Sauce

  • 1 garlic clove
  • 1 small knob ginger
  • 1 lemon
  • 2 tablespoons soy sauce
  • 1 teaspoon brown sugar or honey
  • 1 teaspoon dark sesame oil
  • 1 red bird’s eye chilli

What to do:

For the dough

  • Fill the kettle and turn on to boil. Place the flour into a large bowl. Carefully measure the hot water and stir it gradually into the flour, mixing all the time with a fork or chopsticks, until the water is incorporated. Add more water if the mixture seems dry.
  • Tip the dough mixture onto a clean work surface and knead it with your hands, dusting the dough with a little flour if it’s sticky. Continue kneading until it is smooth – this should take about eight minutes.
  • Put the dough back in the bowl, cover it with a clean damp towel and let it rest for about 20 minutes.

For the stuffing

  • Meanwhile, wash then peel the eggplant. Finely chop until you have 4 full cups (about 500g).
  • Peel and squeeze the garlic through the press to yield 1 tablespoon. Peel and finely chop the ginger to yield 2 teaspoons.
  • Wash and spin-dry the coriander, then finely chop to yield about 4 tablespoons.
  • Heat oil over medium-high heat in the wok. Add the garlic and ginger and cook, stirring, for 1 minute.
  • Add the eggplant and stir-fry over high heat for 4 to 5 minutes until very soft, adding a little water if needed. Add soy sauce, bean sauce, sesame oil, and coriander and cook, stirring, until thick for about 1 minute. Let cool while you prepare the wrappers.

Preparing the dumplings

  • After the resting period, take the dough out of the bowl and knead it again for about five minutes, dusting with a little flour if it is sticky.
  • Once the dough is smooth, shape it into 2 rolls about 23cm long and about 2cm diameter, using your hands.
  • With a sharp knife, slice each roll into 16 equal-sized pieces (each piece is about 15g). Using your hands, roll each of the dough pieces into a small ball and then, with a rolling pin, roll each ball into a small, round, flat and thin ‘pancake’ about 9cm in diameter.
  • Arrange the round skins on a lightly floured baking tray and cover them with a damp kitchen towel to prevent them from drying out until you are ready to use them.
  • Dust another baking sheet with a little cornflour. Arrange several ‘pancakes’ on your work surface. Place 2 teaspoons of filling in the centre of each, then pull up sides into pleats, and plop onto the baking sheet, flattening the bottom and leaving the top open so you can see the filling.
  • Transfer each finished dumpling to the floured tray and keep it covered until you have stuffed all the dumplings in this way.

To cook

  • Put the steamer basket into the wok and then using a jug, fill the wok with cold water to just touch the bottom of the basket. Remove the basket and turn the wok on to boil the water.
  • Line base of the steamer baskets with baking paper. Place dumplings in a single layer into the baskets. Carefully place the steamer baskets over woks, ensuring the dumplings don’t touch any water. Steam dumplings for about 8 minutes until tender and cooked through.

Chilli sauce

  • Meanwhile make the chilli sauce: Peel the clove of garlic and squeeze through the garlic press into the medium bowl. Peel the piece of ginger and rub over the microplane grater to yield one teaspoon. Add the ginger to the garlic.
  • Cut the lemon in half and juice one half to yield 1 tablespoon of juice. Add to the bowl.
  • Carefully slit the chilli in half lengthways and scrape out the seeds of one half, discarding the seeds. Finely slice that half and add to the bowl.
  • Mix all the remaining ingredients in and transfer to little dipping bowls.

To serve

  • Carefully remove the baskets, drying off the bottoms first with a dry tea towel if needed, and serve direct to the tables with the dipping sauce.

Caution:

  • Wash your hands thoroughly after coming in contact with chilli, as the capsaicin (the oil within the chilli) burns when it comes in contact with your eyes or sensitive skin. 

Notes: What is a steamer basket? What other ingredients could you use as filling? How else can you spell siu mai?

ourkitchengarden.net

Categories: Kitchen Garden, Recipe | Tags: , , , , , , , , , | Leave a comment

Kitchen Garden News – 14th March 2013

ourkitchengarden.net

Kung hei fat choi!

We have been swimming in delicious, heady flavours in the cottage these last two weeks – dark and light soy, sesame oil, black bean sauce, rice wine vinegar, chilli oil, fresh chillies, coriander, ginger and garlic – and all the woks and steamer baskets have been working overtime as we launched our Chinese Banquet Menu! All in all I think the cottage oversaw roughly 650 dumplings rolled & filled over the course of eight classes’ sessions… and they all got gobbled up! The children did a sterling job and were super-adventurous trying dishes they hadn’t before – and the grown-up volunteers were fabulous in their support and ability to assist us in what was a huge menu… so to it!

Not only Steamed eggplant siu mai with ginger and chilli dipping sauce and Pork and spinach pot-sticker dumplings with soy vinegar, but also Chinese pumpkin pancakes (Nan Gua Bing), Kylie Kwong’s chilled cucumber salad, Stir-fried eggs with tomato and chilli soy, Perfect steamed rice, Shanghai-style eggplant and finally a little cup of Jasmine tea, of course… all in the same class! I’m looking forward to calming it down a bit in the next menu – we’ve got leeks, carrots and plenty of rocket to come!

So with that I bid you adieu, I hope you have a lovely weekend and look forward to seeing you next week! And also promise that the recipes for the Chinese feast will be up here as soon as humanly (and homeworkly!) possible…

Cheers! Melissa

ourkitchengarden.net

Dumpling heaven…

Categories: Kitchen Garden | Tags: , , , , , , | Leave a comment

School holiday program!

ourkitchengarden.net

Getting stuck in!

I’m so excited to be able to announce 2 new dates for the Our Kitchen Garden school holiday program!

I’ll be opening the cottage in the autumn holidays on Tuesday 23rd April and  Wednesday 24th April for 2 full-day sessions – for students aged 7 to 12 – for more details click out the School Holiday Program tab at the top of the page!

And if you need any convincing, take a look at the photos and recipes from our previous classes in this blog – these kids love rolling up their sleeves and getting their hands dirty!

ourkitchengarden.net

Beans and beans

Categories: Kitchen Garden, School Holiday Program | Tags: , , , , , , , , | Leave a comment

Quick pesto!

This popular sauce is, of course, perfect for steaming hot pasta – but what about as part of an antipasto plate with feta or goats’ cheese, roasted capsicum and garlicky bruschetta? Or even added to a toasted cheese sandwich mmmmm… And the Quick part? At school we usually work the children’s muscles in pounding the leaves, but here is a no-fuss food processor option for home… I mean, why bark when you have a dog? Woof.

ourkitchengarden.net

Basil!

Fresh from the garden: basil, garlic
Recipe source: Melissa

Equipment:

  • Scales
  • Bowls – big, medium
  • Salad spinner
  • Grater
  • Small frying pan
  • Food processor
  • Chopping board and small knife
  • Spatula
  • Measuring jug
  • Tablespoon & jar if needed
  • Serving bowls if needed
Ingredients:

  • 1 big bunch basil, to yield about 100g
  • 50g parmesan or grana padano
  • 80g pine nuts
  • 1 large clove garlic
  • Flaked salt
  • 200ml extra-virgin olive oil plus extra

What to do:

  • Wash and carefully dry the basil, picking off the leaves and discarding the stalks. Weigh to make sure you have the correct amount and then wash in cold water in a big bowl and spin dry thoroughly.
  • Weigh then grate the parmesan.
  • Heat the frying pan on a medium heat and lightly dry-toast the pine nuts, shaking regularly so that they don’t burn.
  • Peel the garlic clove, chop it into small pieces and place in the bowl of the food processor with a good pinch of salt. Blend these to a paste and then add the pine nuts and blend again. Stir in the parmesan.
  • Tear the basil leaves and put them into the mixture. Blending, gradually pour in all the olive oil. Scrape down with the spatula once or twice.
  • Taste for salt and adjust if necessary.
  • Serve, or if using later, spoon into a jar, pour in a thin layer of olive oil to cover, add the lid and refrigerate for up to 3 or 4 days.

Notes: With what else can you use pesto? What also goes with well with basil? Why do we toast the pine nuts? What could you use instead of pine nuts?

Categories: Kitchen Garden, Recipe | Tags: , , , , , , , , , , | 1 Comment

Marinated feta

This recipe is super-easy – it’s lovely to spread on bruschetta, or to add to a frittate recipe, or delicious on it’s own with some roasted chicken & salad… and will also last in the fridge for a week or so, in a jar just covered with a thin film of olive oil.

ourkitchengarden.net

Excuse me do you have the thyme please?

Fresh from the garden: thyme, lemon thyme, garlic, lemon
Recipe source: Melissa

Equipment:

  • Chopping board & knife
  • Bowls – large, med, small
  • Paper towel
  • Peeler
  • Salad spinner
  • Measuring jug
  • Serving bowls
  • Small jar & lid if needed
Ingredients:

  • 200g Danish feta
  • A lemon
  • A small handful thyme (or lemon thyme) sprigs
  • 3 garlic cloves
  • 100ml extra-virgin olive oil
  • Black pepper

What to do:

  • Unwrap the feta & cut into 1cm cubes.
  • Wash and wipe the lemon dry. Using a peeler or a small sharp knife, carefully cut thin strips of yellow flesh from the lemon and add to the feta.
  • Wash the thyme, spin it dry and then strip the leaves from the stalks. Add the leaves to the feta,
  • Peel and chop the garlic into thin slivers and add those to the feta, with a grind or two of the black pepper.
  • Measure the olive oil and then pour it over the feta. Carefully fold the ingredients together without mashing the cheese, then spoon into serving bowls. Leave for a few minutes for the flavours to marry – or if using later, pop in to a clean and dry jar and cover with the lid.
  • Note: the olive oil may solidify and go cloudy if kept in the fridge, so let the jar come to room temperature for 30 minutes or so before you need it!

Notes: What animals’ milk makes feta cheese? What’s the difference between Danish & Greek styles of feta?

Categories: Kitchen Garden, Recipe | Tags: , , , , , , , , | Leave a comment

Roasted capsicum

A wonderful thing happens when you roast capsicum: the crunchy and slightly sour tastes make way for luscious, slippery sweetness – & when married with garlic and herbs the effect is totes delish! My favourite thing to do is gobble these capsicum strips with the marinated feta, some pesto and slices of grilled bruschetta – a perfect little antipasto snack matched with a slice or 5 of super-thin prosciutto and/or some garlic prawns in terracotta, a la Dogs Bar circa 1993… happy days!

ourkitchengarden.net

Fresh from the garden: capsicum, garlic, thyme, marjoram, sage
Recipe source: Melissa

Equipment:

  • Bowls – big, medium
  • Baking tray
  • Oven mitts
  • Tongs
  • Freezer bag
  • Serving bowls
Ingredients:

  • 4 or 5 capsicums
  • Extra-virgin olive oil
  • A head of garlic
  • A small handful of thyme sprigs
  • A small handful of marjoram sprigs
  • Flaked salt

What to do:

  • Preheat oven to 21oC.
  • Wash and thoroughly dry the capsicum.
  • Liberally douse the capsicum with olive oil, massaging the oil into every crevice.
  • Place capsicum onto the baking tray, together with the head of garlic and the thyme & marjoram sprigs.
  • Sprinkle a sparing quantity of flaked salt onto the capsicum and bake for 15 minutes.
  • Carefully remove from oven with oven mitts and using the tongs, turn caps onto their sides.
  • Bake a further 10 minutes, then turn them over.
  • Repeat until all 4 sides have been in contact with the baking tray.
  • Once the capsicums are blackened and soft, remove from the oven, place into a freezer bag, seal tightly and allow to cool for 10 minutes.
  • Once cool enough to handle, put pressure on the stem end and it will pop out. Tear the capsicum in half, and remove all pith and seeds, the skins with slide off easily.
  • Repeat for remainder of the roasted capsicums.
  • Peel off each clove of garlic and squeeze from tip to base. The roasted garlic cloves are much more fragrant and milder than pan fried garlic.
  • Tear the capsicum into thin strips and mix with the herby oil and garlic.
  • Divide into serving bowls and eat with crusty bread!

Notes: What goes well with capsicum? What other vegetables can you roast? Why do we put the capsicum in a plastic bag?

ourkitchengarden.net

Categories: Kitchen Garden, Recipe | Tags: , , , , , , , , , | Leave a comment

Garlic bruschetta with tomatoes and basil

We can elevate even the simplest of snacks into works of art by performing a little garlic magic first… And over an open bbq flame at home takes the toast to an altogether more yummy stratosphere…

ourkitchengarden.net

Fresh from the garden: tomatoes, garlic, basil
Recipe source: Melissa

Equipment:

  • Knives – bread, small
  • Paper towel
  • Salad spinner
  • Bowls
  • Chopping board
  • Grill trays
  • Tongs
  • Oven mitts
  • Garlic press
  • Serving plates
Ingredients:

  • A load of great sourdough bread
  • A bowl of tomatoes
  • A few sprigs of basil
  • Extra-virgin olive oil
  • 3 garlic cloves
  • Flaked salt & black pepper

What to do:

  • Heat the grill on high.
  • Wash and gently dry the tomatoes on some paper towel. Carefully slice the tomatoes into bite-sized pieces, taking care not to squeeze all the juice out!
  • Place in a big bowl and drizzle a little olive oil over the whole lot. Peel and then squeeze one clove of garlic through the press into the tomatoes.
  • Pick the basil leaves and wash in a clean bowl of cold water. Spin the leaves dry and then tear into tiny pieces and scatter over the tomatoes. Sprinkle with a pinch or two of salt and a grind of pepper, then gently toss with a large spoon to combine. Leave for the flavours to mingle.
  • Carefully slice the bread – you may find it easier to ask an adult to slice the loaf down the middle lengthways first, and cut each half separately – and place on grill trays.
  • Slide the bread into the oven to grill & lightly toast, and using the oven mitts, turn when needed (watching to make sure it doesn’t burn).
  • When ready bring toast out from the grill using the oven mitts. Cut the end off the remaining garlic cloves (you don’t need to peel them) and rub each cut-side down on the toast a few times.
  • Arrange onto serving plates with a spoonful of tomato mixture on each one. Yum! 

Notes: What happens when you rub the garlic onto the hot toast? What makes bread sourdough bread? Why do we let the flavours mingle?

ourkitchengarden.net

Categories: Kitchen Garden, Recipe | Tags: , , , , , , , , | Leave a comment

Kitchen News – 14th February 2013

We have started the year in fine fettle here in the cottage, with an action packed couple of weeks: recapping on safety issues; earning our 2013 Knife Licences; enacting our very own Kitchen Treasure Hunt; and even doing a little cooking!

It has been great to see everybody, and to be back in the swing of things – and we’ve had a fab turnout so far of eager volunteers… thanks to all of you for jumping on board so quickly – as ever, this program is only a success because of you!

Ligia has been hard at it too, clearing and planting and organising after a big break in Brazil – if you’re handy with a shovel or know a trick with stink beetles please drop down to the garden and show yourself! Your garden needs you!

And welcome back to Gertie and her posse of feathered friends (and frenemies? Alas the two newcomers seem to still be on the outer) – it’s good to hear their gentle clucking as I go about my business!

So to this latest menu: a snack of garlic bruschetta with tomatoes and basil; thyme and lemon marinated feta; roasted capsicum; our quick pesto; and a lovely salad – using up the delicious veggies that have been quietly ripening over our big summer break. The children have harvested heaps of tomatoes, baskets of capsicum, some enormous cucumbers (handy for showing me their knife skills!), bags of carrots (orange and purple!), and some gorgeous deep coloured eggplants, reams of beans, as well as handfuls of basil and thyme… the fridges are still stocked. And 4W even got to toss some oat pancakes with roasted fruits for Pancake Day on Tuesday!

So welcome back everybody – drop in and say hi at any time, we’ve got lots planned and as usual we’re having a smashing time… Happy Valentine’s Day and Kung Hei Fat Choy to all!

ourkitchengarden.net

Categories: Kitchen Garden | 1 Comment

My baked Xmas ham

I can never get sick of ham and really love being able to pull a leg out of the fridge in its bag and then hack huge slices off the side… we’ve gone through quite a few jars of Jam Girls chilli jam these holidays I can tell ya!

It really does pay to hang the expense and invest in a happy pig as not only your conscience will be freer but the meat is super-juicy and has lots of fat (fat = flavour remember!) … but the price can be quite a shock!

This year I did both: I took a mortgage out for half a leg on the bone from Feather & Bone in Marrickville, but I also bought a sad pig from Aldi – and honestly, the F&B was super-amazing, but the Aldi one wasn’t bad either. So if you can afford to buy the premium one, please do – but we all have to be realistic too and when the price difference was about $120 sometimes one can’t have it all…

One thing is for sure though: It is SOOOOO worth baking your ham. For about an hour of your time and a little bit of basting, your lovely pink ham will turn into another level of deliciousness & the most fabulous of creations… go on DO IT!

One last thing: I think that if you have the choice of easy carve or on the bone, get the one on the bone.

Anyway here is my recipe for a freakin’ lip smackin’ deeeelicious baked ham. Sorry it’s now January, but you know what? I might just get in anothery before the end of the holidays…

ourkitchengarden.net

Baked hammy gorgeousness

For a 5 to 7kg leg ham on the bone

Glaze:
¼ cup orange marmalade or apricot jam
¼ cup Jam Girls chilli jam
½ cup dark brown sugar
¼ cup seeded mustard
1 teaspoon garam masala

1 pack star anise
a tablespoon whole cloves
a calico ham-bag, rinsed

1. Position an oven shelf at the lowest position in the oven and remove all the other shelves. Preheat oven to 160ºC. Place a rack over the largest baking dish you have (it could be the grill tray). Fill the base of the dish/tray with 1 cup water.

2. Remove the rind from ham: using the point of a sharp knife cut a zig zag pattern through the rind around the hock (about 10cm in from the end). Run your thumb around the entire edge of the ham to loosen the rim of the rind from the fat. Then slide your fingers between the fat and the skin, working upward toward the hock, until all the rind is free. Gently pull the rind away. Store the rind in the fridge.

3. Lightly score the fat in a diamond pattern, about 4mm deep, trying not to cut into the meat. Making a pattern with the spices, stud the centre of each diamond with a clove or star anise. Wrap hock with foil.

4. Place marmalade & chilli jam in a medium bowl and beat with a spoon for about a minute. Add the brown sugar, mustard and garam masala and stir to combine. Place ham, fat side up, on prepared rack. Brush half the glaze over the ham. 

Bake 20 minutes, then rotate ham 180º, to ensure even cooking.
Bake for 20 minutes longer.
Remove ham from oven and increase temperature to 200ºC. Brush ham with remaining glaze. Add more water to dish if necessary.
Bake 10 minutes, then rotate ham 180º and continue cooking for a further 10 minutes, or until surface is bubbling and a deep golden brown.

5. Allow ham to rest at least 10 minutes before slicing. Serve warm with more Jam Girls chilli jam & Iggy’s sourdough rolls and then when cold,  serve with with even more Jam Girls chilli jam & Iggy’s sourdough rolls…!

Some handy hammy household tips:

To store ham,  place the rind over top of the cut ham.
Soak the ham-bag in a solution of half white vinegar and half water.
Wring the bag out, then place the ham inside and wrap around. Refrigerate.
Every 2 days rinse out the bag and repeat the vinegar solution. The ham will keep up to 2 weeks – don’t forget to save a little meat for the ham soup!

ourkitchengarden.net

Waiting for the ham! Spot the classic Aussie icons: VB and sparkling burg on the table…


Categories: Kitchen Garden, Recipe | Tags: , , , , , , , , | Leave a comment

Granny’s Christmas Pudding

Now I realise that I’m some weeks (months even) late in posting this – but if I don’t do it now I never will and at least the recipe’ll be up here for next year!

ourkitchengarden.net

The pudding is traditionally made on Advent Sunday – about 4 weeks before Christmas Day – and hung to dry or cure the flavours a bit… I find in the humid atmos of Sydney success lies in hanging it out in the garden under cover so that it doesn’t get mouldy as inside our house there’s not enough airflow. Granny’s words are that there should always be a few spots of mould on the outside – and after 47 years of making them she should know! And if you’re unduly worried (as you undoubtedly will be…) then douse it in brandy. And never mind the fruitflies!

ourkitchengarden.net

Granny passed this recipe down to me in 2011, along with 8 threepences & 26 sixpences, and before Granny, my granddad’s mother Mumma made it. Granny thinks the recipe was Mumma’s grandmother’s…! Obv the recipe was in imperial measurements originally but I changed them as they were hurting my head.

ourkitchengarden.net

You will need:

75cm unbleached calico square
A large stockpot
A wooden spoon
A clean table-top
Old silver coins, threepences & sixpences – not modern coins.

ourkitchengarden.net

225g sultanas
½ cup dark rum (I used brandy)
450g dried mixed fruit
225g chopped nuts & dates (why these are together I don’t know, I love dates and walnuts so used about equal of each I think last time)
225g seeded raisins
225g butter
4 cups self raising flour
225g brown sugar
1 teaspoon mixed spice
4 eggs
1 teaspoon bicarb soda
½ cup milk

ourkitchengarden.net

The perfect pudding-hanging contraption!

What to do:

Soak the sultanas overnight in the rum.

The next day boil up the calico while you prepare the pudding.

Boil up the money separately. Do not use modern coins!

Set water-filled stockpot to boil.

Rub the butter into the flour, add the brown sugar and the mixed spice. Mix in fruit.

Beat the 4 eggs well. Mix the bicarb soda into the milk and then add to the eggs.

Stir the egg mixture into the flour and fruit mixture and add the money. Combine well.

Drain the calico and put it wet onto the clean table. Flour well the centre of the cloth and put the mixture on top. Gather and tie up the cloth 2.5cm above pud with string.

Suspend the pudding so it’s not touching the base of pot. Boil for 3 hours (you will need to top up with boiling water from the kettle). Hang for 1 month (see above).

Boil for 2 hours on Xmas Day. Lift out onto a plate and cut off the string. Pull the calico carefully off the top side. Place another plate carefully on top and without squashing, invert the plates and pudding. Set it down again and pull off the remaining calico.

Serve: If you like you can turn off all the lights, dash 1/2 a cup of brandy over the top of the pudding and then carefully light it.

Then serve with vanilla custard, brandy custard, brandy sauce and ice cream or whatever your custom dictates…!

ourkitchengarden.net

The perfect pud! (with a little crack to see the fruity goodness inside…)

Categories: Kitchen Garden, Recipe | Tags: , , , , , , , , | Leave a comment

Blog at WordPress.com.