Posts Tagged With: children

Kitchen Garden News – 14th March 2013

ourkitchengarden.net

Kung hei fat choi!

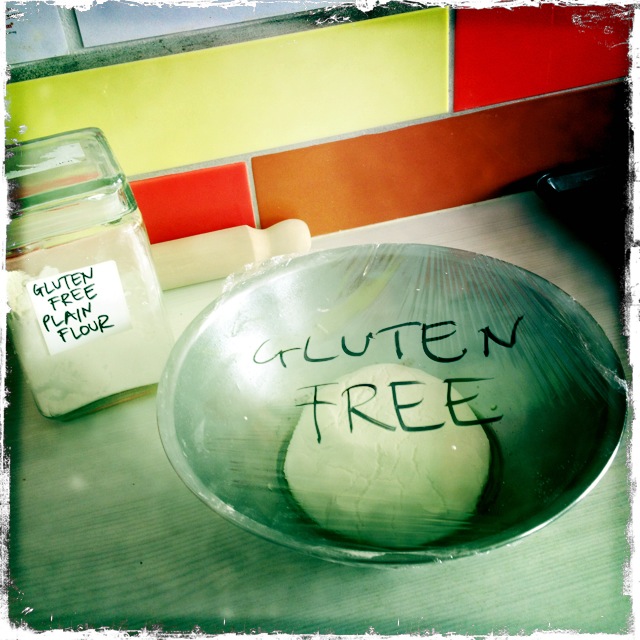
We have been swimming in delicious, heady flavours in the cottage these last two weeks – dark and light soy, sesame oil, black bean sauce, rice wine vinegar, chilli oil, fresh chillies, coriander, ginger and garlic – and all the woks and steamer baskets have been working overtime as we launched our Chinese Banquet Menu! All in all I think the cottage oversaw roughly 650 dumplings rolled & filled over the course of eight classes’ sessions… and they all got gobbled up! The children did a sterling job and were super-adventurous trying dishes they hadn’t before – and the grown-up volunteers were fabulous in their support and ability to assist us in what was a huge menu… so to it!

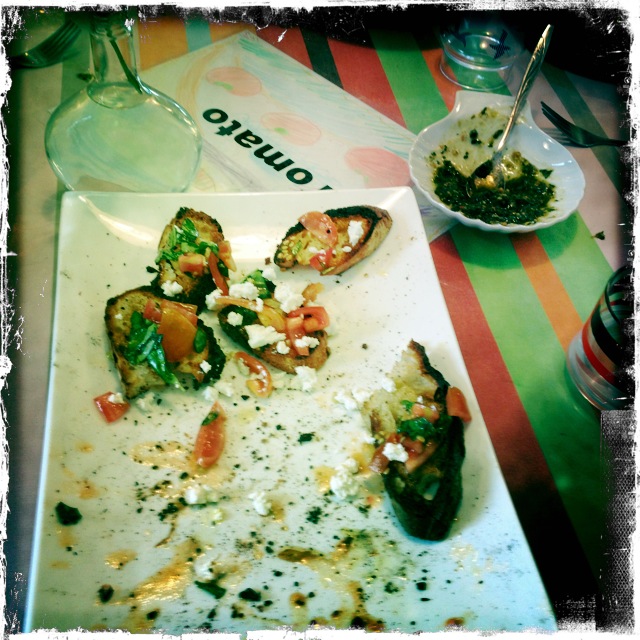
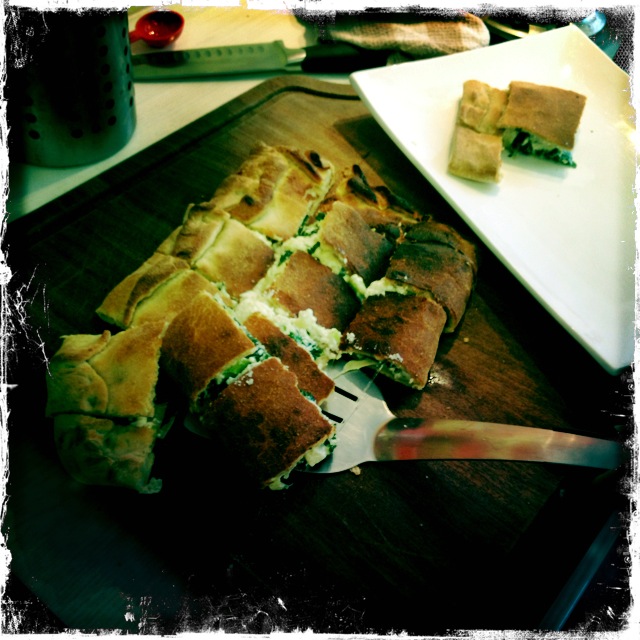
Not only Steamed eggplant siu mai with ginger and chilli dipping sauce and Pork and spinach pot-sticker dumplings with soy vinegar, but also Chinese pumpkin pancakes (Nan Gua Bing), Kylie Kwong’s chilled cucumber salad, Stir-fried eggs with tomato and chilli soy, Perfect steamed rice, Shanghai-style eggplant and finally a little cup of Jasmine tea, of course… all in the same class! I’m looking forward to calming it down a bit in the next menu – we’ve got leeks, carrots and plenty of rocket to come!

So with that I bid you adieu, I hope you have a lovely weekend and look forward to seeing you next week! And also promise that the recipes for the Chinese feast will be up here as soon as humanly (and homeworkly!) possible…

Cheers! Melissa

ourkitchengarden.net

Dumpling heaven…

Categories: Kitchen Garden | Tags: , , , , , , | Leave a comment

School holiday program!

ourkitchengarden.net

Getting stuck in!

I’m so excited to be able to announce 2 new dates for the Our Kitchen Garden school holiday program!

I’ll be opening the cottage in the autumn holidays on Tuesday 23rd April and  Wednesday 24th April for 2 full-day sessions – for students aged 7 to 12 – for more details click out the School Holiday Program tab at the top of the page!

And if you need any convincing, take a look at the photos and recipes from our previous classes in this blog – these kids love rolling up their sleeves and getting their hands dirty!

ourkitchengarden.net

Beans and beans

Categories: Kitchen Garden, School Holiday Program | Tags: , , , , , , , , | Leave a comment

Quick pesto!

This popular sauce is, of course, perfect for steaming hot pasta – but what about as part of an antipasto plate with feta or goats’ cheese, roasted capsicum and garlicky bruschetta? Or even added to a toasted cheese sandwich mmmmm… And the Quick part? At school we usually work the children’s muscles in pounding the leaves, but here is a no-fuss food processor option for home… I mean, why bark when you have a dog? Woof.

ourkitchengarden.net

Basil!

Fresh from the garden: basil, garlic
Recipe source: Melissa

Equipment:

  • Scales
  • Bowls – big, medium
  • Salad spinner
  • Grater
  • Small frying pan
  • Food processor
  • Chopping board and small knife
  • Spatula
  • Measuring jug
  • Tablespoon & jar if needed
  • Serving bowls if needed
Ingredients:

  • 1 big bunch basil, to yield about 100g
  • 50g parmesan or grana padano
  • 80g pine nuts
  • 1 large clove garlic
  • Flaked salt
  • 200ml extra-virgin olive oil plus extra

What to do:

  • Wash and carefully dry the basil, picking off the leaves and discarding the stalks. Weigh to make sure you have the correct amount and then wash in cold water in a big bowl and spin dry thoroughly.
  • Weigh then grate the parmesan.
  • Heat the frying pan on a medium heat and lightly dry-toast the pine nuts, shaking regularly so that they don’t burn.
  • Peel the garlic clove, chop it into small pieces and place in the bowl of the food processor with a good pinch of salt. Blend these to a paste and then add the pine nuts and blend again. Stir in the parmesan.
  • Tear the basil leaves and put them into the mixture. Blending, gradually pour in all the olive oil. Scrape down with the spatula once or twice.
  • Taste for salt and adjust if necessary.
  • Serve, or if using later, spoon into a jar, pour in a thin layer of olive oil to cover, add the lid and refrigerate for up to 3 or 4 days.

Notes: With what else can you use pesto? What also goes with well with basil? Why do we toast the pine nuts? What could you use instead of pine nuts?

Categories: Kitchen Garden, Recipe | Tags: , , , , , , , , , , | 1 Comment

Marinated feta

This recipe is super-easy – it’s lovely to spread on bruschetta, or to add to a frittate recipe, or delicious on it’s own with some roasted chicken & salad… and will also last in the fridge for a week or so, in a jar just covered with a thin film of olive oil.

ourkitchengarden.net

Excuse me do you have the thyme please?

Fresh from the garden: thyme, lemon thyme, garlic, lemon
Recipe source: Melissa

Equipment:

  • Chopping board & knife
  • Bowls – large, med, small
  • Paper towel
  • Peeler
  • Salad spinner
  • Measuring jug
  • Serving bowls
  • Small jar & lid if needed
Ingredients:

  • 200g Danish feta
  • A lemon
  • A small handful thyme (or lemon thyme) sprigs
  • 3 garlic cloves
  • 100ml extra-virgin olive oil
  • Black pepper

What to do:

  • Unwrap the feta & cut into 1cm cubes.
  • Wash and wipe the lemon dry. Using a peeler or a small sharp knife, carefully cut thin strips of yellow flesh from the lemon and add to the feta.
  • Wash the thyme, spin it dry and then strip the leaves from the stalks. Add the leaves to the feta,
  • Peel and chop the garlic into thin slivers and add those to the feta, with a grind or two of the black pepper.
  • Measure the olive oil and then pour it over the feta. Carefully fold the ingredients together without mashing the cheese, then spoon into serving bowls. Leave for a few minutes for the flavours to marry – or if using later, pop in to a clean and dry jar and cover with the lid.
  • Note: the olive oil may solidify and go cloudy if kept in the fridge, so let the jar come to room temperature for 30 minutes or so before you need it!

Notes: What animals’ milk makes feta cheese? What’s the difference between Danish & Greek styles of feta?

Categories: Kitchen Garden, Recipe | Tags: , , , , , , , , | Leave a comment

Roasted capsicum

A wonderful thing happens when you roast capsicum: the crunchy and slightly sour tastes make way for luscious, slippery sweetness – & when married with garlic and herbs the effect is totes delish! My favourite thing to do is gobble these capsicum strips with the marinated feta, some pesto and slices of grilled bruschetta – a perfect little antipasto snack matched with a slice or 5 of super-thin prosciutto and/or some garlic prawns in terracotta, a la Dogs Bar circa 1993… happy days!

ourkitchengarden.net

Fresh from the garden: capsicum, garlic, thyme, marjoram, sage
Recipe source: Melissa

Equipment:

  • Bowls – big, medium
  • Baking tray
  • Oven mitts
  • Tongs
  • Freezer bag
  • Serving bowls
Ingredients:

  • 4 or 5 capsicums
  • Extra-virgin olive oil
  • A head of garlic
  • A small handful of thyme sprigs
  • A small handful of marjoram sprigs
  • Flaked salt

What to do:

  • Preheat oven to 21oC.
  • Wash and thoroughly dry the capsicum.
  • Liberally douse the capsicum with olive oil, massaging the oil into every crevice.
  • Place capsicum onto the baking tray, together with the head of garlic and the thyme & marjoram sprigs.
  • Sprinkle a sparing quantity of flaked salt onto the capsicum and bake for 15 minutes.
  • Carefully remove from oven with oven mitts and using the tongs, turn caps onto their sides.
  • Bake a further 10 minutes, then turn them over.
  • Repeat until all 4 sides have been in contact with the baking tray.
  • Once the capsicums are blackened and soft, remove from the oven, place into a freezer bag, seal tightly and allow to cool for 10 minutes.
  • Once cool enough to handle, put pressure on the stem end and it will pop out. Tear the capsicum in half, and remove all pith and seeds, the skins with slide off easily.
  • Repeat for remainder of the roasted capsicums.
  • Peel off each clove of garlic and squeeze from tip to base. The roasted garlic cloves are much more fragrant and milder than pan fried garlic.
  • Tear the capsicum into thin strips and mix with the herby oil and garlic.
  • Divide into serving bowls and eat with crusty bread!

Notes: What goes well with capsicum? What other vegetables can you roast? Why do we put the capsicum in a plastic bag?

ourkitchengarden.net

Categories: Kitchen Garden, Recipe | Tags: , , , , , , , , , | Leave a comment

Garlic bruschetta with tomatoes and basil

We can elevate even the simplest of snacks into works of art by performing a little garlic magic first… And over an open bbq flame at home takes the toast to an altogether more yummy stratosphere…

ourkitchengarden.net

Fresh from the garden: tomatoes, garlic, basil
Recipe source: Melissa

Equipment:

  • Knives – bread, small
  • Paper towel
  • Salad spinner
  • Bowls
  • Chopping board
  • Grill trays
  • Tongs
  • Oven mitts
  • Garlic press
  • Serving plates
Ingredients:

  • A load of great sourdough bread
  • A bowl of tomatoes
  • A few sprigs of basil
  • Extra-virgin olive oil
  • 3 garlic cloves
  • Flaked salt & black pepper

What to do:

  • Heat the grill on high.
  • Wash and gently dry the tomatoes on some paper towel. Carefully slice the tomatoes into bite-sized pieces, taking care not to squeeze all the juice out!
  • Place in a big bowl and drizzle a little olive oil over the whole lot. Peel and then squeeze one clove of garlic through the press into the tomatoes.
  • Pick the basil leaves and wash in a clean bowl of cold water. Spin the leaves dry and then tear into tiny pieces and scatter over the tomatoes. Sprinkle with a pinch or two of salt and a grind of pepper, then gently toss with a large spoon to combine. Leave for the flavours to mingle.
  • Carefully slice the bread – you may find it easier to ask an adult to slice the loaf down the middle lengthways first, and cut each half separately – and place on grill trays.
  • Slide the bread into the oven to grill & lightly toast, and using the oven mitts, turn when needed (watching to make sure it doesn’t burn).
  • When ready bring toast out from the grill using the oven mitts. Cut the end off the remaining garlic cloves (you don’t need to peel them) and rub each cut-side down on the toast a few times.
  • Arrange onto serving plates with a spoonful of tomato mixture on each one. Yum! 

Notes: What happens when you rub the garlic onto the hot toast? What makes bread sourdough bread? Why do we let the flavours mingle?

ourkitchengarden.net

Categories: Kitchen Garden, Recipe | Tags: , , , , , , , , | Leave a comment

Gluten-free pizza dough

This dough is great for a coeliac’s pizza, calzone or flatbreads – just follow the instructions below and use with any of our recipes. They turn out a treat!

ourkitchengarden.net

Recipe source: Melissa
Makes: 2 large pizza or 2 calzone

Equipment:

  • Scales
  • Stand mixer, bowl & dough hook
  • Measures – cup, ½ cup, tablespoon
  • Bowls – large, medium
  • Cling film
Ingredients:

For the magic dough:

  • 2½ cups gluten-free plain flour
  • 7g dried instant yeast (GF)
  • A pinch of salt
  • 1 cup warm water
  • 1 tablespoon extra-virgin olive oil plus extra for greasing

What to do:

  • Sift flour into the bowl of the stand mixer. Add the yeast and salt and mix to combine.
  • Make a well in the centre and add measured water and oil. Mix to form a soft dough and knead for about 5-7 minutes or until smooth and elastic.
  • Place in a lightly greased bowl and cover with cling film. Stand in a warm place for 45 minutes to 1 hour or until the dough has doubled in size.
  • Using your fist, punch dough the down. Knead on a lightly floured surface until smooth and then use with your favourite pizza or flatbread recipe.

Notes: Why do we leave the dough to rise? What is this process called?

ourkitchengarden.net

Categories: Kitchen Garden, Recipe | Tags: , , , , , , , , | 2 Comments

Hugh’s Magic Dough

Bondi kids love making dough: bread, pizza and pasta regularly grace our table! This ‘magic’ dough recipe can form the base for pizza, flatbreads, breadsticks etc…

Recipe source: Hugh Fearnley-Whittingstall, Veg Every Day
Makes: 2 large pizza or 2 calzone

Equipment:

  • Scales
  • Stand mixer& dough hook
  • Measures – tablespoon, teaspoon, ½ teaspoon
  • Bowls – large, medium
  • Cling film
Ingredients:

For the magic dough:

  • 250g plain white flour
  • 250g strong white flour
  • 1½ level teaspoons fine sea salt
  • 1 teaspoon instant dried yeast
  • 1 tablespoon olive oil, plus a little extra for oiling

What to do:

For the magic dough:

  • Put the two flours into the bowl of the stand mixer with the salt and yeast. Mix well using the dough hook. Add the oil and 325ml warm water and mix to a rough dough. Knead for 5–10 minutes, until smooth. This is quite a loose and sticky dough, which is just as it should be – you get better-textured bread this way – so try not to add too much flour if you can help it, it will become less sticky as you knead.
  • Trickle a little oil into a clean bowl, add the kneaded dough and turn it in the oil so it is covered with a light film. Cover with a tea towel or cling film and leave in a warm place to rise until doubled in size – at least an hour, probably closer to two – or if using the next day, wrap bowl in cling film and put straight into the fridge to prove slowly.
  • When the dough is well risen and puffy, tip it out and ‘knock it back’ by poking it with your outstretched fingers until it collapses to its former size. It’s now ready to be shaped to your will.

Notes: Why do we leave the dough to rise? What is this process called?

Categories: Kitchen Garden, Recipe | Tags: , , , , , , , , , | 3 Comments

Mini Christmas cakes

I love this idea of mini Christmas cakes for everybody! Don’t forget to let everybody have a stir of the mixture so that they can make a wish for the coming year…

ourkitchengarden.net

Recipe source: adapted from a recipe by Kookaburra on food.com
Makes: 32

Equipment:

  • Large non-reactive bowl, spoon
  • 3 x 12 hole muffin tins
  • 36 cupcake cases
  • Peeler, grater
  • Scales, wooden spoon
  • Small saucepan, spatula
  • Bowls – large, med
  • Measures –cup, ½ cup, tablespoon
  • Sieve, skewer
Ingredients:

  • 1½ kg mixed dried fruit
  • 50ml vanilla extract or dark rum
  • 4 large eggs
  • 1 granny smith apple
  • 1 tablespoon treacle or 1 tablespoon molasses
  • 1 cup brown sugar, firmly packed
  • 250g butter
  • 1½ cups plain flour
  • ½ cup self-raising flour
  • 200g blanched almonds (if using)
  • 150g glace cherries

What to do:

The night before:

  • Place mixed fruit into a very large bowl. Add vanilla extract or rum and mix well. Cover with plastic wrap and allow to stand overnight.

Start of lesson:

  • Preheat oven to 150°C and arrange oven racks to accommodate muffin tins in the centre section of the oven.
  • Place a muffin case into each hole of the muffin tins. Peel and grate the apple. Place the butter in the small saucepan and gently heat until melted. Remove from the heat to cool. Break the eggs into a medium bowl and lightly beat.
  • One ingredient at a time, add the beaten eggs, grated apple, treacle and sugar to the fruit mixture, mixing well with a wooden spoon after each addition.
  • Sift the flours into a big bowl, then add the cooled, melted butter and flours to the mixture and mix thoroughly – make sure to let every member of the group have a stir of the mixture while they make a Christmas wish!
  • Spoon the mixture into the muffin cases, filling to almost full. Use the back of a spoon to smooth the top of each cake.
  • Press a glace cherry into the centre of each cake and, if you like, around each cherry press in 5 almonds to make ‘petals’- pointy end closest to the cherry.
  • Bake at 150°C for about 40-45 minutes or until a skewer inserted into the centre of a cake comes out clean. Cool then store in airtight tins or the refrigerator. Or eat!

Notes: They can be eaten immediately or wrapped tightly in cling film, still in their paper. They will keep for a month at least, long after the festivities (and ham) have finished!

ourkitchengarden.net

Categories: Kitchen Garden, Recipe | Tags: , , , , , , , , | Leave a comment

Festive shortbread

Jill writes, ‘Free shortbread from the restrictively narrow timeframe of Christmas, and make it throughout the year. Hallelujah.’ I think by turning these into a festive treat (however short-lasting they may be!) they can be a great present for someone too…

Recipe source: adapted from Jill Dupleix’s recipe for Anytime Shortbread in ‘Simple Food’

Makes: about 30

ourkitchengarden.net

Equipment:

  • Baking trays and paper
  • Scales
  • Bowls – 2 medium
  • Food processor
  • Flour sifter
  • Chopping board and knife
  • Cling film
  • Rolling pins
  • Festive biscuit cutters
  • Ribbon, chopstick, skewer, cellophane
Ingredients:

  • 300g unsalted butter, soft
  • 150g icing sugar
  • Pinch of sea salt
  • 300g plain flour
  • 150g rice flour or cornflour


What to do:

  • Heat the oven to 150C. Line the baking trays with baking paper.
  • Combine the butter, icing sugar and sea salt in a food processor and whiz until smooth.
  • Sift in the flour and rice flour, then pulse off and on, scraping down the sides from time to time, until the mixture gathers into a ball. Knead for a minute or two with your hands until smooth, then cut into two, wrap in cling film and refrigerate for 30 minutes. Tidy & wipe down your workspace.
  • Turn out onto a floured surface and pat or lightly roll out the dough until 1cm thick. Cut into shapes with the biscuit cutters. Reshape the scraps and cut more shapes. Place on a baking tray and prick with a fork. If you want to, you can carefully pierce a hole in each shape with a skewer or chopstick, & later thread ribbon through to hang as a decoration.
  • Bake on the middle shelf of the oven for 10 minutes, then turn the tray around and bake for another 5 to 10 minutes until touched with colour. Leave to cool on the tray.
  • Pack gently into an airtight container, thread with a length of ribbon and tie into a cellophane bag – or simply gobble them up! 

Notes: This shortbread can be stored in an airtight container for up to 2 weeks. Or spread with homemade strawberry jam and whipped cream for a take on the classic Strawberry Shortcake…

Categories: Kitchen Garden, Recipe | Tags: , , , , , , , , | Leave a comment

Create a free website or blog at WordPress.com.