Posts Tagged With: gluten-free

Insalata Caprese

IMG_0217

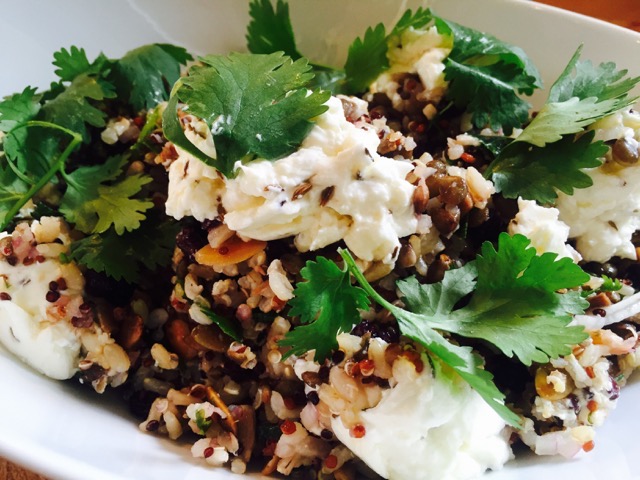
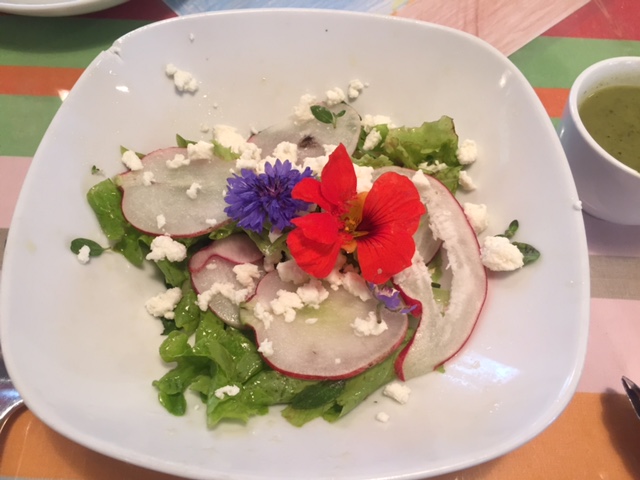
This famous salad from Italy is beautiful in its simplicity, using up all the last of the lovely summer tomatoes and juicy basil and nasturtium leaves.

Fresh from the garden: rocket, baby spinach, young nasturtium leaves, tomatoes, basil
Recipe source: Melissa
Serves: 4 or 28 tastes

Equipment:

  • Mixing bowls – large, med, small
  • Salad spinner
  • Chopping board & knives
  • Paper towel
  • Tea towel
  • Fork or whisk
  • Tongs
  • Serving bowls


Ingredients:

  • A large handful small rocket leaves
  • Some young nasturtium leaves
  • A handful of basil leaves
  • A few handfuls little tomatoes
  • 1 tub bocconcini
  • Extra virgin olive oil
  • Aged balsamic vinegar
  • 1 clove garlic
  • Flaked salt and pepper

What to do:

  1. Wash the leaves very well in a large bowl and several changes of cold water. Dry the leaves very gently in the salad spinner. Repeat this process, working in small batches, until all the leaves and basil (kept separate) have been dried.
  2. Lay out a tea towel and line it with paper towel. Spread the dried leaves over the paper and roll the whole lot up like a log. Keep the rolled parcel of leaves in the refrigerator until needed. Rinse and dry the bowl well.
  3. Peel the garlic and slice in two squashing one half slightly. Into one bowl put this half, tear the basil and drop in, pour in a glug of olive oil and sprinkle some salt. Tear each bocconcini into two and add, then chop each tomato into two – or chunks if larger – and also place these in, turning a few times.
  4. To make the dressing, rub the other garlic half over the inside of the bowl and drizzle ½ cup olive oil and a little stream of balsamic vinegar over. Lightly whisk dressing.
  5. Unwrap the parcel of salad leaves & tip them into the bowl. Gently turn the leaves in the dressing using your hands or tongs
  6. Use the salad servers to transfer the dressed leaves to the serving bowls, then scoop up tomato/ basil/ bocconcini mixture (discarding garlic half) and pop on top of each, making sure to toss well before serving immediately. 

Notes: What is bocconcini and what does it mean?

Categories: Kitchen Garden, Recipe | Tags: , , , , , , , , , | Leave a comment

Paul’s tomatoes, buffalo mozzarella and basil

My uncle Paul has the greenest thumbs I know. He has a big sunny backyard and grows the best veggies – kilos of broad beans, basket-loads of lemons, buckets of zucchini, tubs of  chillies, all different ones, and right now, loads and loads of beautiful tomatoes. We’ve been eating them sliced up every morning for brekky, my aunt Rose and I, on sourdough toast, with lots of unsalted butter and a smear of Promite, and the necessary black pepper and grind of salt…

He gave me some to bring back home after the holidays so I set straight to chopping them up for the simplest but most wonderful salad known to man or woman:

IMG_1402

Paul’s tomatoes with buffalo mozzarella and basil

Ingredients:

  • A large bowl of tomatoes, ideally different shapes and sizes and even colours if you’ve got them!
  • A ball of buffalo mozzarella in a  tub
  • A bunch of basil
  • Some really great olive oil (or at least as fresh as you can get!)
  • Black pepper in a mill

What to do:

  1. Wash and dry the tomatoes and chop into good chunks, discarding any hard cores and place in a  decent shallow bowl.
  2. Open the mozzarella and drain the ball. Pull apart large chunks of the cheese and dot over the tomatoes.
  3. Wash and spin dry the basil leaves then  tear into small pieces and scatter over the salad.
  4. Drizzle over the best olive oil that you can reach. Grind over a few twists of black pepper. Let the salad sit for 20 minutes for the flavours to sink in.
  5. Eat! Crusty bread is great to mop it all up…

As always, the quality of the stuff you use is important, especially when you’re only using so few ingredients. Buffalo mozzarella is expensive but by golly it’s delicious, and perfect for the sweet and acidic brilliance of the home-grown tomatoes. I was also happy to find some Nolan’s Road ‘delicate’ olive oil in the cupboard to use, that stuff’s so good you could drink it neat. Hope you can get in to some soon…

Happy New Year everybody!

Categories: Kitchen Garden, Recipe | Tags: , , , , , | Leave a comment

Spiced grains, almonds, labne and currants

Our friend Caroline had been to Drake Eatery in Bondi and said you MUST go there and have the grain and seed side dish. She said you probably wouldn’t order it if you didn’t know about it, so please order it and tell me what you think… So of course we did, and we loved it, and now order it every time we go there because it’s such a great place, and the salad is a total winner.

Image 1

So I’ve been wondering for ages how to replicate it.

We were invited to a friend’s birthday at his home two days ago on the 1st January (HB PH!) and I suggested I would bring a salad. What a perfect salad to bring, I thought, if I could find out what they put in it? So I consulted the oracle and found, several pages in, a salad recipe that sounded EXACTLY like the one I was looking for! So there it was, on the Food To Love website, brought to you by the Australian Women’s Weekly! So no disrespect to Drake, but I reckon this is where they got their idea…

Mediterranean Grain Salad aka Drake’s spiced grains, almonds, labne and currants

Ingredients

  • 3/4 cup brown rice
  • 1/2 cup french-style small green lentils
  • 1/2 cup quinoa
  • 1 cup (250ml) water
  • 1 small red onion
  • 1/2 cup currants
  • 1 cup flat-leaf parsley leaves
  • 1 cup coriander leaves
  • 1/4 cup lemon juice (1 lemon)
  • 1/3 cup olive oil
  • 2 tablespoons pepitas (pumpkin seeds)
  • 2 tablespoons sunflower seeds
  • 2 tablespoons pine nuts
  • 1 teaspoon cumin seeds
  • 1/2 cup flaked almonds
  • 1 cup (280g) labne
  • 1 1/2 tablespoon honey

Steps

  1. Wash the rice and lentils, separately, drain and then cook in large saucepans of boiling salted water for 20 minutes or until tender, then drain and rinse well in cold water.
  2. Wash the quinoa and drain, and then tip in to a small saucepan with the cup of water and a sprinkle of salt and bring to the boil. Reduce heat to a simmer, and cover for 10 minutes until tender. Drain.
  3. Roast pepitas, sunflower seeds and pinenuts together on an oven tray (keep the cumin seeds and flaked almonds all separate on separate pieces of foil), in a 180°C oven for 8 minutes, stirring half way through.
  4. Peel the onion and finely chop. Squeeze lemon juice. Wash the herbs, dry them and chop the leaves.
  5. Combine the cooked rice, lentils and quinoa in a large bowl. Add the chopped onion, pepitas, sunflower seeds, pine nuts, currants, herbs, juice and the olive oil and stir well.
  6. Stir the cumin seeds into labne in a small bowl.
  7. To serve, top salad with spoonfuls of labne, drizzle with honey and scatter with the flaked almonds. (At school we would omit the almonds).

Tips

Labne is drained yoghurt. You can make it at home, straining Greek yoghurt through cheesecloth in the fridge for 3 days, or you can buy it at Kemeny’s or Harris Farm like I do!


Categories: Kitchen Garden, Recipe | Tags: , , , , , , , , , , | Leave a comment

End of Year salad

This is where we clean out the garden in preparation for the big break… what better to do than throw it all in together?

IMG_1108

Fresh from the garden: all the last veggies of the year…
Recipe source: Melissa

Equipment:

  • Mortar and pestle
  • Citrus juicer
  • Measures: 1/3 cup, teaspoon
  • Teaspoon
  • Scissors
  • Paper towel
  • 2 baking trays
  • Bowls – 2 big, med, 4 small
  • Salad spinner
  • Chopping boards and knives
  • A deep-sided frying pan
  • Slotted spoon


Ingredients:

  • Kale
  • Cucumbers
  • Salad leaves
  • Bok choy or tatsoi
  • Tomatoes
  • 4 eggs

Herby vinaigrette dressing

  • 1 clove garlic
  • Flaked salt & black pepper
  • 1 lemon
  • 1/3 cup extra virgin olive oil
  • A small handful mixed herbs: tarragon, marjoram, thyme, chives, salad burnet

What to do:

  1. For the dressing: Peel the garlic clove and put it in the mortar with a large pinch of salt. Gently pound to a paste. Juice the lemon and add the juice to the mortar (without pips) then stir the lot with the teaspoon and scrape it into the large bowl. Stir in the oil and grind some pepper, then whisk the dressing lightly. Wash and spin dry the herbs, pick off the leaves and snip finely with the scissors. Add to the dressing.
  2. For the crispy kale: Preheat oven to 180C. Wash the kale really well, checking for bugs or cocoons, and using scissors, cut the leaves from the stalks in large pieces. Spin leaves dry in the salad spinner, then dry extra well with paper towel, then place in a bowl and add in a few pinches of flaked salt and drizzle of olive oil. Massage all the flavour into the kale for a minute, then lay out on the baking trays and slide into the oven for 5 to 7 minutes until crispy.
  3. For the salad: Fill up the 2 big bowls with cold water & wash the salad leaves in several changes of water. Spin dry and wipe the bowls dry. Fill the small bowl with water and wash the small garnishing leaves and flowers. Reserve them carefully on a piece of paper towel then keep separate in the bowl.
  4. Wash the tomatoes and drain and then slice any large ones in half without squashing! Wash the cucumbers, peel alternating strips of each one and then slice into thin discs.
  5. To poach eggs: Fill the deep-sided frying pan 5cm deep with water and bring to a simmer. Fill the large bowl with cold water. Carefully crack each egg into a small bowl without breaking it and then carefully slide into the water. Let the pan sit for 4 minutes on the lowest heat before removing each egg into the bowl of cold water with a slotted spoon and reserving until needed.
  6. Add the salad leaves to the bowl with the herbs and the dressing. Gently turn the leaves in the dressing using a clean hand without squishing the leaves.
  7. Pile up the dressed leaves into the serving bowls with the  tomatoes and cucumber, sprinkle over the crispy kale, then carefully drain an egg and place in each bowl with the garnishing petals. Serve immediately.
Categories: Kitchen Garden, Recipe | Tags: , , , , , , , , , , , | Leave a comment

Cornersmith’s bouillon

This recipe comes to us from the picklery Cornersmith in Marrickville. Bouillon is what we use instead of stock in all our soup and risotto recipes. The aim of the recipe is to use up excess vegetable parts – carrot tops, fennel tops, spinach stems, parsley stems etc.The recipe can be varied with the seasons by adding what you have on hand.

ourkitchengarden.net

Fresh from the garden: leeks, fennel, carrots, parsley, mint, coriander, onions
Recipe source: adapted from a recipe from the Cornersmith Café
Makes: 4 medium jars

Equipment:

  • Jars and lids
  • Large oven tray
  • Paper towel
  • Scales
  • Chopping boards & knives
  • Peelers
  • Large mixing bowls
  • Salad spinner, colander
  • Scissors
  • Wooden spoons
  • Food processor
  • Funnel, teaspoons
Ingredients:

  • 200g brown onions
  • 200g leeks
  • 200g fennel
  • 200g Dutch carrots
  • 200g celery
  • Carrot tops
  • 1 bunch parsley
  • 1 bunch mint
  • 1 bunch coriander
  • 40 sundried tomatoes
  • 1 head garlic
  • 200g fine cooking salt

What to do:

  1. Wash the jars and lids in hot soapy water, rinse well and drain upside down. Place all the jars onto an oven tray, right side up, and slide into the oven. Turn the oven on to 160C to sterilize for 15 minutes.
  2. Dry the lids with a clean piece of paper towel.
  3. Wash all the vegetables and scrub if needed. Trim any ugly bits and discard. Peel the onion & garlic, and carrots if needed.
  4. Wash the herbs, spin dry and finely snip, discarding any tough stalks.
  5. Using a large knife, chop all vegetables into small sized chunks. Snip the sun-dried tomatoes into thin slices using scissors.
  6. In batches if necessary, add the ingredients to the food processor.
  7. Process into a thick paste and then scrape out into a clean and dry large bowl. Mix the ingredients thoroughly with the salt so it is mixed in evenly. You can use your hands for this but beware of the onion fumes in your eyes!
  8. Put the funnel into the top of the sterilized jars.
  9. Fill the jars without touching any of the inside or rims, and seal tightly.
  10. You may want to ‘can’ the jars in a water-bath to preserve longer: Line a wide saucepan or stockpot with a rubber mat or tea towel, then place the full, sealed jars in so that none are touching the sides of the pot or each other. Fill with lukewarm water and then set to boil on high for between 10 and 20 minutes. Turn off then using tongs, carefully lift out the jars and leave to cool on a wooden board. Label when cool.

Notes: This is used as a replacement to stock: one tablespoon dissolved in 1 litre of boiling water. It can be added to stews and soups or any meals that need a boost of flavour.

Bouillon will last for a year unopened and stored in a cool dark place. Once opened, store it in the fridge and it should last you for at least 6 months.

ourkitchengarden.net

Categories: Kitchen Garden, Recipe, Uncategorized | Tags: , , , , , , , , , | 1 Comment

Kale and borlotti bean soup

The kids at Bondi tend to favour smooth, blended soups but sometimes I like to shake things up a bit by getting them to prepare a super-hearty and super-chunky soup instead! This one amazingly always goes down well.

Image 2

Fresh from the garden: kale, onion, carrot, celery, garlic, thyme
Recipe source: Melissa
Serves: 6 at home or 24 tastes

Equipment:

  • Glass bowl
  • Measures: cup, tablespoon, teaspoon, ¼ teaspoon
  • Kettle
  • Chopping boards & knives
  • Large stockpot and lid
  • A selection of mixing bowls
  • Sieve
  • Bowls to serve
Ingredients:

  • 1 cup dried borlotti beans
  • 1 teaspoon bicarb soda
  • 1 large brown onion
  • 2 garlic cloves
  • 2 carrots
  • 2 celery sticks
  • 1 bunch kale
  • Olive oil
  • 1 handful fresh thyme
  • 1/4 teaspoon dried chilli flakes
  • 1 tablespoon tomato paste
  • 400g tin diced tomatoes

What to do:

The night before:

  • Place beans in a non-reactive bowl and cover with lots of cold water and a teaspoon of bicarb. Soak for 8 hours or overnight.

In the lesson:

  1. Fill the kettle to the 1.5 mark and set it to boil.
  2. Peel and finely chop the onion and garlic cloves.
  3. Wash, peel and finely chop the carrots.
  4. Wash the celery and shake dry over the sink. Finely chop the stalks including the leaves.
  5. Wash the kale and shake dry over the sink. Slice off the stem, discarding into the compost and finely slice (shred) the kale leaves.
  6. Wash the thyme, spin it dry and strip off the leaves, discarding the stems into the compost.
  7. Pour olive oil into the stockpot just to cover the base and heat over medium heat. Add the onion, and cook until translucent for about 5 minutes stirring occasionally.
  8. Add in the carrot and celery and cook for another few minutes.
  9. Add the garlic, thyme and chilli flakes and then stir in the tomato paste.
  10. Drain the beans, rinse them and drain again. Add them and the tin of tomato, hot water and bouillon to the stockpot and bring to the boil. Reduce heat to low and simmer with the lid half on for 20 minutes or until the beans are tender, adding a little more water if the soup becomes too thick. Add the shredded kale and cook for 5 minutes.
  11. Taste to check for salt levels, then add more if needed and grind in some pepper, then serve. 

Notes: What is a non-reactive bowl? Why do we soak the beans?

ourkitchengarden.net

Categories: Kitchen Garden, Recipe | Tags: , , , , , , | Leave a comment

Rhubarb and vanilla jam

This must be the easiest jam to make in the whole wide world! And, as with all jam-making, small quantities are best: quickest to prepare and also to bring up to that all-important setting point. And if you find you don’t have the exact kilo of prepared fruit, just weigh out the equivalent amount of sugar.

Fresh from the garden: rhubarb, lemon

Recipe source: Melissa

Makes: 3 or 4 medium jars

Equipment:

  • 4 medium jars with good lids
  • Oven tray
  • Paper towel
  • 3 small saucers
  • Chopping boards and knives
  • Scales
  • Citrus juicer
  • Heavy-based wide stockpot
  • Wooden spoon with flat edge
  • Spatula
  • Small serving bowls
Ingredients:

  • 1kg rhubarb
  • 1kg sugar
  • 1 vanilla pod
  • 1 large lemon

What to do:

To sterilise jars:

  1. Wash your jars in hot, soapy water, rinse and then drain them upside-down.
  2. Place on an oven tray right-side-up and slide them into the oven. Turn on the oven to 160C. Leave them there until
  3. Wash the lids, rinse and drain them. Wipe them dry with a piece of paper towel and keep your fingers away from the inside of the lid!

To make the jam:

  1. Put 3 small saucers in the freezer.
  2. Wash the rhubarb stalks and trim the edges. Slice each stalk into 3cm pieces and weigh to make sure you have 1kg.
  3. Slice the vanilla pod lengthways and scrape out the seeds, then cut each pod half into two.
  4. Cut the lemon in half and squeeze out the juice.
  5. Put the rhubarb into a preserving pan or a heavy-based wide stockpot with the measured sugar, vanilla seeds and pods. Heat gently, stirring, until all the sugar has dissolved, then squeeze in the lemon juice and increase the heat.
  6. Boil for about 10 minutes until the fruit is soft, stirring with the flat-ended wooden spoon every minute or so. Test for the setting point by spooning a little onto your chilled plate. After 1-2 mins, push your finger through the jam – if the surface wrinkles it is ready, if not, keep cooking for 2 minute intervals, testing in between.
  7. Once the jam is ready, let it cool for about 10 mins before ladling into your warm sterilised jars and sealing with the clean, dry lids.
  8. Label with the name and date when cool. Will keep for at least 12 months in a cool, dark place.

Notes: What does to sterilise mean? What is the setting point?

Categories: Kitchen Garden, Recipe | Tags: , , , , , , , , , | Leave a comment

Silverbeet and garam masala soup

Garam is the Hindi word for hot, and masala, spice mixture. We often make our own garam masala blend of ground cumin, coriander, ginger and turmeric, cayenne and mustard seeds at school but it is commonly available in the spice section of any supermarket, already blended.

IMG_0520

Fresh from the garden: silverbeet (Swiss chard), onion, potatoes, garlic, coriander

Recipe source: Melissa

Serves: 6 or 24 tastes

Equipment:

  • Kettle
  • Chopping boards and knives
  • Selection of mixing bowls
  • Paper towel
  • Stockpot
  • Flat-ended wooden spoon
  • Measures: jug, tablespoon, teaspoon
  • Garlic press
  • Ladle
  • Stick blender
  • Serving bowls
Ingredients:

  • 1.5 litres boiling water and 2 tablespoons bouillon (or 1.5 litres vegetable stock)
  • 2 medium potatoes
  • 1 brown onion
  • 4 garlic cloves
  • A large bunch of silverbeet
  • Olive oil
  • A heaped teaspoon garam masala
  • Freshly ground black pepper
  • Flaked salt
  • A small handful of coriander

What to do:

  1. Fill the kettle to 1.5 litres and set it to boil.
  2. Wash or scrub the potatoes under running water (but don’t peel!) and then coarsely chop into 2cm cubes.
  3. Peel the onion and slice into two halves, then finely chop. Peel and chop the garlic.
  4. Wash the silverbeet & shake over the sink. Finely chop the silverbeet, using the whole stalk and leaves as well.
  5. Pour olive oil to cover the base of the stockpot and heat over medium heat for 30 seconds. Add the chopped onion and cook on low, stirring every now and then, for 5 minutes and then add the potato and cook for another few minutes.
  6. Add in the garlic, chopped silverbeet and the garam masala and stir together. Cook very gently for a minute until aromatic.
  7. Increase heat to high. Add the 1½ litres of hot water and the 2 tablespoons of bouillon and bring to the boil, then simmer gently, uncovered, for 10 minutes or until the potato is almost tender.
  8. Meanwhile wash and pat the coriander dry and finely chop.
  9. When the soup is ready and the potato is soft, grind a little bit of pepper in too and taste to see if you need to add any extra salt.
  10. Add in the coriander and then blitz the soup with the stick blender until it’s really smooth.
  11. Taste and add more salt if you need to.
  12. Ladle soup among serving bowls and serve!

 Notes: What do is silverbeet also known as? What is in the garam masala blend? Why do potato-based soups need more salt?

Categories: Kitchen Garden, Recipe | Tags: , , , , , , , , , , | Leave a comment

Creamy polenta with poached eggs and sage

This is comfort food at its creamiest, with the frizzled sage leaves giving everything a crispy, savoury lift. Just be sure the eggs are very fresh and that the yolks are intact when they go in to poach!

IMG_0521

From the garden: eggs, sage, bay

Recipe source: Melissa

Serves: 4 or 24 tastes

Equipment:

  • Chopping board & small knife
  • 1 heavy-based saucepan & lid and 1 small saucepan
  • Scales
  • Measures: jug, cup, 1/3 cup
  • Grater
  • Salad spinner & paper towel
  • Flat ended wooden spoon
  • Mixing bowls: 2 med, 4 small
  • Deep-sided frying pan
  • Serving bowls
Ingredients:

  • 400ml milk
  • 600ml water
  • 1 bay leaf
  • 1 cup polenta (cornmeal)
  • Cooking salt
  • 1/3 cup mascarpone
  • 50g grana padano parmesan
  • 50g butter
  • 4 very fresh large eggs
  • A branch of sage leaves
  • Flaked salt and black pepper

What to do:

  1. Measure the milk and water into the larger saucepan and pop in the bay leaf. Heat until almost boiling and then turn off and allow to infuse for 10 or 15 minutes.
  2. Meanwhile grate the parmesan, measure out the mascarpone and get the eggs ready by carefully and gently cracking each egg into its own separate small bowl – without breaking them!
  3. You can also wash and spin the sage leaves dry, separating if needed, and place them in the smaller saucepan. Weigh out the butter and place with the sage leaves.
  4. Removing the bay leaf from the milk mixture, heat the saucepan again and then sprinkle in the polenta and a teaspoon of cooking salt. Using the flat-ended wooden spoon stir continuously until it thickens and is not too grainy, about 10-20 minutes, depending on the variety of polenta.
  5. When the polenta is cooked, add the mascarpone and grated parmesan and mix until well combined. Taste for seasoning and add a little more salt if necessary. The polenta should be soft and creamy and only just hold its shape – you want a sloppy, porridge type consistency.
  6. About 5 mins before the polenta is ready, poach the eggs. Fill the deep-sided frying pan almost to the top with water and bring to a simmer. and then carefully slide into the water until they’re all in. Let the pan sit on a simmer for 4 minutes.
  7. When the eggs are almost ready, heat the butter and sage over medium heat until the butter is bubbling up and starting to turn brown and the leaves are crispy.
  8. To serve, pour out the polenta into serving bowls. Lift the eggs out of the water, drain, and then place one on top of each bowl. Season generously and scatter with the frizzled sage leaves & browned butter.

Notes: What is polenta? What is cooking by ‘absorption’ method? Why should we not break the egg yolks when poaching them? What is to simmer?

IMG_0519

Categories: Kitchen Garden, Recipe | Tags: , , , , , | Leave a comment

Spring salad of broad beans, radish and goats cheese

This salad is a beautiful celebration of spring, with lots of lovely texture from the broad beans, crunch from the radishes and creaminess from the goats cheese. At school the children love to run out and find edible flowers like nasturtiums or borage to garnish their salads. And if the broad beans are particularly small or very young, we don’t both to double-pod them.

IMG_0522

Fresh from the garden: lettuces, broad beans, radishes, marjoram, edible flowers

Recipe source: Melissa

Serves: 6 or 24 tastes

Equipment:

  • Saucepan & lid
  • Bowls – 2 large, 2 med, 2 small
  • Colander
  • 2 salad spinners
  • Paper towel
  • Mandoline slicer
  • Potato peeler
  • Measuring – 1/4 cup, tablespoon, teaspoon
  • A small jar with lid
  • Plates or bowls to serve
Ingredients:

  • A handful of lettuce leaves
  • A large handful broad beans in pod
  • A small handful of radishes
  • 2 sprigs marjoram
  • A small log of goats’ cheese
  • 1 tablespoon red wine vinegar
  • A teaspoon of honey
  • 1/4 cup extra-virgin olive oil
  • Flaked salt & black pepper
  • Edible flowers

What to do:

  1. Fill the saucepan with water & set to boil on high heat.
  2. Pod the broad beans, discarding the outer shell into the compost and add beans to the boiling water. Fill a large bowl with cold water and have ready.
  3. Boil the broad beans for 3 minutes, drain and then immediately refresh in the bowl of cold water. Drain again and double-pod by slipping the outer shell off into the compost. Reserve beans.
  4. Wash the lettuce leaves really well and spin dry in sections, reserving in a large clean, dry bowl. Wash & dry the marjoram sprigs, picking the leaves and leaving whole.
  5. Wash the flowers gently in a small bowl of cold water and reserve on a piece of paper towel until ready to use.
  6. Scrub the radishes clean, wipe dry and using the mandoline or a peeler, carefully slice into thin discs.
  7. For the dressing, measure the olive oil, red wine vinegar and honey and pour them into the jar. Add a sprinkle of salt and pepper, and then put the lid on & give the jar a good shake.
  8. Drizzle the dressing around the large lettuce bowl and gently turn the leaves with your fingers.
  9. Place the leaves in the serving bowls, then pour the broad beans, radish slices and snap peas into the bowl and mix to cover in the residual dressing. Then sprinkle over each bowl of leaves.
  10. Break the goats cheese into small chunks with your fingers and divide over the salads with the marjoram leaves.
  11. Finish by carefully placing the flowers on top of the bowls of salad. Serve immediately!

Notes: What does residual mean? Why do we use honey vinaigrette here instead of our usual lemony dressing? Can you name some edible flowers?

IMG_0426

Categories: Kitchen Garden, Recipe | Tags: , , , , , , , | Leave a comment

Blog at WordPress.com.