Posts Tagged With: Herbs

Rocket and basil pesto

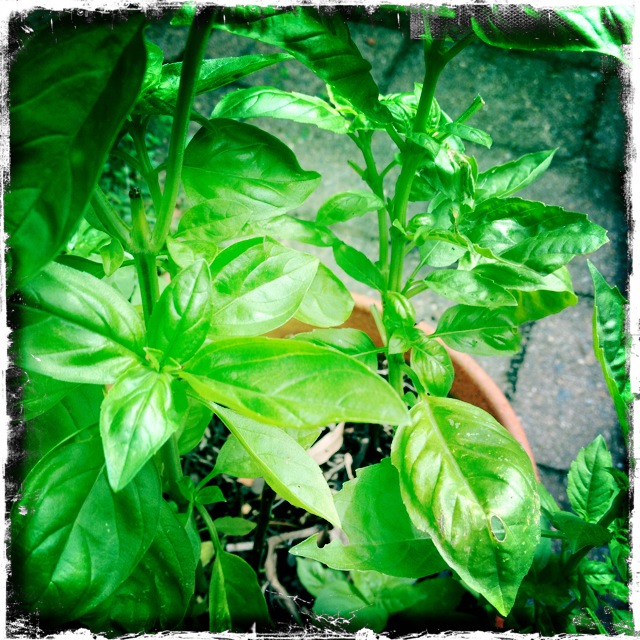
For this alternative pesto, we add rocket leaves to the basil and pound them together but you could also try a parsley or even coriander combination… We love them all! It also seems like a lot of olive oil so tone it back if you like, but I think it’s warranted, especially over freshly cooked pasta & muddled with a ladleful of  pasta-water!

ourkitchengarden.net

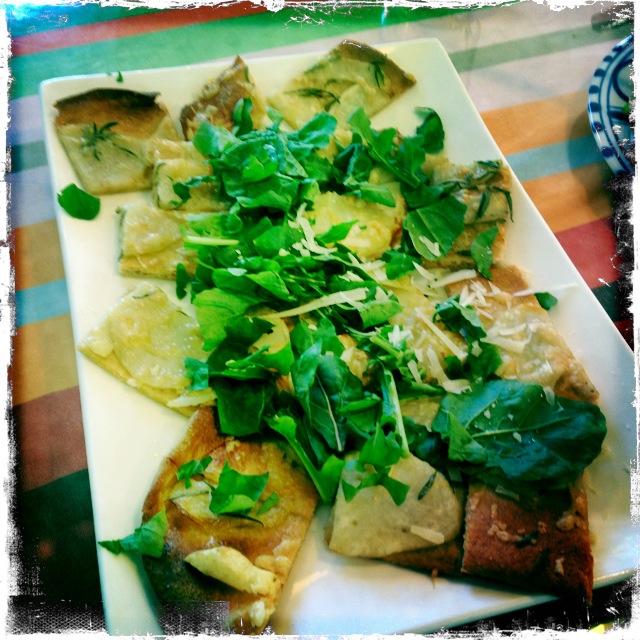
Handmade pasta, rocket & basil pesto

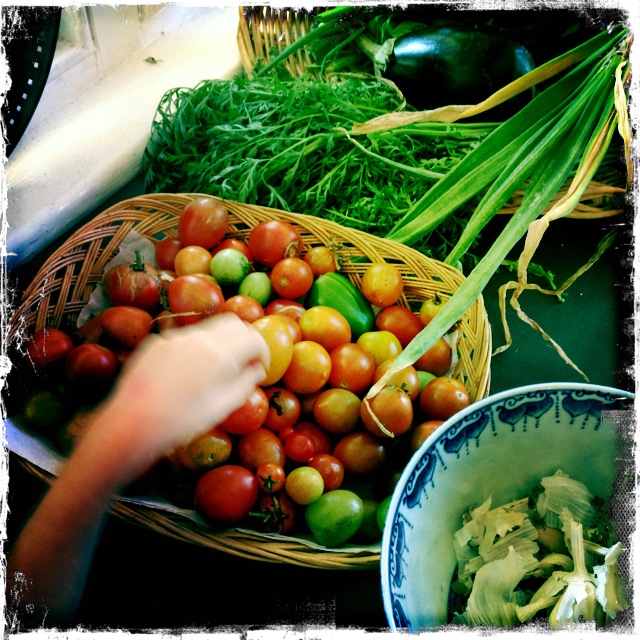
Fresh from the garden: rocket, basil, garlic
Recipe source: Melissa
Makes: 3 cups

Equipment:

  • Mortar & pestle
  • Cheese grater
  • Medium frying pan
  • Tea towel
  • Scales
  • Measuring jug
  • Medium bowl
  • Tablespoon
  • Serving bowls if needed
Ingredients:

  • 1 bunch basil
  • 1 bunch rocket
  • 2 large garlic cloves
  • Salt
  • 80g pine nuts
  • 50g parmesan cheese
  • 200ml extra virgin olive oil

What to do:

  • Before you wash the basil or rocket, pick the stalks from the basil and discard. Weigh the leaves with the rocket – you’ll need about 100g all up.
  • Wash and then spin-dry the basil and rocket, you might need to do this in several stages to make sure the leaves are as dry as can be!
  • Grate the parmesan cheese.
  • Heat the frying pan on a medium heat and lightly dry-toast the pine nuts, shaking regularly so that they don’t stick.
  • Peel the garlic cloves and place in the mortar and pestle with a good pinch of salt. Pound these to a paste.
  • Add the pine nuts to the mortar & pestle and continue to pound. Once smooth-ish, transfer to the bowl and stir in the parmesan.
  • Tear the basil leaves and put them into the mortar. Pound the leaves to a paste. Return the pine nut mixture to the mortar and, pounding it all together, gradually pour in all the olive oil.
  • Taste for salt and adjust if necessary.
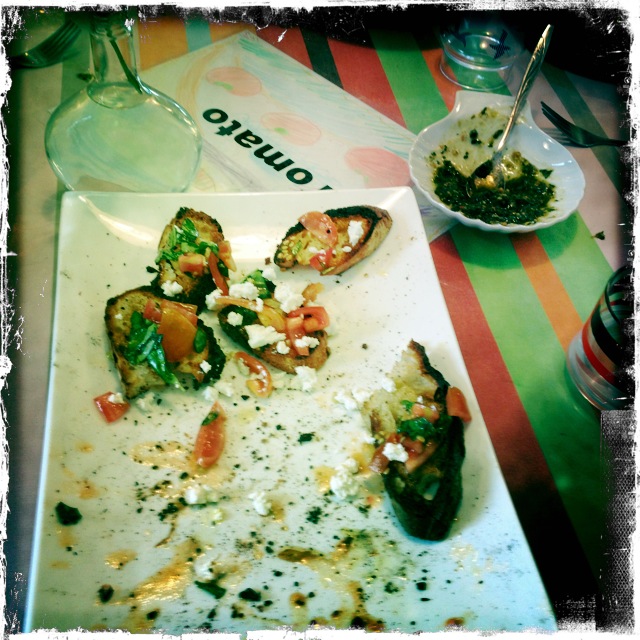
  • Mix into steaming hot pasta, spread on bruschetta, drizzle over tomato slices, serve as part of an antipasto plate with goats’ cheese and roasted capsicum or spoon into serving bowls to serve as a dip with flatbreads.

Notes: With what else can you use pesto? What also goes with well with basil? Why do we toast the pine nuts? What does several mean? Why do we weigh the leaves before we wash them?

Categories: Kitchen Garden, Recipe | Tags: , , , , , , , , , , | 2 Comments

Potato, rosemary & rocket pizza

I think it’s a law that every child should love pizza… and mine certainly do! This one’s a very different style to the usual however, as there’s no tomato nor mozzarella – or even pineapple! But delish nevertheless, and is also a leeeetle bit healthy…

ourkitchengarden.net

Potato, rosemary & rocket pizza

Fresh from the garden: potatoes, rosemary, rocket
Recipe source: adapted from Stephanie Alexander Kitchen Garden Cooking with Kids
Serves:  8 or 24 tastes

Equipment:

For the pizza dough:

  • Bowls – 1 small, 2 large
  • Fork
  • Scales
  • Measures: cup, ½ cup, tablespoon, teaspoon
  • Stand mixer with dough hook
  • Pastry brush
  • 2 large oven trays
  • Wide egg lifter
  • Large boards for cutting pizza
  • Pizza cutter

For the pizza topping:

  • Salad spinner
  • Scales
  • 2 clean, dry tea towels
  • Kitchen paper
  • Chopping board
  • Grater & peelers
  • Mandoline & mezzaluna
Ingredients:

For the pizza dough:

  • 1 cup lukewarm water
  • 3 teaspoons instant dry yeast
  • 1 teaspoon sugar
  • 1½ tablespoons extra virgin olive oil, plus extra for greasing
  • 400g plain flour, plus extra for flouring
  • 2 teaspoons cooking salt

For the pizza topping:

  • 3 handfuls rocket leaves
  • 100g parmesan cheese
  • 4 sprigs rosemary
  • 3 medium-to-large potatoes
  • 1/2 cup extra-virgin olive oil


What to do:

To make the dough:

  • Place the water, yeast and sugar in the small bowl. Mix with the fork and leave for 5–10 minutes until the mixture looks frothy.
  • Add the 2 teaspoons of oil to the yeast mixture and mix well.
  • Place the flour and salt and yeast mixture in the bowl of the stand mixer and beat for at least 8 minutes, until the dough looks smooth.
  • Brush the inside of a large bowl with a little of the extra virgin olive oil, using the pastry brush.
  • Turn the pizza dough into the oiled bowl. Cover with a clean, dry tea towel and put in a draught-free place until the dough has doubled in size. This process, which is called ‘proving’, will take at least 1 hour.

What to do:

Start of lesson:

  • Tip the risen dough onto the workbench and knead briefly, then shape it into a round ball and return it to the bowl.
  • Cover the bowl with the tea towel and leave again, this time for at least 20 minutes.
  • Preheat the oven to 200C. You can prepare the topping now while you wait for the oven to heat up.

For the topping:

  • Rinse the rocket leaves and dry them in the salad spinner. Shred the rocket into fine strips. Lay a piece of kitchen paper on a dry tea towel and spread the dry leaves over the paper and then roll the whole lot up like a log. Keep the rolled parcel of leaves in the refrigerator until needed.
  • Shave off pieces of parmesan using either a grater (if it has a wide slicing option) or a normal potato peeler.
  • Pull the rosemary needles from the stalks and chop them using the mezzaluna.
  • Peel the potatoes, washing them as you go, and slice them very thinly and very carefully using the mandoline & guard.
  • Tip the sliced potatoes into the large bowl and drizzle with most of the oil.
  • Add the rosemary and salt and pepper, then mix together so that all the slices are lightly oiled.

Assembling the pizza:

  • Scatter some flour on the workbench, divide the dough in two and roll to form two thin rectangles to fit the baking trays.
  • Assemble the pizzas directly onto the trays, flouring the trays first.
  • Arrange the slices of potato on the pizzas, overlapping them.
  • Sprinkle most of the Parmesan over the potato, keeping some aside.
  • Drizzle the pizzas with the last of the oil, then place the pizzas in the oven for about 10 minutes or until the edges are very crusty and the cheese is bubbling. 

Finishing off:

  • While the pizzas are baking you can make the dough for the next class (see above).
  • You may want to slip the pizza off the tray onto the rack for the last few minutes, so that you get a really crusty base.
  • Once the pizzas are done, transfer them to the wooden chopping boards using the wide egg lifter.
  • Cut the pizzas in half, and then into small slices or squares and then slide half a pizza onto each plate.
  • Top each with a handful of the shredded rocket leaves and remaining parmesan.

Notes: Where does pizza come from? What type of potatoes will you use here? What other sort of vegetables could you use in a pizza? What sort of other pizza could we make?

ourkitchengarden.net

Yes please, I’ll have another

Categories: Kitchen Garden, Recipe | Tags: , , , , , , , , , , | Leave a comment

Autumn salad with poached eggs & tarragon and landcress mayo

The list of ingredients we can add to a salad is endless… here at Bondi we base our salads on lettuce leaves, fresh herbs and then seasonal additions. This one is a favourite with just-poached eggs and a wonderfully creamy dressing. You can substitute watercress for landcress if you like.

ourkitchengarden.net

The double-yolk autumn salad with tarragon & landcress mayo

Fresh from the garden: Salad leaves, eggs, tarragon, chives, oregano, thyme, marjoram, edible flowers, cucumber, spring onions, garlic, lemon – the list goes on…!
Recipe source: Melissa
Serves: 4 at home or 24 tastes

Equipment:

  • Bowls – 2 large, 1 medium, 2 small
  • 2 salad spinners
  • Tea towel, kitchen paper
  • Chopping boards & knives
  • Non-stick frying pan
  • Slotted spoon
  • Stick blender & cup
  • Measuring: jug, teaspoon, ½ teaspoon
  • Scales
  • Mezzaluna
  • Citrus juicer
  • Serving bowls


Ingredients:

  • 4 freshest eggs
  • A bunch of salad leaves
  • A large handful of herbs
  • A few garnishing flowers
  • Special extras: cucumber, spring onions – whatever you have

For the tarragon mayonnaise:

  • A small bunch of landcress
  • 1 large sprig tarragon
  • 1 extra egg
  • ½ teaspoon salt
  • 1 small clove garlic
  • 1 level teaspoon mustard powder
  • 120ml rice bran or veg oil
  • 25ml extra-virgin olive oil
  • 1 teaspoon white wine vinegar
  • ½ a lemon
  • Freshly milled black pepper

What to do:

For the salad:

  • Fill up the 2 big bowls with cold water & wash the salad leaves in several changes of water. Spin dry and wipe the bowls dry.
  • Lay out the tea towel and line it with kitchen paper. Spread the salad leaves over the paper and roll the whole lot up like a log. Keep the rolled parcel of leaves in the fridge until needed.
  • Fill up another bowl with water and wash the herbs and small garnishing leaves. Spin dry and  pick leaves, discarding stalks into compost.
  • Pick the petals from the flowers and reserve in a small bowl with the garnishing leaves.
  • Chop the herbs and keep separate in their own small bowl.
  • Cut the root end from the spring onion and strip off the first layer or two. Thoroughly wash the remaining part and then chop into fine discs. 

To poach the eggs:

  • Fill a medium-sized frying pan with water to a depth of about 5cm, then heat it to a bare simmer.
  • Then break the eggs into the simmering water, one at a time until they’re all in, and let them cook, uncovered, for 2 minutes. Fill a large bowl with cold water.
  • Then use a draining spoon to lift them from the water and transfer them to the bowl of cold water until you are ready to use them.

For the sauce:

  • Wash, spin dry and separate off the landcress leaves and discard any tough stalks into the compost.  Wash & spin dry the tarragon. Pick the tarragon to yield about 1 tablespoon leaves.
  • Squeeze the lemon half to yield ½ teaspoon lemon juice. Peel the garlic clove & finely chop. Wash & dry the chives and snip finely.
  • Now break the extra egg into the cup of the stock blender, add the salt, garlic, mustard powder and a few twists of freshly milled black pepper, then blitz to blend these together.
  • Now mix the oils in the jug and ask a helper to pour it in a thin trickle into the cup whilst it’s blending. When all the oil is in, add the vinegar, lemon juice, landcress and tarragon leaves, then blend again until the leaves are quite finely chopped.

 To serve:

  • Take the lettuce from the fridge and chop or tear into mouth-sized strips. Pop them into a big bowl, then add the spring onions and drizzle about a teaspoon of olive oil, a teaspoon of white wine vinegar  & a sprinkle of flaked salt over the whole lot.
  • Using your hands, turn the leaves to coat in the dressing and then divide the lot among your serving bowls.
  • Spoon an egg at a time out of the water and dry off with some paper towel or a tea towel, and then carefully arrange one egg on the top of each salad.
  • Drizzle the mayo over the top of each salad, followed by a sprinkle of herbs and the flowers and serve immediately!

Notes: What is mayo short for? What other salad dressings could you use? Why do we need to wash the leaves so well? Why do we roll the leaves up to put them in the fridge? Why don’t we need to use vinegar to poach the eggs? Why do we put the eggs into cold water?

Categories: Kitchen Garden, Recipe | Tags: , , , , , , , , , , , | Leave a comment

Stir-fried eggs with tomato and chilli soy

Jill says, ‘This is a simple dish of Chinese ‘scrambled’ eggs that tastes fresh, clean and light. Serve with rice and Asian greens to max it up into a bigger meal.’

ourkitchengarden.net

Fresh from the garden: tomatoes, coriander, eggs, chilli, spring onions
Recipe source: adapted from a recipe by Jill Dupleix
Serves: 6 as a snack or 24 tastes

Equipment:

  • Chopping boards and knives
  • Salad spinner
  • Measures – 1/3 cup, tablespoons, teaspoons
  • Bowls – 2 large, small
  • Fork or whisk
  • 2 woks
  • Serving plates & small sauce bowls
Ingredients:

  • 2 large vine-ripened tomatoes
  • A small bunch of coriander
  • 1 long red chilli (or green if you don’t want too much heat!)
  • 2/3 cup light soy sauce
  • 2 x 6 eggs
  • 2 teaspoons sesame oil
  • 4 spring onions
  • Flaked salt & black pepper
  • 2 tablespoons peanut oil (we use vegetable or Rice Bran oil)

What to do:

  • Cut the tomatoes in half, scoop out and discard the seeds and juice, then finely chop the flesh. Set aside.
  • Wash and spin dry the coriander and pick out some juicy sprigs.
  • Slice the chilli in half lengthways and remove the seeds out by scraping each half. Slice the flesh really thinly and then mix the sliced chilli and soy sauce into 4 small sauce bowls. Set aside.
  • Wash and strip the first layer of skin from the spring onions and then thinly slice them. Crack 6 eggs each into both bowls, and then lightly beat each bowl. Add a teaspoon of sesame oil into each bowl, most of the spring onion, and some salt and pepper and combine.
  • Heat the 2 woks over high heat until hot, then add the vegetable oil. Once the oil is hot, add each bowl of egg mixture into the woks and leave for 10 seconds, then use a wooden paddle or spatula to slowly draw the outside of the egg mixture into the centre, allowing the uncooked egg to cook. Cook for 2-3 minutes until the egg is almost set, then scatter with the tomato. Lightly toss once or twice to warm through. (It’s important not to allow the tomato to cook for too long, or it will make the eggs too watery.)
  • Separate each wok mixture into 2 and then divide out between 4 serving plates. Scatter with the remaining spring onion and the coriander sprigs, then spoon over some chilli soy sauce and serve immediately.

Caution:

  • Wash your hands thoroughly after coming in contact with chilli, as the capsaicin (the oil within the chilli) burns when it comes in contact with your eyes or sensitive skin.

Notes: Why do we discard the tomato seeds & juice in this recipe? Why do we scrape the seeds out of the chilli?

Categories: Kitchen Garden, Recipe | Tags: , , , , , , , , , | Leave a comment

School holiday program!

ourkitchengarden.net

Getting stuck in!

I’m so excited to be able to announce 2 new dates for the Our Kitchen Garden school holiday program!

I’ll be opening the cottage in the autumn holidays on Tuesday 23rd April and  Wednesday 24th April for 2 full-day sessions – for students aged 7 to 12 – for more details click out the School Holiday Program tab at the top of the page!

And if you need any convincing, take a look at the photos and recipes from our previous classes in this blog – these kids love rolling up their sleeves and getting their hands dirty!

ourkitchengarden.net

Beans and beans

Categories: Kitchen Garden, School Holiday Program | Tags: , , , , , , , , | Leave a comment

Quick pesto!

This popular sauce is, of course, perfect for steaming hot pasta – but what about as part of an antipasto plate with feta or goats’ cheese, roasted capsicum and garlicky bruschetta? Or even added to a toasted cheese sandwich mmmmm… And the Quick part? At school we usually work the children’s muscles in pounding the leaves, but here is a no-fuss food processor option for home… I mean, why bark when you have a dog? Woof.

ourkitchengarden.net

Basil!

Fresh from the garden: basil, garlic
Recipe source: Melissa

Equipment:

  • Scales
  • Bowls – big, medium
  • Salad spinner
  • Grater
  • Small frying pan
  • Food processor
  • Chopping board and small knife
  • Spatula
  • Measuring jug
  • Tablespoon & jar if needed
  • Serving bowls if needed
Ingredients:

  • 1 big bunch basil, to yield about 100g
  • 50g parmesan or grana padano
  • 80g pine nuts
  • 1 large clove garlic
  • Flaked salt
  • 200ml extra-virgin olive oil plus extra

What to do:

  • Wash and carefully dry the basil, picking off the leaves and discarding the stalks. Weigh to make sure you have the correct amount and then wash in cold water in a big bowl and spin dry thoroughly.
  • Weigh then grate the parmesan.
  • Heat the frying pan on a medium heat and lightly dry-toast the pine nuts, shaking regularly so that they don’t burn.
  • Peel the garlic clove, chop it into small pieces and place in the bowl of the food processor with a good pinch of salt. Blend these to a paste and then add the pine nuts and blend again. Stir in the parmesan.
  • Tear the basil leaves and put them into the mixture. Blending, gradually pour in all the olive oil. Scrape down with the spatula once or twice.
  • Taste for salt and adjust if necessary.
  • Serve, or if using later, spoon into a jar, pour in a thin layer of olive oil to cover, add the lid and refrigerate for up to 3 or 4 days.

Notes: With what else can you use pesto? What also goes with well with basil? Why do we toast the pine nuts? What could you use instead of pine nuts?

Categories: Kitchen Garden, Recipe | Tags: , , , , , , , , , , | 1 Comment

Roasted capsicum

A wonderful thing happens when you roast capsicum: the crunchy and slightly sour tastes make way for luscious, slippery sweetness – & when married with garlic and herbs the effect is totes delish! My favourite thing to do is gobble these capsicum strips with the marinated feta, some pesto and slices of grilled bruschetta – a perfect little antipasto snack matched with a slice or 5 of super-thin prosciutto and/or some garlic prawns in terracotta, a la Dogs Bar circa 1993… happy days!

ourkitchengarden.net

Fresh from the garden: capsicum, garlic, thyme, marjoram, sage
Recipe source: Melissa

Equipment:

  • Bowls – big, medium
  • Baking tray
  • Oven mitts
  • Tongs
  • Freezer bag
  • Serving bowls
Ingredients:

  • 4 or 5 capsicums
  • Extra-virgin olive oil
  • A head of garlic
  • A small handful of thyme sprigs
  • A small handful of marjoram sprigs
  • Flaked salt

What to do:

  • Preheat oven to 21oC.
  • Wash and thoroughly dry the capsicum.
  • Liberally douse the capsicum with olive oil, massaging the oil into every crevice.
  • Place capsicum onto the baking tray, together with the head of garlic and the thyme & marjoram sprigs.
  • Sprinkle a sparing quantity of flaked salt onto the capsicum and bake for 15 minutes.
  • Carefully remove from oven with oven mitts and using the tongs, turn caps onto their sides.
  • Bake a further 10 minutes, then turn them over.
  • Repeat until all 4 sides have been in contact with the baking tray.
  • Once the capsicums are blackened and soft, remove from the oven, place into a freezer bag, seal tightly and allow to cool for 10 minutes.
  • Once cool enough to handle, put pressure on the stem end and it will pop out. Tear the capsicum in half, and remove all pith and seeds, the skins with slide off easily.
  • Repeat for remainder of the roasted capsicums.
  • Peel off each clove of garlic and squeeze from tip to base. The roasted garlic cloves are much more fragrant and milder than pan fried garlic.
  • Tear the capsicum into thin strips and mix with the herby oil and garlic.
  • Divide into serving bowls and eat with crusty bread!

Notes: What goes well with capsicum? What other vegetables can you roast? Why do we put the capsicum in a plastic bag?

ourkitchengarden.net

Categories: Kitchen Garden, Recipe | Tags: , , , , , , , , , | Leave a comment

Garlic bruschetta with tomatoes and basil

We can elevate even the simplest of snacks into works of art by performing a little garlic magic first… And over an open bbq flame at home takes the toast to an altogether more yummy stratosphere…

ourkitchengarden.net

Fresh from the garden: tomatoes, garlic, basil
Recipe source: Melissa

Equipment:

  • Knives – bread, small
  • Paper towel
  • Salad spinner
  • Bowls
  • Chopping board
  • Grill trays
  • Tongs
  • Oven mitts
  • Garlic press
  • Serving plates
Ingredients:

  • A load of great sourdough bread
  • A bowl of tomatoes
  • A few sprigs of basil
  • Extra-virgin olive oil
  • 3 garlic cloves
  • Flaked salt & black pepper

What to do:

  • Heat the grill on high.
  • Wash and gently dry the tomatoes on some paper towel. Carefully slice the tomatoes into bite-sized pieces, taking care not to squeeze all the juice out!
  • Place in a big bowl and drizzle a little olive oil over the whole lot. Peel and then squeeze one clove of garlic through the press into the tomatoes.
  • Pick the basil leaves and wash in a clean bowl of cold water. Spin the leaves dry and then tear into tiny pieces and scatter over the tomatoes. Sprinkle with a pinch or two of salt and a grind of pepper, then gently toss with a large spoon to combine. Leave for the flavours to mingle.
  • Carefully slice the bread – you may find it easier to ask an adult to slice the loaf down the middle lengthways first, and cut each half separately – and place on grill trays.
  • Slide the bread into the oven to grill & lightly toast, and using the oven mitts, turn when needed (watching to make sure it doesn’t burn).
  • When ready bring toast out from the grill using the oven mitts. Cut the end off the remaining garlic cloves (you don’t need to peel them) and rub each cut-side down on the toast a few times.
  • Arrange onto serving plates with a spoonful of tomato mixture on each one. Yum! 

Notes: What happens when you rub the garlic onto the hot toast? What makes bread sourdough bread? Why do we let the flavours mingle?

ourkitchengarden.net

Categories: Kitchen Garden, Recipe | Tags: , , , , , , , , | Leave a comment

Kitchen News – 6th December 2012

(OK this is a bit late but I’ve finally managed to find time to get this all updated! Watch this space…)


IMG_1806

Sunny and hot, cold and windy, humid and foggy, sunny and windy, cold and rainy, warm and rainy, sunny and windy… What’s going on? Goodness, just as I think I can pack the heaters away and start chilling cucumber soup, the wind & rain get me reaching for the long sleeves & slow-braised lamb again… One thing’s for sure though: the broad bean season has definitely come to an end! I counted to about 25 kilos but then I reckon we plucked another 25kg after that… and even today I finished blanching & freezing another box-worth, so will be able to surprise and delight (!) some eager-beavers in the first few weeks back in 2013…

So to business: Weeks 9 and 10 of Term 4 traditionally only mean One Thing: the Festive Menu! We’re mixing it up though in the interest of sustainability and using up what we’ve got before the big break… so we’re balancing mini Christmas cakes and festive shortbread with rainbow silverbeet and spring onion calzone, and the return of our fabulous Nicoise salad as it’s just SO good with our spanking-fresh eggs, and those green dwarf beans just keep on comin’… the children have also been hard at work signing their thankyou cards and then completing them in our kitchen classes, and Ligia has been helping our groups create beautiful mandala-inspired patterns on them with some clever kitchen garden materials…

IMG_1805

This will be my last Kitchen News of 2012… So with that I would like to thank all the Bondi children for being so enthusiastic and inspiring, for being so helpful and happy, for saying hello in the playground and telling me that they made one of our dishes at home, for trying new foods and for being brave. I’m very sad to be saying goodbye to the beautiful Year 6s (and some year 4s too) who have been such a joy to work with this year, but in reality the circle of life continues and I’ll be a proud mum waving my big girl off at the school gates for the first time in the New Year…

Our heartfelt thanks too to our great community of KG volunteers who help these kids achieve so much every lesson – and that’s not just the delicious food: I see first-hand the changes in self-esteem, self-control, technical ability & fine motor skills, the ability to work as a team (and even vegetable identification and preparation!) – and then stay and sweep the floor too! And a big group-hug to all the amazing staff and teachers at Bondi who help me do this great job and keep me smiling day after day…

Thank you for a great year. Love, Melissa x

IMG_1867

Categories: Kitchen Garden | Tags: , , , , , , , , | Leave a comment

Carrot and fennel soup

We love all the different combinations of vegetables that the seasons throw at us… and adding various spices can change everything! This is a lovely silky variation of soup…

ourkitchengarden.net

Fresh from the garden: carrot, fennel, onion, thyme, coriander
Recipe source: Melissa
Serves: 6 or 24 tastes

Equipment:

  • Kettle
  • Chopping board & knife
  • Scales
  • Potato peelers
  • Graters
  • Paper towel
  • Stockpot & lid
  • Measures: jug, tablespoon, teaspoon
  • Bowls – big, medium, small
  • Wooden spoon
  • Medium heavy-bottomed saucepan
  • Stick blender
  • Serving bowls
Ingredients:

  • 2 onions
  • 1 large thyme sprig
  • ½ teaspoon cumin seeds
  • 50g butter
  • 1kg carrots
  • A head of fennel
  • 1.25 litre stock (or 1 tablespoon bouillon & 1.25 litre boiling water)
  • Cooking salt
  • Flaked salt and black pepper
  • A little bunch of coriander

 What to do:

  • Fill the kettle if using and set to boil.
  • Peel and thinly slice the onions. Wash and pat dry the thyme sprig and strip off the leaves.
  • Melt the butter in the stockpot, then add the onions, the cumin and thyme, and cook over a low heat until tender for about 10 minutes.
  • Meanwhile, wash & peel the carrots, then grate them and reserve in a big bowl.
  • Wash, then top and tail the fennel, discarding the discoloured outer layer if desired. Slice the fennel as thin as you can.
  • After the 10 minutes, add the carrots & fennel to the onion and add a teaspoon of salt. Stir, then cook gently for 5 minutes with the lid on.
  • Add the stock or bouillon and water, bring to the boil then lower the heat and simmer until the carrots & fennel are tender, about 20 minutes.
  • Wash the coriander and spin dry. Pick the leaves from the stalks and very finely chop the stalks. Gently chop the leaves but leave them quite big.
  • When done, blitz with the stick blender, season to taste and serve into your bowls. Garnish with the chopped coriander.
  • Serve right away or chill overnight to serve cold the next day, perhaps with a little sour cream drizzled in…

Notes: What is bouillon? How do you make stock? Why do we leave the coriander leaves quite big?

Categories: Kitchen Garden, Recipe | Tags: , , , , , , , , , , | Leave a comment

Create a free website or blog at WordPress.com.