Kitchen Garden

Mini chive, gruyere and rocket frittate

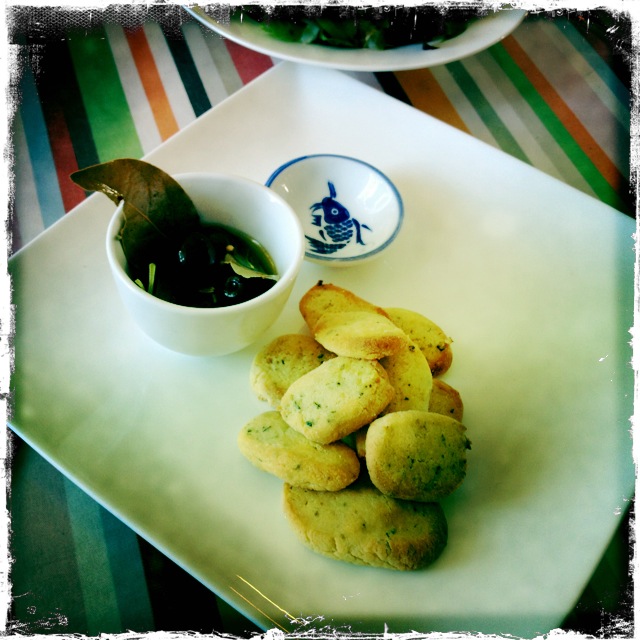
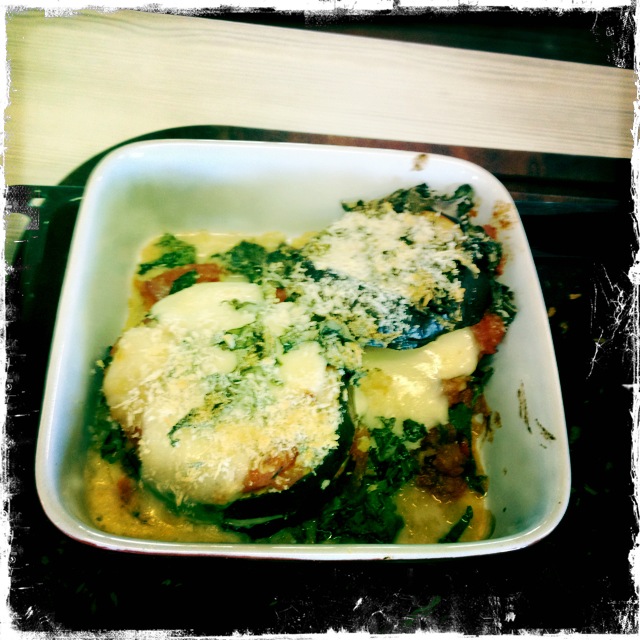
Tasty little morsels – these are lovely just warm out of the oven with a dollop of basil aioli or even cold to pop in a lunch box!

ourkitchengarden.net

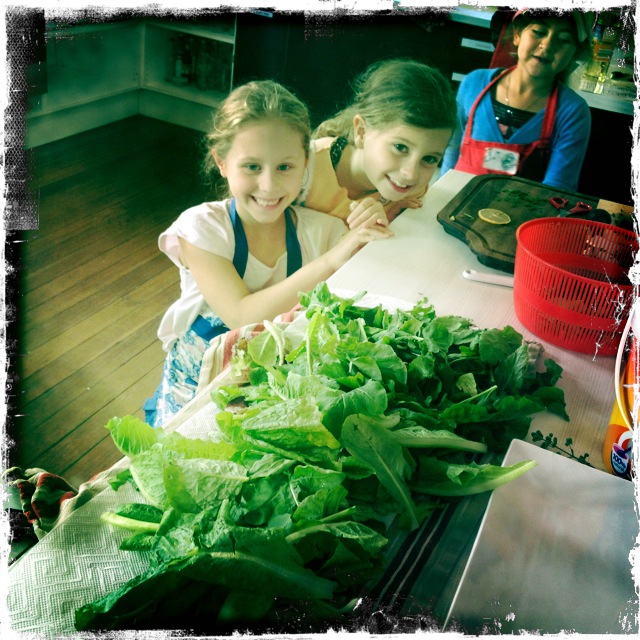
Fresh from the garden: chives, eggs, rocket, parsley
Recipe source: adapted from recipe by Cynthia Black Australian Good Taste
Makes: 48 mini frittate

Equipment

  • Pastry brush
  • 2 mini muffin pans
  • Paper towel
  • Scissors
  • Graters
  • Bowls – big, small
  • Chopping board & knife
  • Whisk
  • Salad spinner
  • Measures –  jug, cup, tablespoon, teaspoon
  • Serving plates
Ingredients:

  • 2 tablespoons olive oil
  • A small bunch of chives
  • 9 eggs
  • 200ml thickened cream
  • 50g gruyere
  • 30g parmesan
  • A small handful rocket plus extra to garnish
  • 2 or 3 sprigs of parsley
  • Basil aioli

What to do:

  • Preheat oven to 180°C. Brush the holes of the non-stick mini muffin pans with a little of the oil.
  • Wash the chives and pat dry with paper towel. Using the scissors, thinly snip. Divide the chives between the mini-muffin holes.
  • Measure and coarsely grate the gruyere. Finely grate the parmesan. Sprinkle the cheeses into each of the chive holes.
  • Wash, spin-dry and shred most of the rocket to yield about a cup, reserving a few leaves for the garnish. Wash and spin-dry the parsley, discard the stalks and chop the leaves to yield about a tablespoon. Add these too to the pans.
  • Crack the eggs into a large bowl and lightly whisk. Measure the cream & add into the same bowl, whisk again and then carefully pour into the prepared pans.
  • Bake for 20 minutes or until just set.
  • Meanwhile clean up your station & then make the aioli (see separate recipe).
  • When the frittate are ready, set aside in pans for 5 minutes to cool slightly before dividing onto your serving plates. Soak the pans in water straight away…!
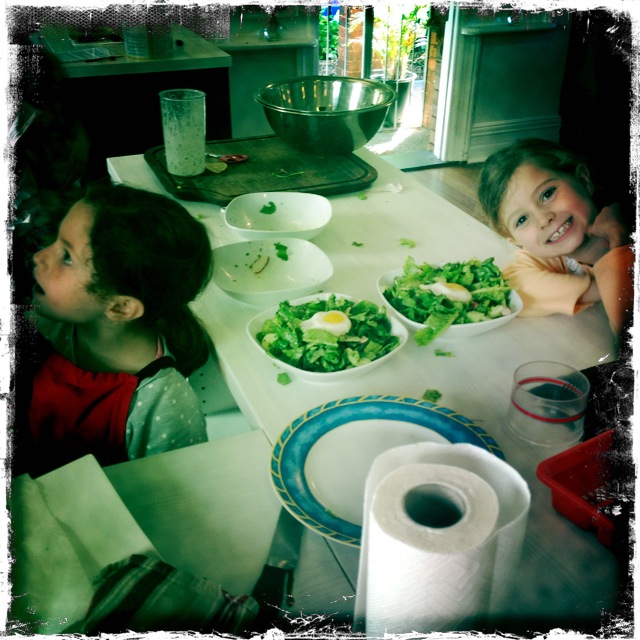
  • Garnish your serving plates with the rocket, add the frittate, serve with a dollop of aioli & eat!

Notes: Why do we need to preheat the oven? What is gruyere? What does to shred mean?

Categories: Kitchen Garden, Recipe | Tags: , , , , , , , , , | Leave a comment

Green soup!

(Rocket, silverbeet and potato…)

These sunny-but-cool days & lengthening nights sing to me of soup, soup and more soup – and this is a great way to use up the bolting rocket!

ourkitchengarden.net

Green soup!

Fresh from the garden: rocket, silverbeet, potatoes, chives
Recipe source: Melissa
Serves: 8 or 24 tastes

Equipment:

  • Kettle
  • Scales
  • Chopping boards & knives, scissors
  • Peelers, garlic press
  • Bowls – big
  • Salad spinner
  • Large stockpot
  • Wooden spoon
  • Measures – litre jug, tablespoon
  • Handheld mixer
  • Ladle
  • Serving bowls
Ingredients:

  • 500g waxy potatoes
  • A small bunch of chives
  • 1 big bunch rocket
  • 2 or 3 silverbeet stems & leaves
  • 4 cloves garlic
  • 50g unsalted butter
  • 1 litre water
  • 1 tablespoon bouillon
  • Black pepper

What to do:

  • Fill the kettle and, making sure you have dry hands, set it to boil.
  • Peel the potatoes under running cold water & cut into 2cm cubes.
  • Wash the chives, shake dry and slice into 1cm bits.
  • Peel the garlic cloves and squeeze them through the garlic press.
  • Melt butter in the large stockpot over medium heat and sauté the chives and garlic for a minute, and then add the potato cubes and turn so that the potato sweats in the butter.
  • Meanwhile wash the rocket in several changes of water and spin dry. Roll up and slice into thin ribbons.
  • Wash the silverbeet in several changes of water and shake dry. Slice or cut the leaves up the middle to remove the stems, then chop them into cm pieces. Roll up the leaves and finely slice them into ribbons.
  • Measure the bouillon & boiling water into a litre jug, stir and then pour it into the potatoes. Bring them to a boil, then turn down to a simmer, cover and cook gently over low heat for 10 minutes, then add the silverbeet stalks.
  • Cook for 2 minutes – check that the potato is tender, then stir in rocket and silverbeet leaves. Increase heat to medium and simmer for another 2 minutes. If it’s really thick you may want to add another cup of hot water.
  • With dry hands, plug in the handheld mixer and carefully whizz the soup until it is silky smooth.
  • Taste for correct seasoning (the bouillon is salty so you may not need any extra salt) and ladle into bowls to serve.

Notes: What other vegetables can be used for soup? How many different procedures are there in this recipe? Why do we want the potato to ‘sweat’?

ourkitchengarden.net

Thick green soup!

Categories: Kitchen Garden, Recipe | Tags: , , , , , , , , , , , , , | Leave a comment

Warm salad of chestnuts, apple & sage

I love autumn and the change in vegetables and fruits, as well as the colder nights and return to heartier dishes. This is lovely as a first course, or as an accompaniment to roast pork or even a slab of sheep’s milk cheese…

ourkitchengarden.net

Warm salad of chestnuts, apple & sage

Fresh from the garden: chestnuts, apples, red onion, lettuces, sage
Recipe source: Melissa
Serves: 6 or 24 tastes

Equipment:

  • Chopping board and knives
  • Baking tray
  • Bowls – big
  • Salad spinner
  • Paper towel & tea towel
  • Apple corer, mandoline
  • Measures – scales, tablespoon
  • Frying pan, slotted spoon
  • Wooden spoon, foil, plate
  • Serving bowls
Ingredients:

  • 10 fresh chestnuts
  • 2 pink lady apples
  • 1 red onion
  • A head of lettuce
  • A handful of radishes
  • Extra-virgin olive oil
  • 20 fresh sage leaves
  • 20g butter
  • Aged balsamic vinegar

What to do:

  • Preheat oven to 180C.
  • Carefully cut a small cross in the base of each chestnut. Place on a baking tray and roast in the oven for about 20 minutes until soft.
  • Meanwhile, separate out the lettuce leaves and wash thoroughly in several bowls of cold water. Spin-dry and then break or chop up the leaves into mouth-sized pieces. Wrap the leaves in a paper towel-lined tea towel and store in the fridge until you need them.
  • Wash and spin-dry the sage leaves. Wash the radishes & slice them with the mandoline.
  • Wash and wipe the apples dry, then using the corer, cut out the apple cores. Cut in half, then crossways into thin 5mm slices.
  • Peel the onion, cut it in half and then thinly slice it using the mandoline.
  • Heat the butter in the frying pan over medium heat. Add the sage leaves and cook until crisp, stirring & then transfer to a plate lined with paper towel.
  • Then add the apple slices to the frying pan and cook, stirring occasionally, for 5 minutes or until apples are golden and tender. Use a slotted spoon to transfer the apple slices to a plate.
  • Add the onion to the frying pan and cook, stirring occasionally, for 5 minutes until soft.
  • Carefully slide the chestnuts out of the oven & leave to cool for 5 minutes until cool enough to handle. Peel away the shells and the light brown skin and break into pieces. Set aside.
  • Bring out the leaves from the fridge and drop into a large bowl. Drizzle with a tablespoon of balsamic vinegar, add a pinch of flaked salt and grind of pepper. Gently toss with your fingers, then add the radishes, apple slices & chestnut pieces and divide among serving bowls. Finish off by garnishing with the crispy sage leaves.
ourkitchengarden.net

Infernal chestnuts!

Categories: Kitchen Garden, Recipe | Tags: , , , , , , , , , , | Leave a comment

Parmesan and dried rosemary biscuits

When I worked at bel mondo a few years ago for the Manfredis we used to serve the parmesan biscuits with little bowls of marinated olives to guests as they sat down at the table – and tried not to eat them while we worked!

ourkitchengarden.net

Parmesan biscuits & olives, simply

Fresh from the garden: rosemary, egg
Recipe source: adapted from a recipe by Steve Manfredi 
Makes: about 30 biscuits

Equipment:

  • Grater
  • Bowls – small
  • Fork
  • Paper towel
  • Chopping board & knife
  • Food processor
  • Scales
  • Cling film & baking paper
  • Baking sheets
  • Serving plates
Ingredients:

  • 80g parmesan
  • 1 egg
  • A few stalks of dried rosemary
  • 125g salted butter at room temperature
  • 250g plain flour
  • Cooking salt

 What to do:

  • Grate the parmesan. Crack the egg into the small bowl and lightly whisk with the fork.
  • Slide the rosemary leaves from the stalks and run them through the food processor. Then add in the salted butter, plain flour, grated parmesan, egg and a pinch of salt.
  • Pulse until they are well incorporated and the dough forms a ball. If the ingredients are too dry add a little water until the dough catches.
  • Remove from the processor, form the dough into a sausage about the diameter of a 50c piece, wrap in cling film and rest in the refrigerator for 20 minutes.
  • Preheat the oven to 180C and line the baking sheets with baking paper.
  • Cut the sausage into coins 3-4mm thick and place on the baking sheets.
  • Cook for 10-12 minutes until golden.

Notes: How is the dried rosemary different to the fresh? Why do we ‘rest’ the dough? What would you serve these biscuits with? What other herbs could you use?

Categories: Kitchen Garden, Recipe | Tags: , , , , , , , | Leave a comment

Our Bondi olives

These olives were picked from our own trees here at Bondi at the end of February and beginning of March this year. They spent about 2 months brining, both black and green, separated by harvest date & slit on two sides – the first week with a daily change of 1/3 of a cup of salt to a litre of water & then a weekly change of the same… In 2013 we harvested about 4.5kg of black and green combined & they have been brining for 2 months. This recipe is for preserving some olives & eating the rest – the jars of olives are even better after a week & will last undisturbed in the cupboard for at least 12 months; once opened will last for about a month in the fridge.

ourkitchengarden.net

Our olives!

Fresh from the garden: olives, rosemary, thyme, sage
Recipe source: Melissa
Makes: 3 jars plus a bowl to eat!

Equipment:

  • Slotted spoon
  • Paper towel
  • 3 small jars with metal lids
  • Knife – small
  • Baking tray
  • Saucepan
  • Oven mitts
  • Small ladle
  • 4 little bowls to serve with separate bowls for pits
Ingredients:

  • 500g black & green olives in brine
  • 1 sprig of rosemary
  • 2 sprigs of sage
  • A small handful of thyme sprigs
  • 4 garlic cloves
  • 1 orange
  • 2 teaspoons fennel seeds
  • 1 teaspoon coriander seeds
  • ½ teaspoon chilli flakes
  • 4 bay leaves
  • 2 or 3 cups extra-virgin olive oil

What to do:

  • Preheat oven to 160°C.
  • Thoroughly wash jars and lids in hot soapy water, rinse well and leave upside down to drain.
  • When the oven is ready, place jars right-side up on the baking tray and slip into the oven for 5-10 minutes until totally dry. Wipe the lids with paper towel to make sure perfectly dry.
  • Meanwhile scoop olives out of the tub and into the colander with the slotted spoon and rinse in cold water, checking each olive and discarding any that are mushy. Pat dry with paper towel.
  • Wash and thoroughly dry all the herbs and strip the leaves from their stalks.
  • Peel the garlic cloves and gently crush each clove with the back of a knife to break.
  • Carefully slice 1 cm-wide strips of zest from the orange, trying to take just the peel and none of the white pith.
  • Pour the olive oil into the saucepan and add the olives, herbs, chilli, bay leaves, fennel seeds, garlic and orange strips. Heat over medium-low heat until warm & smelling lovely.
  • Using oven mitts slide the tray of jars out of the oven. Using the ladle, carefully fill each jar with a good combination of olives, herbs, spices, orange peel, and garlic. Fill right to the top with olive oil and then seal each with its lid.
  • Spoon the remainder into the four little bowls and place each on a plate with a spare to catch the pits.

Notes: Why don’t we use the olives straight from the trees? Why are they green & black? What does ‘marinate’ mean? Why do we heat up the olive oil? What other ingredients could you use?

ourkitchengarden.net

Olives, jarred

Categories: Kitchen Garden, Recipe | Tags: , , , , , , , , , , , , , | Leave a comment

Melanzane alla Parmigiana

Eggplant Parmigiana

The key here is to make sure the eggplant is well-cooked and therefore slippery and succulent… combined with melted cheese, tomato and basil, well – that’s a marriage made in heaven!

ourkitchengarden.net

Eggplant parmie!

Fresh from the garden: eggplant, basil, onion, garlic, thyme, carrot
Recipe source: adapted from a recipe by Mario Batali in Molto Mario
Serves: 6 or 24 tastes

Equipment:

  • Pastry brush
  • Baking sheet
  • Paper towel
  • Chopping board & knife
  • Bowls – big, med, small
  • Scales
  • Grater
  • Peeler
  • Frying pan
  • Wooden spoon
  • Plate
  • Measures – cup, ¼ cup, tablespoon, teaspoon
  • Egg slice
  • 4 small baking dishes
  • Pot holders
  • Serving plates
Ingredients:

  • Extra-virgin olive oil
  • 2 large eggplant
  • Flaked salt and black pepper
  • 2 cups basic tomato sauce (recipe below)
  • 1 bunch fresh basil
  • A 200g pot of bocconcini
  • 50g Parmigiano-Reggiano
  • 1/4 cup bread crumbs

Basic tomato sauce

  • 2 tablespoons extra-virgin olive oil
  • 1 Spanish onion
  • 4 garlic cloves
  • A handful thyme sprigs
  • 1 small carrot
  • 1 can chopped tomatoes
  • Flaked salt


What to do:

  • Preheat the oven to 230C. Using a pastry brush, oil a baking sheet.
  • Wipe the eggplant and then carefully cut each into slices about ½ cm thick – you may need the mandoline for this, set to the thickest setting. Lightly season each disc with salt and pepper and place on the oiled sheet. Bake the eggplant for about 10 minutes until the slices begin turning deep brown on top.

Then make the tomato sauce:

  • Peel the onion and finely chop. Peel the garlic and finely slice. Wash and wipe the thyme dry, and then strip off the leaves to yield 3 tablespoons. Wash, peel and grate the carrot.
  • Then: Heat the olive oil in the frying pan over medium heat. Add the onion and garlic and cook until soft, about 5 minutes. Add the thyme and carrot and cook 5 minutes more, until the carrot is quite soft. Add the tomatoes and juice and bring to a boil, stirring often. Lower the heat and simmer until thick. Season with salt to taste.

Continued…

  • While the eggplant is baking and the sauce is simmering,  you can organise the rest of the dish: pick the basil leaves, wash them well and spin them totally dry. Rolling up a few leaves at a time into a roll, slice them into very fine ribbons (chiffonade).
  • Drain the bocconcini and carefully cut the balls into thin slices.
  • Measure the parmesan and grate it. Weigh the breadcrumbs and have ready.
ourkitchengarden.net

The stacking game

To complete the dish:

  • When the eggplant slices are done, slide them out of the oven and lower the oven temperature to 180C.
  • We are going to layer the different ingredients into each of the four small baking dishes – to start, sprinkle half a teaspoon or so of olive oil into each dish and then carefully place the largest eggplant slices on top of the oil.
  • Over each slice, spread a spoon or two of tomato sauce over the top and sprinkle with a teaspoon of basil. Place one layer of mozzarella over each and sprinkle with 1 teaspoon grated parmesan. Place the smaller slices of eggplant over each of the discs and repeat with tomato sauce, basil, and the 2 cheeses. Repeat the layering again until all the ingredients are used.
  • Sprinkle the breadcrumbs over the top of the eggplant dish, and bake uncovered until the cheese melts and the tops turn light brown, about 15/20 minutes.
  • Using pot holders, carefully place on serving plates and serve immediately.

Notes: This dish’s original name is melanzane alla Parmigiana – what does it mean and which language is it from? What other foreign language dishes can you name?

ourkitchengarden.net

Categories: Kitchen Garden, Recipe | Tags: , , , , , , , , , , , , , | Leave a comment

Kitchen garden news – 16th May 2013

ourkitchengarden.net

Our own Bondi olives

Even though we’re in deepest late-autumn, with these wonderful warm and sunny days we are continuing our run of eggplant and basil in the garden like it’s the middle of summer… So we’re capitalising on this and also fulfilling our cool-evening cravings for comfort food: Melanzane alla Parmigiana (baked eggplant with parmesan, basil and tomato) has been wowing the crowds with its wafty oven-baked aromas and gooey deliciousness!

And the olives have been brining and are ready to be jarred-up, so these weeks have seen the classes bottling and preserving our 4½kgs-worth picked back in February & March – for our Bondi Olives we’ve used orange peel, rosemary, thyme, fennel seed and bay in a nwarm extra-virgin olive oil bath and the results are wonderful – really savoury and delicious. The Olive teams have been busy also knocking up a batch of bel-mondo-inspired Parmesan & dried rosemary biscuits to go with as a wee appetiser…

Also on the menu is a Warm salad of chestnuts, apple and sage – this is a lovely autumn salad, with all the different textures and combination of sweet and savoury, and excitement of possible chestnut explosions! And I think this menu’s soup is quite possibly the thickest, greenest soup we have seen… so chunky you could carve it, or at least spread it on toast! I quite honestly can tell you that the Silverbeet, rocket and potato soup gets eaten up every class and there is never any left!

And last but not least, Rhubarb and pear compote with vanilla yoghurt – the perfect brownie-point winner: if you forgot Mums’ Day last week, this is the chance you need to redeem yourself!

All recipes will be up before the weekend: ourkitchengarden.net

And one last thing! We will be making pesto to sell over the next 2 weeks so bring your $5 on a Thursday arvo for a tub of end-of-season free-range Bondi PS Pesto!

Cheers! Melissa

Categories: Kitchen Garden, News | Tags: , , , , , , | Leave a comment

OKG School Holiday Program – Wednesday 24th April 2013

ourkitchengaredn.net

Wednesday’s menu

MENU
Introduction – Knife Licences

MORNING TEA
Mushroom and rocket frittate*
Apple and cinnamon compote with vanilla yoghurt*
Ava’s orange Anzacs*

Chook care – Garden walk & herb id
Harvesting

LUNCH
Autumn fridge soup*
Pumpkin gnocchi with burnt butter and sage*
Lettuces and radish salad with poached eggs and tarragon mayo*

Seedlings & seeds
Sustainability
Take home: start a herb garden!

ourkitchengarden.net

Herb ID & beautiful drawings

And another day dawned bright and clear in the Kitchen Garden Cottage… we had another set of talented and keen children who got stuck in right away & produced some delicious work! As well as the enormous amount of cooking we did, we also had some great discussions about keeping chooks, and what Sustainability means and how we can help our planet… and how growing your own veggies and herbs, cooking at home, choosing less packaging, and recycling and re-using can help, especially if we’re all doing it!

ourkitchengarden.net

Smiling faces!

We got to do a little harvesting and potted our own herbs to take home – and cooked up such a storm that everyone was really full! It was a lovely day, calm and productive… and delicious! (If you would like to reproduce some of the fabulous dishes, click on the asterisked links in the menu to be redirected to the recipes!)

ourkitchengarden.net

Can we start?!

And one last thanks to all the helpers – thanks to Kelly, Erin and the lovely Sharon from Sydney Mum for being the beacons of help and teaching! As always, the helpers are crucial in maintaining momentum (and for the cleaning up at the end!)

ourkitchengarden.net

The lovely Sharon!

Thank you, thank you, thank you! See you next time xx

Categories: Kitchen Garden, School Holiday Program | Leave a comment

Lettuces, rocket and radish salad with poached eggs and tarragon mayo

The list of ingredients we can add to a salad is endless… here we base our salads on salad leaves, fresh herbs and then seasonal additions. This one is a favourite with just-poached eggs and a wonderfully creamy dressing. We always try to have a salad on the table for every meal – I find at the beginning of new year the children are reluctant to eat lettuce leaves or radishes, but that changes as they become used to seeing the bowls on the table, and the difference of ingredients according to the seasons…

ourkitchengarden.net

Perfect yolky salad!

Fresh from the garden: Lettuces leaves, rocket, eggs, cucumber, radishes, tarragon, chives, oregano, thyme, marjoram, parsley
Recipe source: Melissa
Serves: 6 or 24 tastes

Equipment:
  • Bowls – 2 large, 1 medium, 2 small
  • A salad spinner
  • Tea towel, kitchen paper
  • Chopping boards & knives
  • Peelers
  • Mandoline
  • Non-stick frying pan
  • Slotted spoon
  • Stick blender & cup
  • Measuring: jug, teaspoon, ½ teaspoon
  • Scales
  • Mezzaluna
  • Citrus juicer
  • Serving bowls

Ingredients:

  • 4 freshest free-range eggs
  • A bunch of salad & rocket leaves
  • A handful of herbs
  • A few garnishing flowers
  • A cucumber
  • Some radishes

For the tarragon mayonnaise:

  • 50g landcress
  • 1 large sprig tarragon
  • 1 extra egg
  • ½ teaspoon flaked salt
  • 1 small clove garlic
  • 1 level teaspoon mustard powder
  • 120ml rice bran or veg oil
  • 25ml olive oil
  • 1 teaspoon white wine vinegar
  • ½ a lemon
  • Freshly milled black pepper

What to do:

For the salad:

  • Fill up the 2 big bowls with cold water & wash the salad leaves in several changes of water. Spin dry and wipe the bowls dry.
  • Lay out the tea towel and line it with kitchen paper. Spread the salad leaves over the paper and roll the whole lot up like a log. Keep the rolled parcel of leaves in the fridge until needed.
  • Fill up another bowl with water and wash the herbs and small garnishing leaves. Spin dry and  pick leaves, discarding stalks into compost.
  • Pick the petals from the flowers and reserve in a small bowl with the garnishing leaves.
  • Chop the herbs and keep separate in their own small bowl.
  • Wash the cucumber and peel if spiky. Slice into mouth-sized pieces.
  • Wash the radishes and trim any roots and stalk. Slice into smaller pieces or chunks – or even better, use the mandoline to carefully slice super-thin discs.

To poach the eggs:

  • Fill a medium-sized frying pan with water to a depth of approximately 4cm, then heat it to a temperature just sufficient to keep the water at a bare simmer.
  • Then break the eggs into the simmering water, one at a time until they’re all in, and let them cook, uncovered, for 2 or 3 minutes. Fill a large bowl with cold water.
  • The eggs are done when the white is no longer wobbly, then use a draining spoon to lift them from the water and transfer them to the bowl of cold water until you are ready to use them.

For the sauce:

  • Wash, spin dry and separate off the landcress leaves and discard any tough stalks into the compost.  Wash & spin dry the tarragon. Pick the tarragon to yield about 1 tablespoon leaves.
  • Squeeze the lemon half to yield ½ teaspoon lemon juice. Peel the garlic clove & finely chop. Wash & dry the chives and snip finely.
  • Now break the extra egg into the cup of the stock blender, add the salt, garlic, mustard powder and a few twists of freshly milled black pepper, then blitz to blend these together.
  • Now mix the oils in the jug and ask a helper to pour it in a thin trickle into the cup whilst it’s blending. When all the oil is in, add the vinegar, lemon juice, watercress and tarragon leaves, then blend again until the leaves are quite finely chopped.

 To serve:

  • Take the lettuce from the fridge and chop or tear into mouth-sized strips. Pop them into a big bowl, then add the spring onions and herbs & drizzle about a teaspoon of olive oil, a teaspoon of white wine vinegar  & a sprinkle of flaked salt over the whole lot.
  • Using your hands, turn the leaves to coat in the dressing and then divide the lot among your serving bowls.
  • Spoon an egg at a time out of the water and dry off with some paper towel or a tea towel, and then carefully arrange one egg on each salad.
  • Drizzle the mayo over the top of each salad, followed by a sprinkle of a few of the snipped chives and the flowers and serve immediately with tongs or service cutlery.

Notes: What is mayo short for? What other salad dressings could you use? Why do we need to wash the leaves so well? Why do we roll the leaves up to put them in the fridge? When would you need to use vinegar to poach the eggs? Why do we reserve the cooked eggs in cold water?

ourkitchengarden.net

Eggcellent salads!

Categories: Kitchen Garden, Recipe | Tags: , , , , , , , , , , , , | Leave a comment

Pumpkin gnocchi with burnt butter and sage

Don’t be put off thinking that these gnocchi are too hard to make! The trick here is to lightly knead the dough so that the gnocchi too are light… super-yum! And once you’ve had a go you will NEVER buy packaged gnocchi ever again! The crispy sage is a big hit too – get the kids to have a smell of the savoury and almost meaty sage leaves, and then compare after the leaves have sizzled in the butter…

And if you’re interested in the gluten-free version, see below!*

ourkitchengarden.net

Pumpkin gnocchi, burnt butter and sage

Fresh from the garden: potatoes, pumpkin, sage
Recipe source: adapted from a recipe by Stephanie Alexander, Kitchen Garden Cooking W/ Kids
Serves: 6-8 or about 24 tastes

Equipment:

  • Ovenproof serving dishes
  • Chopping board & knife
  • Peelers, grater, scales
  • Medium saucepan
  • Wok & steamer basket
  • Bowls – med, small
  • Skewer, colander
  • Baking tray, Mouli food mill
  • Measures – tablespoon
  • Pastry scraper, slotted spoon
  • Frying pan with 5cm sides
  • Non-stick frying pan
Ingredients:

  • 500g potatoes (use Nicola or Desiree)
  • Cooking salt
  • 600g pumpkin (use a dry-fleshed variety, such as butternut)
  • 320g plain flour, plus extra for dusting
  • 80g Parmesan
  • 20 large sage leaves
  • 150g butter
  • Ground nutmeg
  • Flaked salt and freshly ground black pepper
ourkitchengarden.net

Gnocchi ready for the pan

What to do:

  • Preheat the oven to 120C and place serving dishes in the oven to keep warm. Peel the potatoes, cut into chunks, then place in a saucepan with a teaspoon ofcooking salt and enough cold water to cover generously. Bring to the boil and cook for 15 minutes.
  • Peel and seed the pumpkin. Weigh to make sure you have 500g and cut into bite-sized chunks. Place a wok over a high heat and pour in enough hot water to come a third of the way up the sides. Rest a bamboo steamer on top and spread the pumpkin cubes out in it; cover and steam for 10 minutes. Set the pumpkin aside. Meanwhile weigh the parmesan and grate.
  • Check the potatoes are tender with a skewer then drain, return to the saucepan, shake over the heat to dry out and tip into a bowl. In a separate, small bowl, place the flour. Set this aside until needed.
  • Lightly flour the workbench and the baking tray, and have the measured flour close by. Squash the pumpkin and potato through the coarsest disc of the food mill to form a loose mound on the bench. Sprinkle with a good pinch of flaked salt. Sieve most of the flour over the vegetable mound and, quickly but lightly, combine. Knead briefly until the dough is smooth, using a little more flour if necessary.
  • Cut the dough into four pieces and, with your fingers, roll each into a sausage 2-3cm wide. Cut each “sausage” into pieces 2cm long and place on the floured baking tray.
  • Fill a high-sided frying pan with water, add a teaspoon of salt and bring to the boil. Drop in as many gnocchi as will fit easily in a layer. Adjust the heat to a simmer. When the gnocchi rise to the surface (about three minutes), lift out with a slotted spoon, drain well and slip into the warmed serving dishes. Return to the oven after adding each batch of gnocchi. Scatter over the Parmesan and a sprinkle of nutmeg.
  • Spread the sage leaves in the non-stick frying pan and add the butter. Fry until the leaves are crisp and the butter has become a medium-brown colour. Spoon the sage leaves and butter over the gnocchi in the serving dish and add some ground pepper. Place heatproof mats on the tables and serve the gnocchi in the ovenproof dishes.

*Gluten-free note: We took off about 100g of the milled potato and pumpkin mixture and combined it with about 30g gluten-free plain flour, the results were fabulous – check these babies out:

ourkitchengarden.net

Gluten-free pumpkin gnocchi

Categories: Kitchen Garden, Recipe, School Holiday Program | Tags: , , , , , , , , , , , , , , , | Leave a comment

Blog at WordPress.com.