Posts Tagged With: kids

End of Year salad

This is where we clean out the garden in preparation for the big break… what better to do than throw it all in together?

IMG_1108

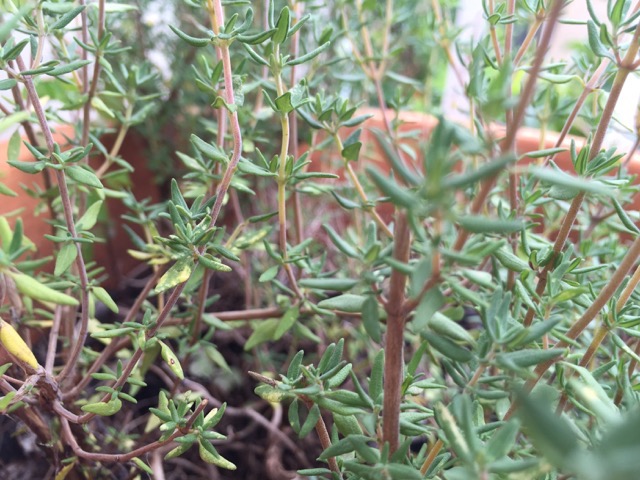
Fresh from the garden: all the last veggies of the year…
Recipe source: Melissa

Equipment:

  • Mortar and pestle
  • Citrus juicer
  • Measures: 1/3 cup, teaspoon
  • Teaspoon
  • Scissors
  • Paper towel
  • 2 baking trays
  • Bowls – 2 big, med, 4 small
  • Salad spinner
  • Chopping boards and knives
  • A deep-sided frying pan
  • Slotted spoon


Ingredients:

  • Kale
  • Cucumbers
  • Salad leaves
  • Bok choy or tatsoi
  • Tomatoes
  • 4 eggs

Herby vinaigrette dressing

  • 1 clove garlic
  • Flaked salt & black pepper
  • 1 lemon
  • 1/3 cup extra virgin olive oil
  • A small handful mixed herbs: tarragon, marjoram, thyme, chives, salad burnet

What to do:

  1. For the dressing: Peel the garlic clove and put it in the mortar with a large pinch of salt. Gently pound to a paste. Juice the lemon and add the juice to the mortar (without pips) then stir the lot with the teaspoon and scrape it into the large bowl. Stir in the oil and grind some pepper, then whisk the dressing lightly. Wash and spin dry the herbs, pick off the leaves and snip finely with the scissors. Add to the dressing.
  2. For the crispy kale: Preheat oven to 180C. Wash the kale really well, checking for bugs or cocoons, and using scissors, cut the leaves from the stalks in large pieces. Spin leaves dry in the salad spinner, then dry extra well with paper towel, then place in a bowl and add in a few pinches of flaked salt and drizzle of olive oil. Massage all the flavour into the kale for a minute, then lay out on the baking trays and slide into the oven for 5 to 7 minutes until crispy.
  3. For the salad: Fill up the 2 big bowls with cold water & wash the salad leaves in several changes of water. Spin dry and wipe the bowls dry. Fill the small bowl with water and wash the small garnishing leaves and flowers. Reserve them carefully on a piece of paper towel then keep separate in the bowl.
  4. Wash the tomatoes and drain and then slice any large ones in half without squashing! Wash the cucumbers, peel alternating strips of each one and then slice into thin discs.
  5. To poach eggs: Fill the deep-sided frying pan 5cm deep with water and bring to a simmer. Fill the large bowl with cold water. Carefully crack each egg into a small bowl without breaking it and then carefully slide into the water. Let the pan sit for 4 minutes on the lowest heat before removing each egg into the bowl of cold water with a slotted spoon and reserving until needed.
  6. Add the salad leaves to the bowl with the herbs and the dressing. Gently turn the leaves in the dressing using a clean hand without squishing the leaves.
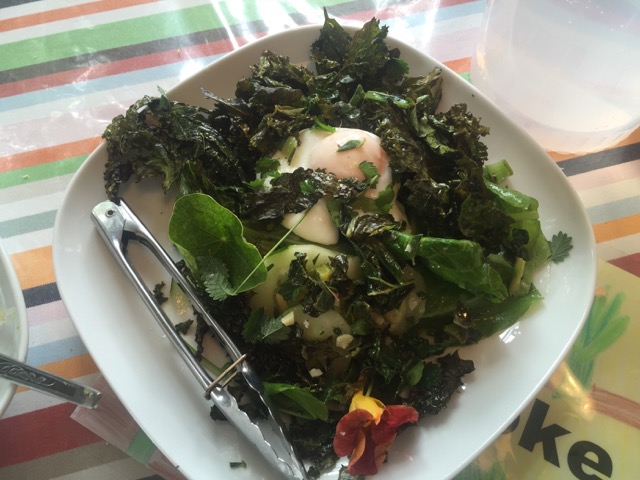
  7. Pile up the dressed leaves into the serving bowls with the  tomatoes and cucumber, sprinkle over the crispy kale, then carefully drain an egg and place in each bowl with the garnishing petals. Serve immediately.
Categories: Kitchen Garden, Recipe | Tags: , , , , , , , , , , , | Leave a comment

Broad bean, parmesan and pea mash

We love broad beans when they arrive in the spring – they’re a true seasonal and local veg! Our harvest wasn’t huge this year so we added frozen peas in too for bulk and sweetness.

IMG_1107

Fresh from the garden: broad beans, lemon, garlic, fresh herbs
Recipe source: Melissa
Serves: 6 at home or 24 tastes

Equipment:

  • 2 saucepans & lids
  • 2 big mixing bowls
  • Chopping board
  • Grater
  • Garlic press
  • Scales
  • Measures: tablespoon, teaspoon
  • 2 colanders
  • Citrus juicer
  • Mortar & pestle
  • Serving bowls
Ingredients:

  • A large handful of broad beans
  • A cup of frozen peas
  • 50g grana padano or parmesan
  • 3 tablespoons extra-virgin olive oil
  • Half a lemon
  • A clove of garlic
  • Cooking salt
  • Flaked salt & black pepper
  • A small handful tarragon, thyme and marjoram

What to do:

  1. Fill the two saucepans with water & set it to boil with the lid on.
  2. Pod the broad beans into the medium bowl and put the outer shells into the compost.
  3. Wash the lemon and zest it, and then juice the lemon. Peel the garlic clove and squeeze it through the press.
  4. Wash and dry the herbs and pick from stems, and finely chop if needed.
  5. Weigh the parmesan, then grate and reserve in the small bowl.
  6. Fill the big bowl with cold water.
  7. When the water is boiling, drop all the broad beans into one of the saucepans, and the frozen peas into the other saucepan with a teaspoon of cooking salt each and put the lid back on to bring back to the boil quickly. Boil for 3 minutes with the lid off.
  8. Then drain the broad beans into one of the colanders & then immediately refresh in the bowl of cold water. Drain the peas into the other colander and then drop into the big bowl.
  9. Double-pod the broad beans into the peas, discarding the outer skin into the chook bin.
  10. Scoop a few spoons of peas and broad beans into the mortar with a tablespoon of the olive oil and grind them with the pestle with a pinch of salt (you may have to do this in a few batches) until smooth – a few beanie lumps are fine!
  11. Stir in the lemon juice bit by bit, and taste – and add in the grated parmesan, garlic and herbs with a grind of pepper into the broad bean mixture. Taste again to check if enough salt.
  12. Spoon the mash into serving bowls and serve with some lovely bread or crispy flatbread.

Notes: What does ‘double-pod’ mean? Why do we do this to the broad beans? What other name are broad beans known by?

Categories: Kitchen Garden, Recipe | Tags: , , , , | Leave a comment

Cornersmith’s bouillon

This recipe comes to us from the picklery Cornersmith in Marrickville. Bouillon is what we use instead of stock in all our soup and risotto recipes. The aim of the recipe is to use up excess vegetable parts – carrot tops, fennel tops, spinach stems, parsley stems etc.The recipe can be varied with the seasons by adding what you have on hand.

ourkitchengarden.net

Fresh from the garden: leeks, fennel, carrots, parsley, mint, coriander, onions
Recipe source: adapted from a recipe from the Cornersmith Café
Makes: 4 medium jars

Equipment:

  • Jars and lids
  • Large oven tray
  • Paper towel
  • Scales
  • Chopping boards & knives
  • Peelers
  • Large mixing bowls
  • Salad spinner, colander
  • Scissors
  • Wooden spoons
  • Food processor
  • Funnel, teaspoons
Ingredients:

  • 200g brown onions
  • 200g leeks
  • 200g fennel
  • 200g Dutch carrots
  • 200g celery
  • Carrot tops
  • 1 bunch parsley
  • 1 bunch mint
  • 1 bunch coriander
  • 40 sundried tomatoes
  • 1 head garlic
  • 200g fine cooking salt

What to do:

  1. Wash the jars and lids in hot soapy water, rinse well and drain upside down. Place all the jars onto an oven tray, right side up, and slide into the oven. Turn the oven on to 160C to sterilize for 15 minutes.
  2. Dry the lids with a clean piece of paper towel.
  3. Wash all the vegetables and scrub if needed. Trim any ugly bits and discard. Peel the onion & garlic, and carrots if needed.
  4. Wash the herbs, spin dry and finely snip, discarding any tough stalks.
  5. Using a large knife, chop all vegetables into small sized chunks. Snip the sun-dried tomatoes into thin slices using scissors.
  6. In batches if necessary, add the ingredients to the food processor.
  7. Process into a thick paste and then scrape out into a clean and dry large bowl. Mix the ingredients thoroughly with the salt so it is mixed in evenly. You can use your hands for this but beware of the onion fumes in your eyes!
  8. Put the funnel into the top of the sterilized jars.
  9. Fill the jars without touching any of the inside or rims, and seal tightly.
  10. You may want to ‘can’ the jars in a water-bath to preserve longer: Line a wide saucepan or stockpot with a rubber mat or tea towel, then place the full, sealed jars in so that none are touching the sides of the pot or each other. Fill with lukewarm water and then set to boil on high for between 10 and 20 minutes. Turn off then using tongs, carefully lift out the jars and leave to cool on a wooden board. Label when cool.

Notes: This is used as a replacement to stock: one tablespoon dissolved in 1 litre of boiling water. It can be added to stews and soups or any meals that need a boost of flavour.

Bouillon will last for a year unopened and stored in a cool dark place. Once opened, store it in the fridge and it should last you for at least 6 months.

ourkitchengarden.net

Categories: Kitchen Garden, Recipe, Uncategorized | Tags: , , , , , , , , , | 1 Comment

Kale and borlotti bean soup

The kids at Bondi tend to favour smooth, blended soups but sometimes I like to shake things up a bit by getting them to prepare a super-hearty and super-chunky soup instead! This one amazingly always goes down well.

Image 2

Fresh from the garden: kale, onion, carrot, celery, garlic, thyme
Recipe source: Melissa
Serves: 6 at home or 24 tastes

Equipment:

  • Glass bowl
  • Measures: cup, tablespoon, teaspoon, ¼ teaspoon
  • Kettle
  • Chopping boards & knives
  • Large stockpot and lid
  • A selection of mixing bowls
  • Sieve
  • Bowls to serve
Ingredients:

  • 1 cup dried borlotti beans
  • 1 teaspoon bicarb soda
  • 1 large brown onion
  • 2 garlic cloves
  • 2 carrots
  • 2 celery sticks
  • 1 bunch kale
  • Olive oil
  • 1 handful fresh thyme
  • 1/4 teaspoon dried chilli flakes
  • 1 tablespoon tomato paste
  • 400g tin diced tomatoes

What to do:

The night before:

  • Place beans in a non-reactive bowl and cover with lots of cold water and a teaspoon of bicarb. Soak for 8 hours or overnight.

In the lesson:

  1. Fill the kettle to the 1.5 mark and set it to boil.
  2. Peel and finely chop the onion and garlic cloves.
  3. Wash, peel and finely chop the carrots.
  4. Wash the celery and shake dry over the sink. Finely chop the stalks including the leaves.
  5. Wash the kale and shake dry over the sink. Slice off the stem, discarding into the compost and finely slice (shred) the kale leaves.
  6. Wash the thyme, spin it dry and strip off the leaves, discarding the stems into the compost.
  7. Pour olive oil into the stockpot just to cover the base and heat over medium heat. Add the onion, and cook until translucent for about 5 minutes stirring occasionally.
  8. Add in the carrot and celery and cook for another few minutes.
  9. Add the garlic, thyme and chilli flakes and then stir in the tomato paste.
  10. Drain the beans, rinse them and drain again. Add them and the tin of tomato, hot water and bouillon to the stockpot and bring to the boil. Reduce heat to low and simmer with the lid half on for 20 minutes or until the beans are tender, adding a little more water if the soup becomes too thick. Add the shredded kale and cook for 5 minutes.
  11. Taste to check for salt levels, then add more if needed and grind in some pepper, then serve. 

Notes: What is a non-reactive bowl? Why do we soak the beans?

ourkitchengarden.net

Categories: Kitchen Garden, Recipe | Tags: , , , , , , | Leave a comment

Beetroot ravioli with goats cheese and mint

The pasta dough will need to rest for about an hour, so each class makes for the next, so gets straight down to rolling for the ravioli!

IMG_0708

Fresh from the garden: chives, mint
Recipe source: adapted from a recipe by Martha Stewart
Makes: 48 small ravioli

Equipment:

·       Pasta machines

·       A selection of mixing bowls

·       Salad spinner, paper towel

·       Chopping board & knife

·       Large metal spoon, teaspoons

·       Crinkly or pizza cutter

·       Pastry brush

·       2 baking trays

·       A large stockpot & small saucepan

·       Slotted spoon

·       Colander

·       Serving bowls

Ingredients:

·       1 quantity 500g beetroot pasta (complete first 8 points then continue with this recipe)

·       200g ricotta

·       150g goats cheese at room temperature

·       10 chives

·       2 sprigs mint

·       Semolina flour or fine polenta, for dusting

·       Cooking salt

·       Flaked salt & black pepper

·       Extra-virgin olive oil

·       50g salted butter

What to do:

  1. Fill the stockpot with water and set to heat to a rolling boil.

To make the filling:

  1. Wash and pat dry the mint and chives. Weigh the cheeses out. Saving one mint sprig for garnish, finely chop the leaves from the other to yield about 2 tablespoons worth. Snip the chives into tiny pieces & stir the herbs together with cheeses. Season with salt and pepper.

To make the ravioli:

  1. Dust a baking sheet and your work surface with the semolina flour. Working with each sheet of dough just after it’s been rolled, lay the sheet down on your dusted surface.
  2. Space tablespoons of filling about 10cm apart along just about a quarter in of the strip. Fold the top half over, and then gently press around filling to seal, working from centre out.
  3. Using a cutter, cut between each ravioli to separate. Transfer ravioli to sheet, and cover with a clean tea towel. Repeat with remaining pasta dough and filling.
  4. Add 2 tablespoons of salt to the boiling water in the stockpot and half of the ravioli. Cook, stirring once or twice to separate, for about 4 minutes until edges are just tender.
  5. Using a slotted spoon, transfer to a colander to drain. Drizzle with oil, and toss gently to coat. Transfer to a bowl, and loosely cover to keep warm. Repeat with remaining ravioli.
  6. Meanwhile, once all the ravioli is almost cooked, melt the butter in the small saucepan over medium heat. Cook until butter is golden brown and has a nutty aroma for about 4 minutes.
  7. Divide ravioli among plates (if first batch has cooled, return them to hot water for 15 seconds, then drain). Spoon browned butter over ravioli. Serve immediately garnished with the mint.

Notes: To freeze ravioli, place in a single layer on baking sheets in the freezer for about 15 minutes, and then pack in airtight container. Freeze for up to 1 month. Do not thaw before cooking.

Categories: Kitchen Garden, Recipe | Tags: , , , , , , , | 1 Comment

Bruschetta with zucchini, feta and basil

Image

Bruschetta: Italian for open sandwich! You can use pretty much anything you want but we love this zucchini version.

Fresh from the garden: zucchini, lemon, garlic, basil
Recipe source: Melissa
Serves: 8 or 24

Equipment:

  • Grill trays
  • Chopping board & knife
  • Measures: ¼ cup, tablespoon, ¼ teaspoon
  • Pastry brush
  • A selection of mixing bowls
  • A clean, dry tea towel
  • Graters
  • Garlic press
  • Microplane grater
  • Salad spinner
  • Large frying pan
  • Serving plates
Ingredients:

  • A loaf of good sourdough
  • Olive oil
  • 3 zucchini
  • 2 large garlic cloves
  • 1 lemon
  • ¼ teaspoon chilli flakes (optional)
  • Flaked salt and black pepper
  • 50g Danish feta
  • About 10 basil leaves

What to do:

  1. Preheat the grill on high.
  2. Slice the loaf in half lengthwise and then slice each half into small slices – you will need about 15 from each half-loaf. Measure 1/4 cup of olive oil into a small bowl and then brush each slice with oil. Place the bread on the grill trays and slide into the top level of the oven to grill for about 1 minute or so each side. Remove when done.
  3. Wash the zucchini and shake dry, then grate them on to a clean tea towel, then pull up the sides and twist and squeeze tightly over a large bowl to remove as much liquid as possible. Drain and wipe the bowl out and tip the grated zucchini into it.
  4. Peel and crush the garlic. Wash the basil, picking the leaves off and spin-drying them before finely chopping or tearing them into little pieces.
  5. Wash the lemon, then dry it and using the microplane grater, zest the lemon.
  6. Heat 3 tablespoons of oil into the frying pan over medium heat. Add the zucchini and garlic (and chilli flakes if using) and stir-fry for about 5 minutes until zucchini has softened without browning. Remove from heat and season with salt and pepper. Cool for 5 minutes.
  7. Weigh the feta and then crumble it in to the zucchini, adding in the lemon zest and basil.
  8. Place the toasted bruschetta slices onto serving plates, spoon the zucchini mixture on and serve!

Notes: Why do we squeeze the zucchini through the tea towel? What is another name for zucchini? How do you pronounce bruschetta?

Categories: Kitchen Garden, Recipe | Tags: , , , , , | Leave a comment

Kitchen News 18th November 2015

ourkitchengarden.net

Ok so here we really are in spring. Finally! With pelting November rain again and burst of brilliant sunshine the garden is finally giving up its gorgeous primavera prizes… In class we’ve been discussing why it is that a lot of our veggies have bolted to seed without forming properly, like the onions that have flowers but no bulb, and the non-bulbous fennel bulbs shooting out with towering fronds: we know it’s the hot crazy October sun, great for swimming in the ocean early but havoc for the plants. Anyway at least now the winter veg is gone and we are totally seasonal baby! If you walk through at the garden now you’ll be amazed at all the activity and sprouting green stuff everywhere. Hallelujah!

So to our menu reflecting the hues and tones of green, green and green (with some orange bits thrown in too): a brand new orange and fennel salad with (the last of the) blood orange vinaigrette, slinky silverbeet and home-made garam masala soup with coriander, a burstingly spring salad of broad beans, radishes and goats cheese, and then to top it all off, some comfort food for the odd wintry day where you need something soulful: creamy polenta with poached eggs and sage. And we even found time to bottle up some of our famous rhubarb and vanilla jam too in some classes. So there you go. All these recipes up on this blog, so clink the links if interested…

Only a few weeks left of Kitchen Garden so make the most of us! And we still have lots of Chicken spots to fill over the holidays so please sign up if you can help 🙂

To Volunteer for Classes or Chickens: click on VolunteerSpot at http://vols.pt/8qCfEY

Peace

Categories: Kitchen Garden, News | Tags: , , , | Leave a comment

Rhubarb and vanilla jam

This must be the easiest jam to make in the whole wide world! And, as with all jam-making, small quantities are best: quickest to prepare and also to bring up to that all-important setting point. And if you find you don’t have the exact kilo of prepared fruit, just weigh out the equivalent amount of sugar.

Fresh from the garden: rhubarb, lemon

Recipe source: Melissa

Makes: 3 or 4 medium jars

Equipment:

  • 4 medium jars with good lids
  • Oven tray
  • Paper towel
  • 3 small saucers
  • Chopping boards and knives
  • Scales
  • Citrus juicer
  • Heavy-based wide stockpot
  • Wooden spoon with flat edge
  • Spatula
  • Small serving bowls
Ingredients:

  • 1kg rhubarb
  • 1kg sugar
  • 1 vanilla pod
  • 1 large lemon

What to do:

To sterilise jars:

  1. Wash your jars in hot, soapy water, rinse and then drain them upside-down.
  2. Place on an oven tray right-side-up and slide them into the oven. Turn on the oven to 160C. Leave them there until
  3. Wash the lids, rinse and drain them. Wipe them dry with a piece of paper towel and keep your fingers away from the inside of the lid!

To make the jam:

  1. Put 3 small saucers in the freezer.
  2. Wash the rhubarb stalks and trim the edges. Slice each stalk into 3cm pieces and weigh to make sure you have 1kg.
  3. Slice the vanilla pod lengthways and scrape out the seeds, then cut each pod half into two.
  4. Cut the lemon in half and squeeze out the juice.
  5. Put the rhubarb into a preserving pan or a heavy-based wide stockpot with the measured sugar, vanilla seeds and pods. Heat gently, stirring, until all the sugar has dissolved, then squeeze in the lemon juice and increase the heat.
  6. Boil for about 10 minutes until the fruit is soft, stirring with the flat-ended wooden spoon every minute or so. Test for the setting point by spooning a little onto your chilled plate. After 1-2 mins, push your finger through the jam – if the surface wrinkles it is ready, if not, keep cooking for 2 minute intervals, testing in between.
  7. Once the jam is ready, let it cool for about 10 mins before ladling into your warm sterilised jars and sealing with the clean, dry lids.
  8. Label with the name and date when cool. Will keep for at least 12 months in a cool, dark place.

Notes: What does to sterilise mean? What is the setting point?

Categories: Kitchen Garden, Recipe | Tags: , , , , , , , , , | Leave a comment

Silverbeet and garam masala soup

Garam is the Hindi word for hot, and masala, spice mixture. We often make our own garam masala blend of ground cumin, coriander, ginger and turmeric, cayenne and mustard seeds at school but it is commonly available in the spice section of any supermarket, already blended.

IMG_0520

Fresh from the garden: silverbeet (Swiss chard), onion, potatoes, garlic, coriander

Recipe source: Melissa

Serves: 6 or 24 tastes

Equipment:

  • Kettle
  • Chopping boards and knives
  • Selection of mixing bowls
  • Paper towel
  • Stockpot
  • Flat-ended wooden spoon
  • Measures: jug, tablespoon, teaspoon
  • Garlic press
  • Ladle
  • Stick blender
  • Serving bowls
Ingredients:

  • 1.5 litres boiling water and 2 tablespoons bouillon (or 1.5 litres vegetable stock)
  • 2 medium potatoes
  • 1 brown onion
  • 4 garlic cloves
  • A large bunch of silverbeet
  • Olive oil
  • A heaped teaspoon garam masala
  • Freshly ground black pepper
  • Flaked salt
  • A small handful of coriander

What to do:

  1. Fill the kettle to 1.5 litres and set it to boil.
  2. Wash or scrub the potatoes under running water (but don’t peel!) and then coarsely chop into 2cm cubes.
  3. Peel the onion and slice into two halves, then finely chop. Peel and chop the garlic.
  4. Wash the silverbeet & shake over the sink. Finely chop the silverbeet, using the whole stalk and leaves as well.
  5. Pour olive oil to cover the base of the stockpot and heat over medium heat for 30 seconds. Add the chopped onion and cook on low, stirring every now and then, for 5 minutes and then add the potato and cook for another few minutes.
  6. Add in the garlic, chopped silverbeet and the garam masala and stir together. Cook very gently for a minute until aromatic.
  7. Increase heat to high. Add the 1½ litres of hot water and the 2 tablespoons of bouillon and bring to the boil, then simmer gently, uncovered, for 10 minutes or until the potato is almost tender.
  8. Meanwhile wash and pat the coriander dry and finely chop.
  9. When the soup is ready and the potato is soft, grind a little bit of pepper in too and taste to see if you need to add any extra salt.
  10. Add in the coriander and then blitz the soup with the stick blender until it’s really smooth.
  11. Taste and add more salt if you need to.
  12. Ladle soup among serving bowls and serve!

 Notes: What do is silverbeet also known as? What is in the garam masala blend? Why do potato-based soups need more salt?

Categories: Kitchen Garden, Recipe | Tags: , , , , , , , , , , | Leave a comment

Creamy polenta with poached eggs and sage

This is comfort food at its creamiest, with the frizzled sage leaves giving everything a crispy, savoury lift. Just be sure the eggs are very fresh and that the yolks are intact when they go in to poach!

IMG_0521

From the garden: eggs, sage, bay

Recipe source: Melissa

Serves: 4 or 24 tastes

Equipment:

  • Chopping board & small knife
  • 1 heavy-based saucepan & lid and 1 small saucepan
  • Scales
  • Measures: jug, cup, 1/3 cup
  • Grater
  • Salad spinner & paper towel
  • Flat ended wooden spoon
  • Mixing bowls: 2 med, 4 small
  • Deep-sided frying pan
  • Serving bowls
Ingredients:

  • 400ml milk
  • 600ml water
  • 1 bay leaf
  • 1 cup polenta (cornmeal)
  • Cooking salt
  • 1/3 cup mascarpone
  • 50g grana padano parmesan
  • 50g butter
  • 4 very fresh large eggs
  • A branch of sage leaves
  • Flaked salt and black pepper

What to do:

  1. Measure the milk and water into the larger saucepan and pop in the bay leaf. Heat until almost boiling and then turn off and allow to infuse for 10 or 15 minutes.
  2. Meanwhile grate the parmesan, measure out the mascarpone and get the eggs ready by carefully and gently cracking each egg into its own separate small bowl – without breaking them!
  3. You can also wash and spin the sage leaves dry, separating if needed, and place them in the smaller saucepan. Weigh out the butter and place with the sage leaves.
  4. Removing the bay leaf from the milk mixture, heat the saucepan again and then sprinkle in the polenta and a teaspoon of cooking salt. Using the flat-ended wooden spoon stir continuously until it thickens and is not too grainy, about 10-20 minutes, depending on the variety of polenta.
  5. When the polenta is cooked, add the mascarpone and grated parmesan and mix until well combined. Taste for seasoning and add a little more salt if necessary. The polenta should be soft and creamy and only just hold its shape – you want a sloppy, porridge type consistency.
  6. About 5 mins before the polenta is ready, poach the eggs. Fill the deep-sided frying pan almost to the top with water and bring to a simmer. and then carefully slide into the water until they’re all in. Let the pan sit on a simmer for 4 minutes.
  7. When the eggs are almost ready, heat the butter and sage over medium heat until the butter is bubbling up and starting to turn brown and the leaves are crispy.
  8. To serve, pour out the polenta into serving bowls. Lift the eggs out of the water, drain, and then place one on top of each bowl. Season generously and scatter with the frizzled sage leaves & browned butter.

Notes: What is polenta? What is cooking by ‘absorption’ method? Why should we not break the egg yolks when poaching them? What is to simmer?

IMG_0519

Categories: Kitchen Garden, Recipe | Tags: , , , , , | Leave a comment

Blog at WordPress.com.