Monthly Archives: October 2013

Kitchen Garden News – 12th September 2013

I’m clearly a bit late in posting this so apologies chaps!  Attempting to get myself up-to-date tout-suite..!

KITCHEN GARDEN NEWS

Spring is springing with a force to be reckoned with: the garden is full of winter, spring and even almost summer crops due to this super-warm and dry bushfire weather… Cauliflower, cabbage, beetroot, spinach, lettuces, snap peas, radishes, broad beans and quite a few tomato plants sticking their tendrills out! And still mushrooms, mushrooms, mushrooms…

We’ve doubled up a few menu items this time due to few classes missing out recently – and we’re none the worse for it as all dishes these last weeks have been delicious. We whisked up another batch of Mushroom and spinach omelettes, but the Salad of broad beans, radishes and goats cheese, with beans so young they didn’t need a double-pod, was beautiful and delicious, and had the children almost licking the plates!

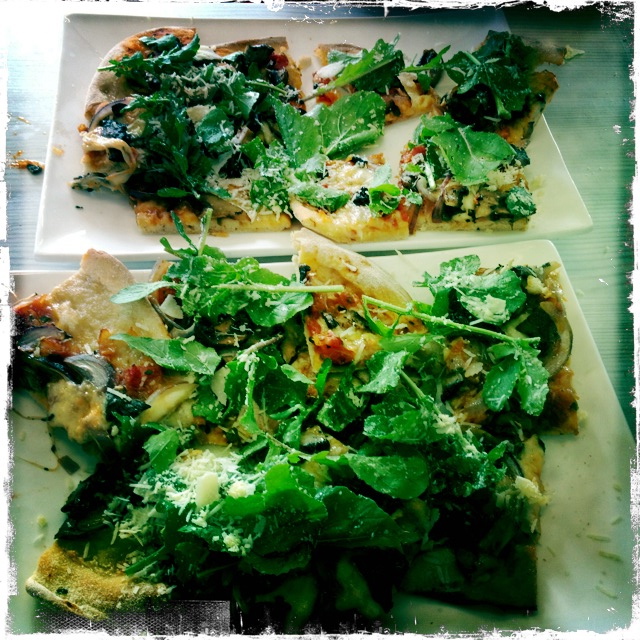
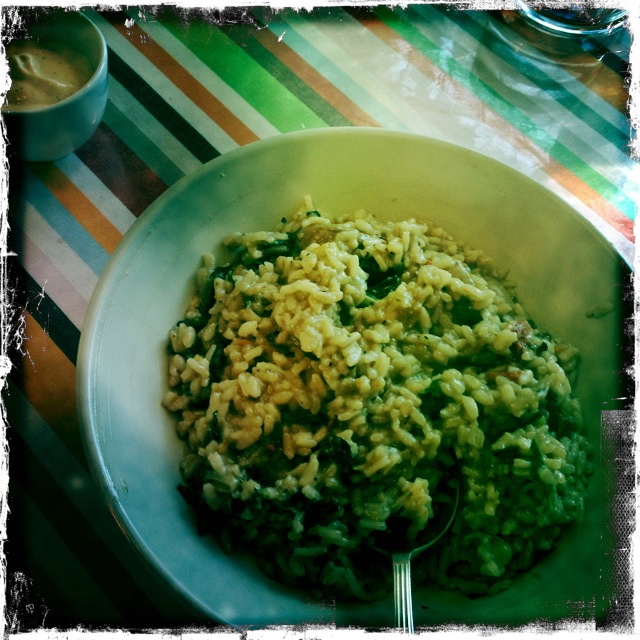
We blitzed and mouli’d cruciferous veggies with our Cauliflower and nutmeg soup & Speedy croutons, and also stirred and stirred Mushroom and Tuscan kale risotto (with beetroot leaves too in the last classes). The Pizza ai funghi e rucola we jazzed up with some lovely peppery rocket with parmesan and balsamic, and for the Upside-down blood orange and cardamom cake we whipped up a few bowls of Vanilla bean yoghurt too. And it was good…

Before I go I’d like to say thanks to Ligia for the two and a half years we have worked together – Bondi PS’s Garden Specialist and I have been through thick times and thin, drought and deluge, plague and plenty (of broad beans, last year…!) and I wish her well in her travels back to Brazil for Term 4, and whatever 2014 holds in store for her and her family… viagem segura chica!

And from Ligia: As I am finishing up this term, I would like to thank ‘the Bondi School community’ for all their hard work and support with the garden program. Cheers. Ligia

Cheers all!

ourkitchengarden.net

Categories: Kitchen Garden, News | Tags: , , | Leave a comment

Pizza ai funghi e rucola

Why did the mushroom go to the party? ‘Cos he was a fun-gi to be with… boom tish! And this one has some peppery rocket sprinkled over, yum yum…

ourkitchengarden.net

Fresh from the garden: mushrooms, rocket, onion, garlic, marjoram
Recipe source: Melissa
Serves: 8 at home or 24 tastes

Equipment:

  • Chopping boards & knives
  • A frying pan
  • Bowls – large, med
  • Salad spinner
  • Measures – ¼ cup, tablespoons, teaspoons
  • Colander, grater
  • Scales
  • Paper towel
  • Wooden spoon
  • 2 pizza trays
  • Metal tablespoons
  • Wide egg lifter
  • Pizza cutting wheels
  • Serving plates
Ingredients:

For the pizza topping:

  • 1 handful mushrooms
  • 1 tub bocconcini
  • 2 tablespoons extra-virgin olive oil
  • 2 cloves garlic
  • 30g parmesan
  • A handful rocket
  • Aged balsamic vinegar

Tomato sauce:

  • 1 onion
  • 2 cloves garlic
  • 3 sprigs marjoram
  • ¼ cup extra-virgin olive oil
  • 1 tin diced tomatoes
  • Flaked salt and black pepper

What to do:

  • Preheat the oven to 220C.

For the tomato sauce:

  • Peel and finely chop the onion and garlic, reserving half of the garlic for the topping.
  • Heat the olive oil in the frying pan & gently cook the onion and garlic until translucent but not brown.
  • Open the tin of tomato and add to the frying pan with a pinch of salt and a grind of pepper.
  • Wash, dry and pick the herbs. Roughly chop then add to the tomatoes.
  • Simmer gently for 10 minutes, stirring occasionally, until quite reduced.

For the topping: 

  • Wipe the mushrooms free of dirt using a piece of paper towel and finely slice. Drop them in to a big bowl, drizzle about a tablespoon of olive oil and a pinch of olive oil and toss to combine.
  • Open the tub of bocconcini and cut each ball into 3 or 4 slices.
  • Wash and spin the rocket dry and then reserve in another large bowl.
  • Grate the parmesan and add it to the rocket with a tablespoon or two of olive oil and a teaspoon of balsamic vinegar. Gently toss to combine.

Assembling the pizza:

  • Scatter some flour on the workbench, divide the dough in two and roll to form two thin shapes about 26 cm in diameter.
  • Assemble the pizzas directly onto the trays, flouring the trays first.
  • Usingthe metal spoon, swirl a couple of spoonfuls of tomato sauce onto the pizza bases, spreading so that they become totally covered with a clean border.
  • Layer the bocconcini on top, spoon on the garlicky mushrooms, then slide the pizzas into the oven.
  • Wash and dry the wooden chopping boards and set them out ready.

Baking the pizza:

  • Bake the pizzas for 12 minutes or until the edges are very crusty and the cheese is bubbling.
  • Use this time to make the dough for the next class if needed.
  • You may want to slip the pizza off the tray onto the rack for the last few minutes, so that you get a really crusty base.
  • Once the pizzas are done, transfer them to the wooden boards using the wide egg lifter.
  • Cut the pizzas in half first, and then each half into squares for each plate.
  • Lift onto serving plates and sprinkle with the rocket and parmesan.
  • Eat! 

Notes: Where does pizza come from? What other sort of vegetables could you use in a pizza? What sort of other pizza could we make? What other cheeses could we use?

Categories: Kitchen Garden, Recipe | Tags: , , , , , , , , , , , , | Leave a comment

Mushroom and kale risotto

This lovely risotto is textural and beautifully herby, and very easy once you get past all the stirring! Feel free to experiment with different types of mushies too. And if you have any left over then go crazy making arancini!

ourkitchengarden.net

Fresh from the garden: mushrooms, Tuscan kale (cavolo nero), marjoram, garlic, onion
Recipe source: Melissa
Serves: 8 at home or 24 tastes

Equipment:

  • Saucepan
  • Salad spinner
  • Garlic press
  • Bowls – 1 large, small, med
  • Large knife& chopping board
  • Grater & microplane zester
  • Ladle
  • Wooden spoon with a flat end
  • Heavy based stockpot
  • Measures:scales, jug, cup, tablespoon
  • 4 bowls or soup plates to serve


Ingredients:

  • 2 litres water with 2 tablespoons bouillon (or 2 litres stock)
  • A large handful of mushrooms
  • A small handful marjoram
  • 4 or 5 kale leaves
  • 3 garlic cloves
  • 1 brown onion
  • Extra-virgin olive oil
  • 20g butter
  • 400g Arborio rice
  • 1 lemon
  • 50g parmesan
  • Flaked salt & black pepper

What to do:

  • Measure the water into the saucepan, add the bouillon and bring it to a simmer on medium heat.
  • Meanwhile wipe the dirt from the mushrooms with a piece of paper towel, trim any ugly bits and then thinly slice the mushrooms.
  • Wash and spin dry the marjoram, strip and discard the stems. Wash the kale leaves, trim from the stalks and finely slice into ribbons.
  • Squeeze the garlic cloves through the press into a small bowl. Peel and finely chop the onion.
  • Heat half the butter and 2 tablespoons of olive oil and butter over medium heat in the stockpot. Add half the chopped onion and cook gently until just tender, about three minutes. Do not brown. Add the mushrooms and garlic and a pinch of flaked salt and sauté for 3 or 4 minutes until the mushrooms are starting to colour. Remove from the pan and reserve in a medium bowl.
  • Heat the rest of the butter and another 2 tablespoons of olive oil in the same pan & then add the rest of the onions. Cook until translucent & then stir in the rice until the grains begin to crackle.
  • Begin adding the simmering stock, a ladle at a time, and stir in until fully absorbed. The stock should just cover the rice and bubble. Add the kale, and stir every minute or so for about 15 minutes, making sure you get into all the corners of the pan with the wooden spoon.
  • Meanwhile, zest the lemon and grate the parmesan to yield about ½ cup.
  • After about 15 minutes, add the mushrooms backto the rice and keep stirring for about another 5 minutes. When the rice is just tender all the way through but still slightly firm, usually in about 20 minutes, it is done.
  • When you are ready to serve, add in a last ladleful of stock. Stir in the marjoram, lemon zest and parmesan, and remove from the heat. Taste now and check the seasoning. The mixture should be creamy.
  • Serve onto the soup plates and eat right away!


Categories: Kitchen Garden, Recipe | Tags: , , , , , , , , , , , , | Leave a comment

Speedy croutons

These are an easy and delicious accompaniment to any soup or salad, adding a fantastic & garlicky crunch.

ourkitchengarden.net

Recipe source: Stephanie Alexander: Kitchen Garden Cooking with Kids
Makes: Lots!

Equipment:

  • Butter knife
  • Large non-stick frying pan
  • Egg lifter
  • Chopping board
  • Large serrated knife
  • Medium bowl
Ingredients:

  • 4 or 5 slices of thick bread
  • Unsalted butter at room temperature
  • 2 garlic cloves
  • Flaked salt

What to do:

  • Butter the slices of bread on both sides.
  • Place the frying pan over a medium to high heat and fry the bread slices until golden on the undersides (about 3 minutes). You may need to do this in several batches.
  • Flip the bread with an egg lifter and brown the other side.
  • Transfer the bread to the chopping board.
  • Slice the garlic cloves in half and rub each half on one side of the fried bread slices. Sprinkle with a little salt.
  • Stack the slices together, and using the serrated knife, carefully cut the bread into 1cm cubes & transfer to the bowl.
  • Sprinkle on your dish!

Notes: Where does the word ‘crouton’ come from? Would different sorts of bread be good to use?

Categories: Kitchen Garden, Recipe | Tags: , , , , , , | Leave a comment

Cauliflower and nutmeg soup

Silky and spiced, creamy and smooth – we love cauliflower soup! And with a little crunchy addition of speedy croutons, we’re in heaven!

ourkitchengarden.net

Fresh from the garden: cauliflower, leeks, onion, potato, garlic
Recipe source: Melissa
Serves: 6 or 24 tastes

Equipment:

  • Kettle
  • Garlic press, peeler
  • Chopping board & knife
  • Stockpot
  • Measures – tablespoon, jug
  • Wooden spoon
  • Large & med bowls
  • Stick blender
  • Mouli
  • Microplane grater
  • Ladle
  • Serving bowls
Ingredients:

  • 1 leek
  • 1 brown onion
  • 4 cloves of garlic
  • 1 large potato
  • A large head of cauliflower
  • Extra-virgin olive oil
  • 1.5 lt water & 1.5 tablespoons bouillon (or 1.5 litres stock)
  • White pepper & flaked salt
  • A whole nutmeg

 What to do:

  • Fill the kettle and set to boil.
  • Wash the leek, scoring and peeling the outer layers off to look for hidden dirt, and then finely chop the leek.
  • Peel and finely chop the onion. Peel the potato under running water and chop into 1cm cubes.
  • Peel and squeeze the garlic cloves through the press.
  • Wash, shake dry and cut or tear the cauliflower into small florets.
  • Heat the 2 tablespoons of olive oil in the stockpot. Add the leek and onion and fry gently for 5 minutes.
  • Carefully measure the boiling water into the jug and add the bouillon. Stir.
  • Add the cauliflower, the potato and the garlic and sweat for a minute, then add the hot stock.
  • Simmer for 20 minutes until the cauliflower is tender. Season with salt and ground white pepper and puree with the stick blender until very smooth.
  • You may need to pass the soup through the mouli into another bowl to achieve an even smoother texture.
  • Just before serving, grate in about half a nutmeg using the microplane grater, the ladle out into your bowls.

 Notes: What other vegetables can be used for soup? Why do we sweat the veggies out?

Categories: Kitchen Garden, Recipe | Tags: , , , , , , , , , , | Leave a comment

Salad of broad beans, radishes and goats cheese

This salad is a beautiful celebration of spring, with lots of lovely contrasting textures and flavours…

ourkitchengarden.net

Fresh from the garden: lettuces, broad beans, radishes, snap peas, marjoram, edible flowers
Recipe source: Melissa
Serves: 6 at home or 24 tastes

Equipment:

  • Saucepan & lid
  • Bowls – 2 large, 2 med, 1 small
  • Colander
  • 2 salad spinners
  • Paper towel
  • Mandoline
  • Potato peeler
  • Measuring – 1/4 cup, tablespoon, teaspoon
  • A small jar with lid
  • Plates or bowls to serve
Ingredients:

  • A handful lettuce leaves
  • A large handful broad beans in pod
  • A small handful radishes
  • A small punnet snap peas
  • 2 sprigs marjoram
  • 150g goats’ cheese
  • 1 tablespoon red wine vinegar
  • A teaspoon of honey
  • 1/4 cup extra-virgin olive oil
  • Flaked salt & black pepper
  • Edible flowers

What to do:

  • Fill the saucepan with water & set to boil on high heat.
  • Pod the broad beans, discarding the outer shell into the compost and add beans to the boiling water. Fill a large bowl with cold water and have ready.
  • Boil the broad beans for 3 minutes, drain and then immediately refresh in the bowl of cold water. Drain again and double-pod by slipping the outer shell off into the compost. Reserve beans.
  • Wash the lettuce leaves really well and spin dry in sections, reserving in a large clean, dry bowl. Wash & dry the marjoram sprigs, picking the leaves and leaving whole. Gently wash the flowers and reserve on a piece of paper towel until ready to use.
  • Scrub the radishes clean, wipe dry and using the mandoline or a peeler, carefully slice into thin discs.
  • Wash the snap peas, then top-and-tail each one, de-stringing as you go. Slice each bean in half or thirds.
  • For the dressing, measure the olive oil, red wine vinegar and honey and pour them into the jar. Add a sprinkle of salt and pepper, and then put the lid on & give the jar a good shake.
  • Drizzle the dressing around the large lettuce bowl and gently turn the leaves with your fingers.
  • Place the leaves in the serving bowls, then pour the broad beans, radish slices and snap peas into the bowl and mix to cover in the residual dressing. Then sprinkle over each bowl of leaves.
  • Break the goats cheese into small chunks with your fingers and divide over the salads with the marjoram leaves.
  • Finish by carefully placing the flowers on top of the bowls of salad. Serve immediately!

Notes: What does residual mean? Why do we use honey vinaigrette here instead of our usual lemony dressing? Can you name some edible flowers?

Categories: Kitchen Garden, Recipe | Tags: , , , , , , , , , , | Leave a comment

Mushroom and spinach omelette

This appears to be an easy recipe but many top chefs are judged by their ability to execute the perfect omelette! This recipe is almost a meal in itself…

ourkitchengarden.net

Fresh from the garden: eggs, spinach, mushrooms, garlic, chives, parsley, thyme
Recipe source: Melissa
Makes: 4 large omelettes (to feed about 24 people) 

Equipment:

  • Salad spinner
  • Bowls – large, 4 medium, small
  • Scissors
  • Fork, butter knife
  • 2 non-stick frying pans
  • A large wok
  • Wooden spoon
  • Garlic press
  • Tablespoon measure
  • Serving plates

Ingredients:

  • A large handful of mushrooms
  • A large bunch of spinach
  • A small handful: chives, parsley and thyme
  • 16 eggs
  • Flaked salt &black pepper
  • 50g butter
  • Olive oil

What to do:

  • Trim the mushrooms of any dirt and wipe clean with a damp piece of paper towel. Chop into thin slices and reserve in the medium bowl.
  • Peel the garlic clove and squeeze through the garlic press in to the mushrooms.
  • Wash the spinach in several changes of water, then shake dry. Roll up and chop into fine ribbons.
  • Wash and carefully dry the herbs, keeping then separate and picking off the leaves. Discard any stalks, and add the thyme to the mushrooms.Using the scissors, snip the chives and reserve in a small bowl. Finely chop the parsley and reserve in a separate bowl.
  • Break 4 of the eggs into each medium bowl, add a quarter of the chives and parsley to each, then whisk lightly with a fork and season with salt and pepper. 
  • Heat 25g butter and 2 tablespoons of olive oil in the wok over medium heat until foaming. Add in the mushrooms, thyme and garlic and carefully toss a few times to cover in the butter mixture. Sprinkle in a few pinches of salt, a grind of pepper, and then sauté until slippery.
  • Add a quarter of the chopped spinach to the wok and heat through until wilted and the liquid has cooked off.
  • Add a quarter of the remaining butter to each of the 2 frying pans and then when foaming, pour one of the bowls of whisked egg mixture to each and gently rotate the pan to distribute. Cook for 20 seconds or so, until it begins to bubble, then draw the egg into the centre with the wooden spoon and rotate the pan again to redistribute the uncooked egg.
  • The omelettes are cooked when the base is set, but is still slightly runny in the middle.
  • Slide a quarter of the mushroom and spinach mixture onto one half of one omelette, fold the other half over to form a half-moon and slice out on to your serving plate.
  • Repeat with the remaining 2 omelettes and the rest of the mushroomy spinach, and serve!

 Notes: In what other languages can you say omelette? Why do we leave the omelette slightly runny in the middle? Where does the word omelette come from?

Categories: Kitchen Garden, Recipe | Tags: , , , , , , , , , , , | Leave a comment

Blog at WordPress.com.