Kitchen Garden

Kitchen garden news – 13th June 2013

ourkitchengarden.net

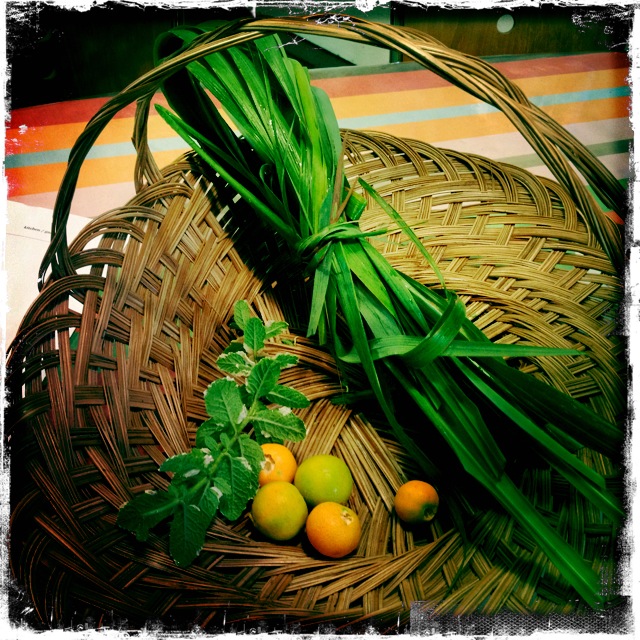
Lemongrass, cumquat peel and apple thyme for the tisane

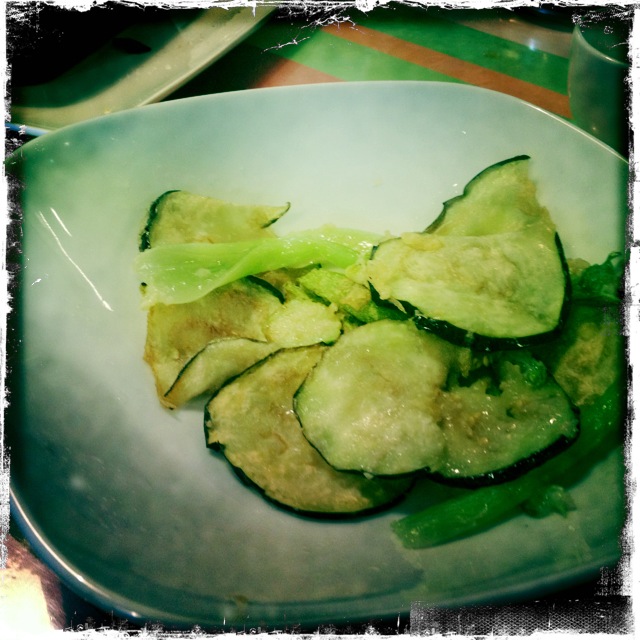
Ha ha! Winter has finally hit but we’re safe and secure down here in the Cottage of the Steamy Windows with ovens baking, soups stirring, eggs poaching and herbal teas brewing… the garden has been flooded with rain this week: great for our broad beans and other spring crops already planted. We still have the odd summer plant yet to give up the ghost – every time Ligia plans to pull them out they throw up another handful of delicious veggies – zucchini and their flowers, snap & snow-peas, basil… they’re hanging on for dear life!

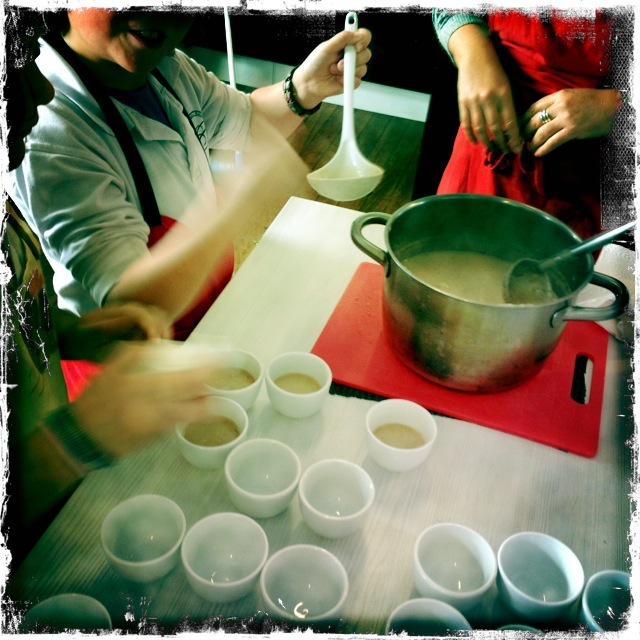
So to our menu this week: a hearty Cabbage, barley and coriander soup, an unblended soup this time & left in all its chunky glory; Pizza with broccoli, garlic and anchovies – amazing how so many children say they don’t eat fish ‘cos they don’t like it – but then scoff this pizza in fistfuls as it comes to the table!

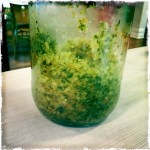
We are mixing the aforementioned cross-seasonal veggies in our Ragout of (winter) vegetables, and serving this alongside Creamy polenta with poached eggs & sage – I beg you to try this recipe if you haven’t already made friends with polenta! And to finish, some Lemon butter biscuits (thanks Shelley for the lemons, I must get some bikkies up to you!) & Herbal tisane: our ‘tea’ of lemongrass, cumquat peel and apple mint. Yum yum, all of it!

I will do my best to get the recipes posted by the weekend – if you’re keen to receive the recipes straight to your inbox then subscribe to this site (there is a button on the right of main screen) for all new posts – updated fortnightly!

And one last thing: next term we want to start a weekly Fruit & Veggie Box Scheme for BPS families – seasonally sourced from the Sydney area to avoid road & air miles and mainly organic with a little conventional added in (PS this is NOT our Kitchen Garden produce!).

A-one-size-fits-all-box: Fifty bucks, pick up from the Cottage on a Monday arvo, proceeds going directly to the SAKGP! Who’s in? We should be able to do up to 40 boxes – first in etc. Speak to Grace or me at school if you’re interested and we will let you know deets once we have more info.

Cheers all! Melissa

Categories: Kitchen Garden, News | Tags: , , , , , , | Leave a comment

Lemon butter biscuits

Jamie says, “These biscuits are dead easy to make and perfect for a simple gift. If you fancy jazzing them up for Christmas, try using an orange in place of the lemons and add a pinch of cinnamon to your demerara – lovely and festive!”

ourkitchengarden.net

Fresh from the garden: lemons, egg
Recipe source: Jamie Oliver on www.jameoliver.com
Makes: 30

Equipment:

  • Stand mixer & bowl
  • Microplane zester
  • Scales
  • Measures – tablespoon, ¼ teaspoon
  • Plastic wrap
  • Rolling pins
  • Biscuit cutters
  • Baking paper
  • Baking trays
  • Wire rack
  • Serving plates
Ingredients:

  • 125g butter, at room temperature
  • 100g caster sugar
  • 1 free-range egg
  • 200g plain flour plus extra for dusting
  • 2 lemons
  • ¼ teaspoon baking powder
  • 1 pinch sea salt
  • 3 tablespoons demerara sugar

What to do:

  • Preheat your oven to 180°C.
  • Measure out the butter and sugar in to the bowl of the stand mixer and then beat until creamy.
  • Beat in the egg until the mixture is light and fluffy.
  • Meanwhile zest the lemons with the microplane.
  • Add the flour, lemon zest, baking powder and salt to the butter mixture and mix until you have a ball of dough. Cover and place in the fridge for about 30 mins (or at home for 2 hours until firm).
  • Roll out the dough on a floured surface until ½cm thick. Line your trays with baking paper. Cut out shapes and place on the trays. Sprinkle with demerara sugar and bake for 10 to 12 minutes until the edges are light brown. Transfer to a wire rack to cool.
  • Divide among serving plates & eat!

Notes: Why do we let dough rest? What happens if we don’t? What is zest? What does demerara look like?

Categories: Kitchen Garden, Recipe | Tags: , , , , , | Leave a comment

Ragout of (winter) vegetables

Half veggie stew, half side-of-mixed-veg, this dish can be added to or subtracted as the fancy takes you… we’re clearing the beds of the last summer and autumn crops at the mo – hence zucchini, beans etc – but otherwise pop in some tasty cauliflower & cabbage?

ourkitchengarden.net

Fresh from the garden: bok choy, pencil leeks, zucchini, beans, snap peas, lemons, tarragon, parsley
Recipe source: Melissa from an idea by Stephanie Alexander
Serves: 8 or 24 tastes

Equipment:

  • Colander
  • Chopping board & knife
  • Bowls – large, med
  • Salad spinner
  • A small saucepan
  • A medium frying pan with lid
  • Scales
  • Measures – jug, ½ cup
  • Wooden spoon
  • Serving plates
Ingredients:

  • 1 or 2 heads of bok choy
  • A small handful pencil leeks
  • 1 or 2 zucchini
  • A handful of beans & snap peas
  • 8 garlic cloves
  • 30g unsalted butter
  • 1 lemon
  • ½ cup light stock (or ½ cup boiling water and a teaspoon of bouillon)
  • Small bunch French tarragon
  • Small bunch parsley
  • Flaked salt & black pepper

What to do:

  • Separate out the leaves of the bok choy and wash thoroughly to remove the dirt. Leaving small stems whole, chop the remaining stalks & leaves into large bite-sized pieces.
  • Cut the roots & the very tops from the leeks and strip back the top layer to remove any dirt. Leave whole.
  • Wash and chop the zucchini into large bite-sized pieces.
  • Wash & dry the herbs, pick from the stalks and finely chop.
  • Place the garlic cloves (in their skin) into a small saucepan and just cover with water. Bring to the boil on low-medium heat. Drain then repeat. Slip the garlic skins off & set aside.
  • Melt half the butter in the frying pan on medium heat.
  • Once frothing add the leeks and the whole cooked garlic cloves & sauté until the leeks are golden flecked.
  • Then add the 1/2 cup stock & the zucchini, the beans and snap peas and cook, covered, for about 3 minutes.
  • Uncover the pan, scatter over the bok choy pieces & cook for another minute, shaking the pan gently. Using the microplane, zest the lemon and add to the pan.
  • Should be very little liquid now, if so turn up the heat to high & continue shaking gently.
  • Add the remaining butter in cubes and the herbs and then grind over pepper and a sprinkle of salt and divide among serving bowls.

Notes: Why do we cook the garlic twice? What is bouillon? What does ragout mean? Why do we need to use French tarragon?

Categories: Kitchen Garden, Recipe | Tags: , , , , , , , , , , | Leave a comment

Creamy polenta with poached eggs and sage

This is such a vibrant and comforting dish, with the frizzled sage leaves giving everything a crispy, colourful lift. Just be sure the eggs are very fresh – and then there’s no need to add vinegar or do any of that silly swirling stuff!

ourkitchengarden.net

From the garden: eggs, sage, garlic
Recipe source: Melissa
Serves: 4 or 24 tastes

Equipment:

  • Chopping board &small knife
  • 1 heavy-based saucepan & lid
  • Scales
  • Measuring jug
  • Grater
  • 1 small saucepan
  • Salad spinner
  • Paper towel
  • Wooden spoons
  • Bowls – 4 small
  • Deep-sided frying pan
  • Serving bowls
Ingredients:

  • 250ml milk plus extra 100ml on standby
  • 250ml water
  • 1 bay leaf
  • 1/2 cup fine polenta
  • 1/3 cup mascarpone
  • 50g pecorino
  • 25g butter
  • 4 very fresh large eggs
  • A branch of sage leaves
  • Flaked salt and black pepper

ourkitchengarden.net What to do:

  • Bring the milk, water and bay leaf to the boil in the larger saucepan then remove from heat and allow to infuse for 20 minutes. Strain and discard the bay leaf, bring to the boil again, pour in the polenta and stir continuously until it thickens, about 10-20 minutes, depending on the variety of polenta.
  • Meanwhile grate the pecorino and measure out the mascarpone.
  • When the polenta is cooked, add the mascarpone and grated pecorino and mix until well combined. Taste for seasoning and adjust if necessary. The polenta should be soft and creamy and only just hold its shape. You may need to add a little extra of the standby milk to loosen up the polenta if it becomes too stiff – this will also depend on what brand of polenta you use. You want a sloppy, porridge type consistency.
  • About 5 mins before the polenta is ready, poach the eggs. Fill the deep-sided frying pan 5cm deep with water and bring to a simmer. Carefully crack each egg separately into a small bowl without breaking it and then carefully slide into the water until they’re all in. Let the pan sit on a simmer for 4 minutes.
  • Pick the sage leaves, then wash and spin them dry. Heat the butter in the small saucepan over medium heat. Add the sage leaves and cook, stirring, until they are dark green, crispy and fragrant.
  • To serve, divide polenta among serving bowls. Lift the eggs out of the water, drain, and then place one on top of each bowl. Season generously and scatter with the frizzled sage leaves & browned butter.

Notes: What is polenta? What is cooking by ‘absorption’ method? Why shouldn’t we break the eggs when poaching them? What is to simmer?

ourkitchengarden.net

Categories: Kitchen Garden, Recipe | Tags: , , , , , , , , , , , , | Leave a comment

Pizza with broccoli, garlic and anchovies

We love kneading out any sort of dough but pizza is the best – you can take away any sort of bad mood or grumpiness in pounding out pizza dough! Fed up with homework? Whack! Not allowed to watch telly? Thump! Must tidy your room? Whump! (Insert gripe here:____________________________________)

PIzza broccoli, anchovy, garlic

Fresh from the garden: broccoli, onion, garlic, oregano, thyme
Recipe source: Melissa
Serves: 8 or 24 tastes

Equipment:

  • 2 wooden chopping boards & knives
  • 2 frying pans
  • Bowls – large, med
  • Salad spinner
  • Small saucepan
  • Measures – ¼ cup, tablespoons, teaspoons
  • Colander, grater
  • Scales
  • Wooden spoon
  • Kitchen towel
  • 2 pizza trays
  • Metal tablespoons
  • Wide egg lifter
  • Pizza cutting wheels
  • Serving plates
Ingredients:

  • 1 amount Hugh’s magic dough recipe

For the pizza topping:

  • 1 tub bocconcini
  • 1 head broccoli
  • 2 tablespoons extra-virgin olive oil
  • 6 anchovies
  • 2 cloves garlic
  • 30g parmesan

Tomato sauce:

  • 1 onion
  • 2 cloves garlic
  • 3 sprigs each oregano & thyme
  • ¼ cup extra-virgin olive oil
  • 1 tin diced tomatoes
  • Flaked salt and black pepper

What to do:

  • Preheat the oven to 220C.

For the tomato sauce:

  • Peel and finely chop the onion and garlic, reserving half of the garlic for the broccoli.
  • Heat the olive oil in the frying pan & gently cook the onion and garlic until translucent but not brown.
  • Open the tin of tomato and add to the frying pan with a pinch of salt and a grind of pepper.
  • Wash, dry and pick the herbs. Roughly chop then add to the tomatoes.
  • Simmer gently for 10 minutes, stirring occasionally, until quite reduced.

For the topping: 

  • Fill the saucepan with water and set to boil.
  • Wash the broccoli, and cut finely into 1cm slices, keeping the florets intact. Drop them into the boiling saucepan with a teaspoon of salt and cook for 2 minutes. Drain into the colander.
  • Gently set the 2nd frying pan to heat and add the 2 tablespoons of olive oil, the reserved garlic and the anchovies. Simmer slowly until the anchovies have almost melted, and then add the broccoli and toss or stir to incorporate. Taste for seasoning.
  • Open the tub of bocconcini and cut each ball into 3 or 4 slices.
  • Grate the parmesan.

Assembling the pizza:

  • Scatter some flour on the workbench, divide the dough in two and roll to form two thin shapes about 26 cm in diameter.
  • Assemble the pizzas directly onto the trays, flouring the trays first.
  • Using the metal spoon, swirl a couple of spoonfuls of tomato sauce onto the pizza bases, spreading so that they become totally covered with a clean border.
  • Layer the bocconcini on top, spoon on the garlicky broccoli with a drizzle of the oil, then slide the pizzas into the oven.
  • Wash and dry the wooden chopping boards and set them out ready.

Baking the pizza:

  • Bake the pizzas for 12 minutes or until the edges are very crusty and the cheese is bubbling.
  • Use this time to make the dough for the next class if needed.
  • You may want to slip the pizza off the tray onto the rack for the last few minutes, so that you get a really crusty base.
  • Once the pizzas are done, transfer them to the wooden boards using the wide egg lifter.
  • Cut the pizzas in half first, and then each half into squares for each plate. Sprinkle with the grated parmesan.
  • Lift onto serving plates and eat!

Notes: Where does pizza come from? What other sort of vegetables could you use in a pizza? What sort of other pizza could we make? What other cheeses could we use?

ourkitchengarden.net

Categories: Kitchen Garden, Recipe | Tags: , , , , , , , , , , , | Leave a comment

Cabbage, barley and coriander soup

Thick and chunky, perfect for a winter’s day outside in the fields threshing wheat, or even dealing with the Westfield car park… We used Demeter organic pearled barley – super texture, super delish!

ourkitchengarden.net

Fresh from the garden: cabbage, onion, garlic, carrots, bay, coriander
Recipe source: Melissa
Serves: 8 or 24 tastes

Equipment:

  • Kettle
  • Chopping board & knife
  • Bowls – large, med
  • Peelers
  • Colander
  • Salad spinner
  • A large stockpot
  • Measures – jug, ½ cup, tablespoon
  • Wooden spoon
  • Serving bowls
Ingredients:

  • 1 medium onion
  • 4 cloves garlic
  • 4 large carrots
  • 1/2 large head cabbage
  • 2 tablespoons olive oil
  • 1½ litres stock (or 1½ litres boiling water & 1½ tablespoons bouillon)
  • 1 tin diced tomatoes
  • 1/2 cup pearled barley
  • A teaspoon of ground coriander
  • 1 bay leaf
  • Black pepper
  • A small bunch of fresh coriander

What to do:

  • Fill the kettle and set it to boil.
  • Peel and finely chop the onion and garlic.
  • Peel, wash and chop the carrots into small bite-sized chunks.
  • In a large stockpot, heat olive oil over medium heat.
  • Add onion and garlic, and cook until fragrant and translucent, about 3-5 minutes. Stir in carrots and cook until slightly softened, about 5 minutes.
  • Measure out the boiling water & add to bouillon, stir and carefully pour in to the stockpot. Bring to the boil then measure out and add the barley, bay leaf, the ground coriander and a few grinds of pepper.
  • Cut the cabbage into quarters, wash them then chop out the core (good for the chooks!) and roughly chop. Then add the cabbage and tomatoes and return to the boil. Simmer for about 25 minutes all up, stirring occasionally, until the barley is cooked.
  • Meanwhile wash and spin the fresh coriander dry, then finely chop (but not into mush!!!)
  • When the soup is done, divide among bowls, sprinkle on the coriander and eat hot!

Notes: What does fragrant and translucent mean? What is barley? What does pearled barley mean? What else is coriander known as?

ourkitchengarden.net

Categories: Kitchen Garden, Recipe | Tags: , , , , , , , , , , | 2 Comments

Kitchen garden news – 30th May 2013

ourkitchengarden.net

A great discussion these last two weeks in the cottage has been based around why, if we have winter arriving this Saturday, we still have heaps of basil appearing on the harvest table – whilst nestled among the baskets are chunks of pumpkin and cauliflower heads too… in effect: summer, autumn and winter produce all at the same time? In every class we’ve had at least one of the children work out that we’ve been having lovely sunny weather and the basil still thinks it’s summer – while Ligia & her gangs have been busily planting the winter crop for some time now… How lucky are we to live in Sydney and receive this generous cross-seasonal bounty!

We were very excited to meet our program’s foundress Stephanie Alexander last night in the cottage while she was here spruiking the program to new schools. She was super-happy with all that we’ve been doing and particularly impressed with our new beds of garlic shoots (thanks to Andrew Worssam). It was lovely to be reminded yet again of her passion and purpose…!

ourkictehngarden.net

And to business! In the kitchen this week: Cauliflower and borlotti bean soup; Mini frittate of chive, gruyere and rocket with Basil aioli; Tempura of veggies; Last of the season Pesto*; and Pumpkin gnocchi with burnt butter and sage. Nom nom.

All recipes are up! Click on the links to see or download them…

*And thanks to all generous subscribers to our pesto offerings – I only wish there were more! Watch this space in about a year’s time for the next lot!

Cheers! Melissa

Categories: Kitchen Garden, News | Tags: , , , | Leave a comment

Cauliflower and borlotti bean soup

There is something almost saintly about a pureed bean soup – and this has texture and flavour & a wonderful creaminess from the beans. And protein! Although who cares how healthy this is for you when it tastes so good?!

ourkitchengarden.net

Fresh from the garden: onion, garlic, bay, cauliflower, parsley
Recipe source: Melissa
Serves: 6 or 24 tastes

Equipment:

  • Kettle
  • Chopping board & knife
  • Colander, sieve
  • Large saucepan or stockpot
  • Measures – jug, tablespoon, teaspoon
  • Bowls – big, medium
  • Salad spinner
  • Stick blender
  • Mouli
  • Ladle
  • Serving bowls


Ingredients:

  • 1 large brown onion
  • 4 or 5 garlic cloves
  • 1 large head of cauliflower
  • 2 tins of borlotti beans
  • 2 tablespoons olive oil
  • 2 teaspoons fennel seeds
  • 2 bay leaves
  • 1½ litres vegetable or chicken stock (or 1½ litres water and a tablespoon and a half of bouillon)
  • A small handful parsley
  • Black pepper

What to do:

  • Fill the kettle and set it to boil.
  • Peel and finely dice the onion. Peel and slice the garlic. Wash, drain and chop the cauliflower, finely chopping the stalks and discarding the leaves to the chook bin.
  • Open the tins of borlotti beans, drain into the sieve and rinse well under cold water.
  • Heat the olive oil in the saucepan and gently sauté the onion until soft for about 5 minutes and then add the garlic, fennel seeds & bay leaves and cook gently for another minute.
  • Add the cauliflower and the drained beans. Pour in the stock or water and bouillon.
  • Bring to a boil, then reduce the heat and simmer for 10 minutes until the cauliflower is tender.
  • Meanwhile wash and spin the parsley dry. Pick off the leaves, discarding the stalks, and finely chop.
  • Fish out the bay leaves, grind a little pepper in and then carefully whizz until smooth using the stick blender.
  • For a silky smooth finish you may want to pass the soup through the fine setting of a mouli, and then reheat.
  • Taste for correct seasoning and ladle into bowls.
  • Garnish with parsley and serve!

 Notes: We are using tinned beans in this recipe. What would you need to do if you were using dried beans? What other sort of beans are there? What is bouillon?

ourkitchengarden.net

Categories: Kitchen Garden, Recipe | Tags: , , , , , , , , , , , , , | Leave a comment

Tempura veggies

These crunchy, crispy and delicious veggies are easy to make as long as you are super-careful with the hot oil… Please read the warning below before you start!

ourkitchengarden.net

Fresh from the garden: zucchini, zucchini flowers, capsicum, eggplant, carrot
Recipe source: adapted from a recipe by Damian Heads in Ready Steady Cook

Equipment:

  • Bowls – big, small
  • Chopping board & knife
  • Paper towel, plate
  • Zip-lock freezer bag
  • Rolling pin
  • Tea towel
  • Measures –  jug, cup
  • Whisk
  • Saucepan
  • Tongs, slotted spoon
  • Serving plates
Ingredients:

  • Vegetable or Rice Bran oil, for deep frying
  • 1 cup self-raising flour
  • 3 ice cubes
  • 200-300ml soda water
  • A selection of veggies: bokchoy, zucchini, zucchini flowers, capsicum, eggplant etc


What to do:

  • Pre-heat the oven to 150C and line a baking tray with paper towel.
  • Wash the vegetables thoroughly, separating any leaves and drying well. Slice any firm vegetables into thin strips or slices. If using zucchini flowers, check to make sure there aren’t any ants or bugs inside each flower & remove the stamen.
  • Take 3 ice cubes from the freezer and zip into a plastic freezer bag.  Place the bag onto the chopping board, cover with the tea towel and bash a few times with the rolling pin to form crystals.
  • Measure the flour and 200ml soda water into a big bowl, add the crushed ice and then whisk to make a batter – do not over mix, the flour should still be a little lumpy. If it’s too thick then add a little more soda water but you’ll need it to be thick enough to cling!
  • Pour the oil into a medium saucepan until one-third full. Heat over medium-high heat until hot. SEE WARNING!
  • Using tongs, dip each vegetable piece into the batter allowing excess to run off, then carefully lower one at a time into the pan to deep fry, until a few are cooking at the same time in batches. Fry for a minute or two, then scoop out with the slotted spoon on to the lined baking tray and place back in the oven with the door slightly ajar.
  • Finish all the veggies – then divide among serving plates & eat hot!

Warning:

  • Whenever working with hot oil, take extreme care and keep small children and pets well away.
  • Never leave hot oil unattended. Never fill the pan more than half way with oil.
  • Make sure any saucepan handle is turned in & not overhanging the stove.
  • Drop food to fry in carefully, using tongs – and make sure the food isn’t wet or the water will make the oil spit!

Notes: Why do we need to take care around hot oil and never leave the pan unattended? Why can we not fill the pan more than half full? Why should the handle be turned in?

ourkitchengarden.net

Bashing out the ice-cubes for tempura

Categories: Kitchen Garden, Recipe | Tags: , , , , , , | Leave a comment

Basil aioli

Herby? Garlicky? Yup, ticks all the boxes… yum yum yum! Hooray for mayonnaise!

ourkitchengarden.net

Fresh from the garden: lemon, eggs, basil, garlic
Recipe source: Melissa
Makes: about 300ml

Equipment:

  • Salad spinner
  • Bowls – large, small
  • Chopping board & knife
  • Citrus juicer
  • Garlic press
  • Stick blender & cup
  • Measuring – jug, cup, teaspoon
  • Serving bowls

Ingredients:

  • A small handful basil
  • 1 juicy lemon
  • 2 garlic cloves
  • 3 eggs
  • 1 teaspoon Dijon mustard
  • 1 cup rice bran oil
  • Flaked salt & black pepper

What to do:

  • Pick the basil leaves, wash them well, spin them dry and finely chop.
  • Cut the lemon in half and juice the halves. You will need 50ml lemon juice in total.
  • Smash the garlic cloves, peel them and squeeze them through the garlic press.
  • Separate two of the eggs and reserve the 2 yolks in a small bowl.
  • Into the stick blender cup add the whole egg, the egg yolks, the mustard and only 20ml lemon juice. Whizz together until all is combined.
  • Measure the rice bran oil, then get a friend to help super-slowly stream in the oil into the egg mixture while you are whizzing (this takes a few minutes so don’t rush it).
  • To make this mayo into an aioli, slowly add in the remaining 30ml lemon juice, the pressed garlic, the chopped basil and a good sprinkle of salt and pepper. Blend until smooth.

Notes: What is aioli? Why is it different to mayonnaise? What else could you serve it with? What could you make with the leftover egg whites?

Categories: Kitchen Garden, Recipe | Tags: , , , , , , , , , , | Leave a comment

Create a free website or blog at WordPress.com.