Posts Tagged With: cooking

Kitchen news – 27th March 2014

(This post has been rather delayed so apologies… Now to catch up!)

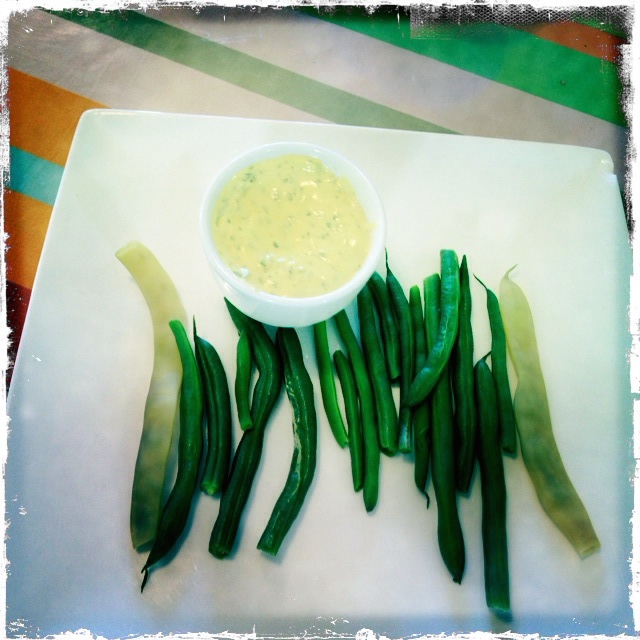
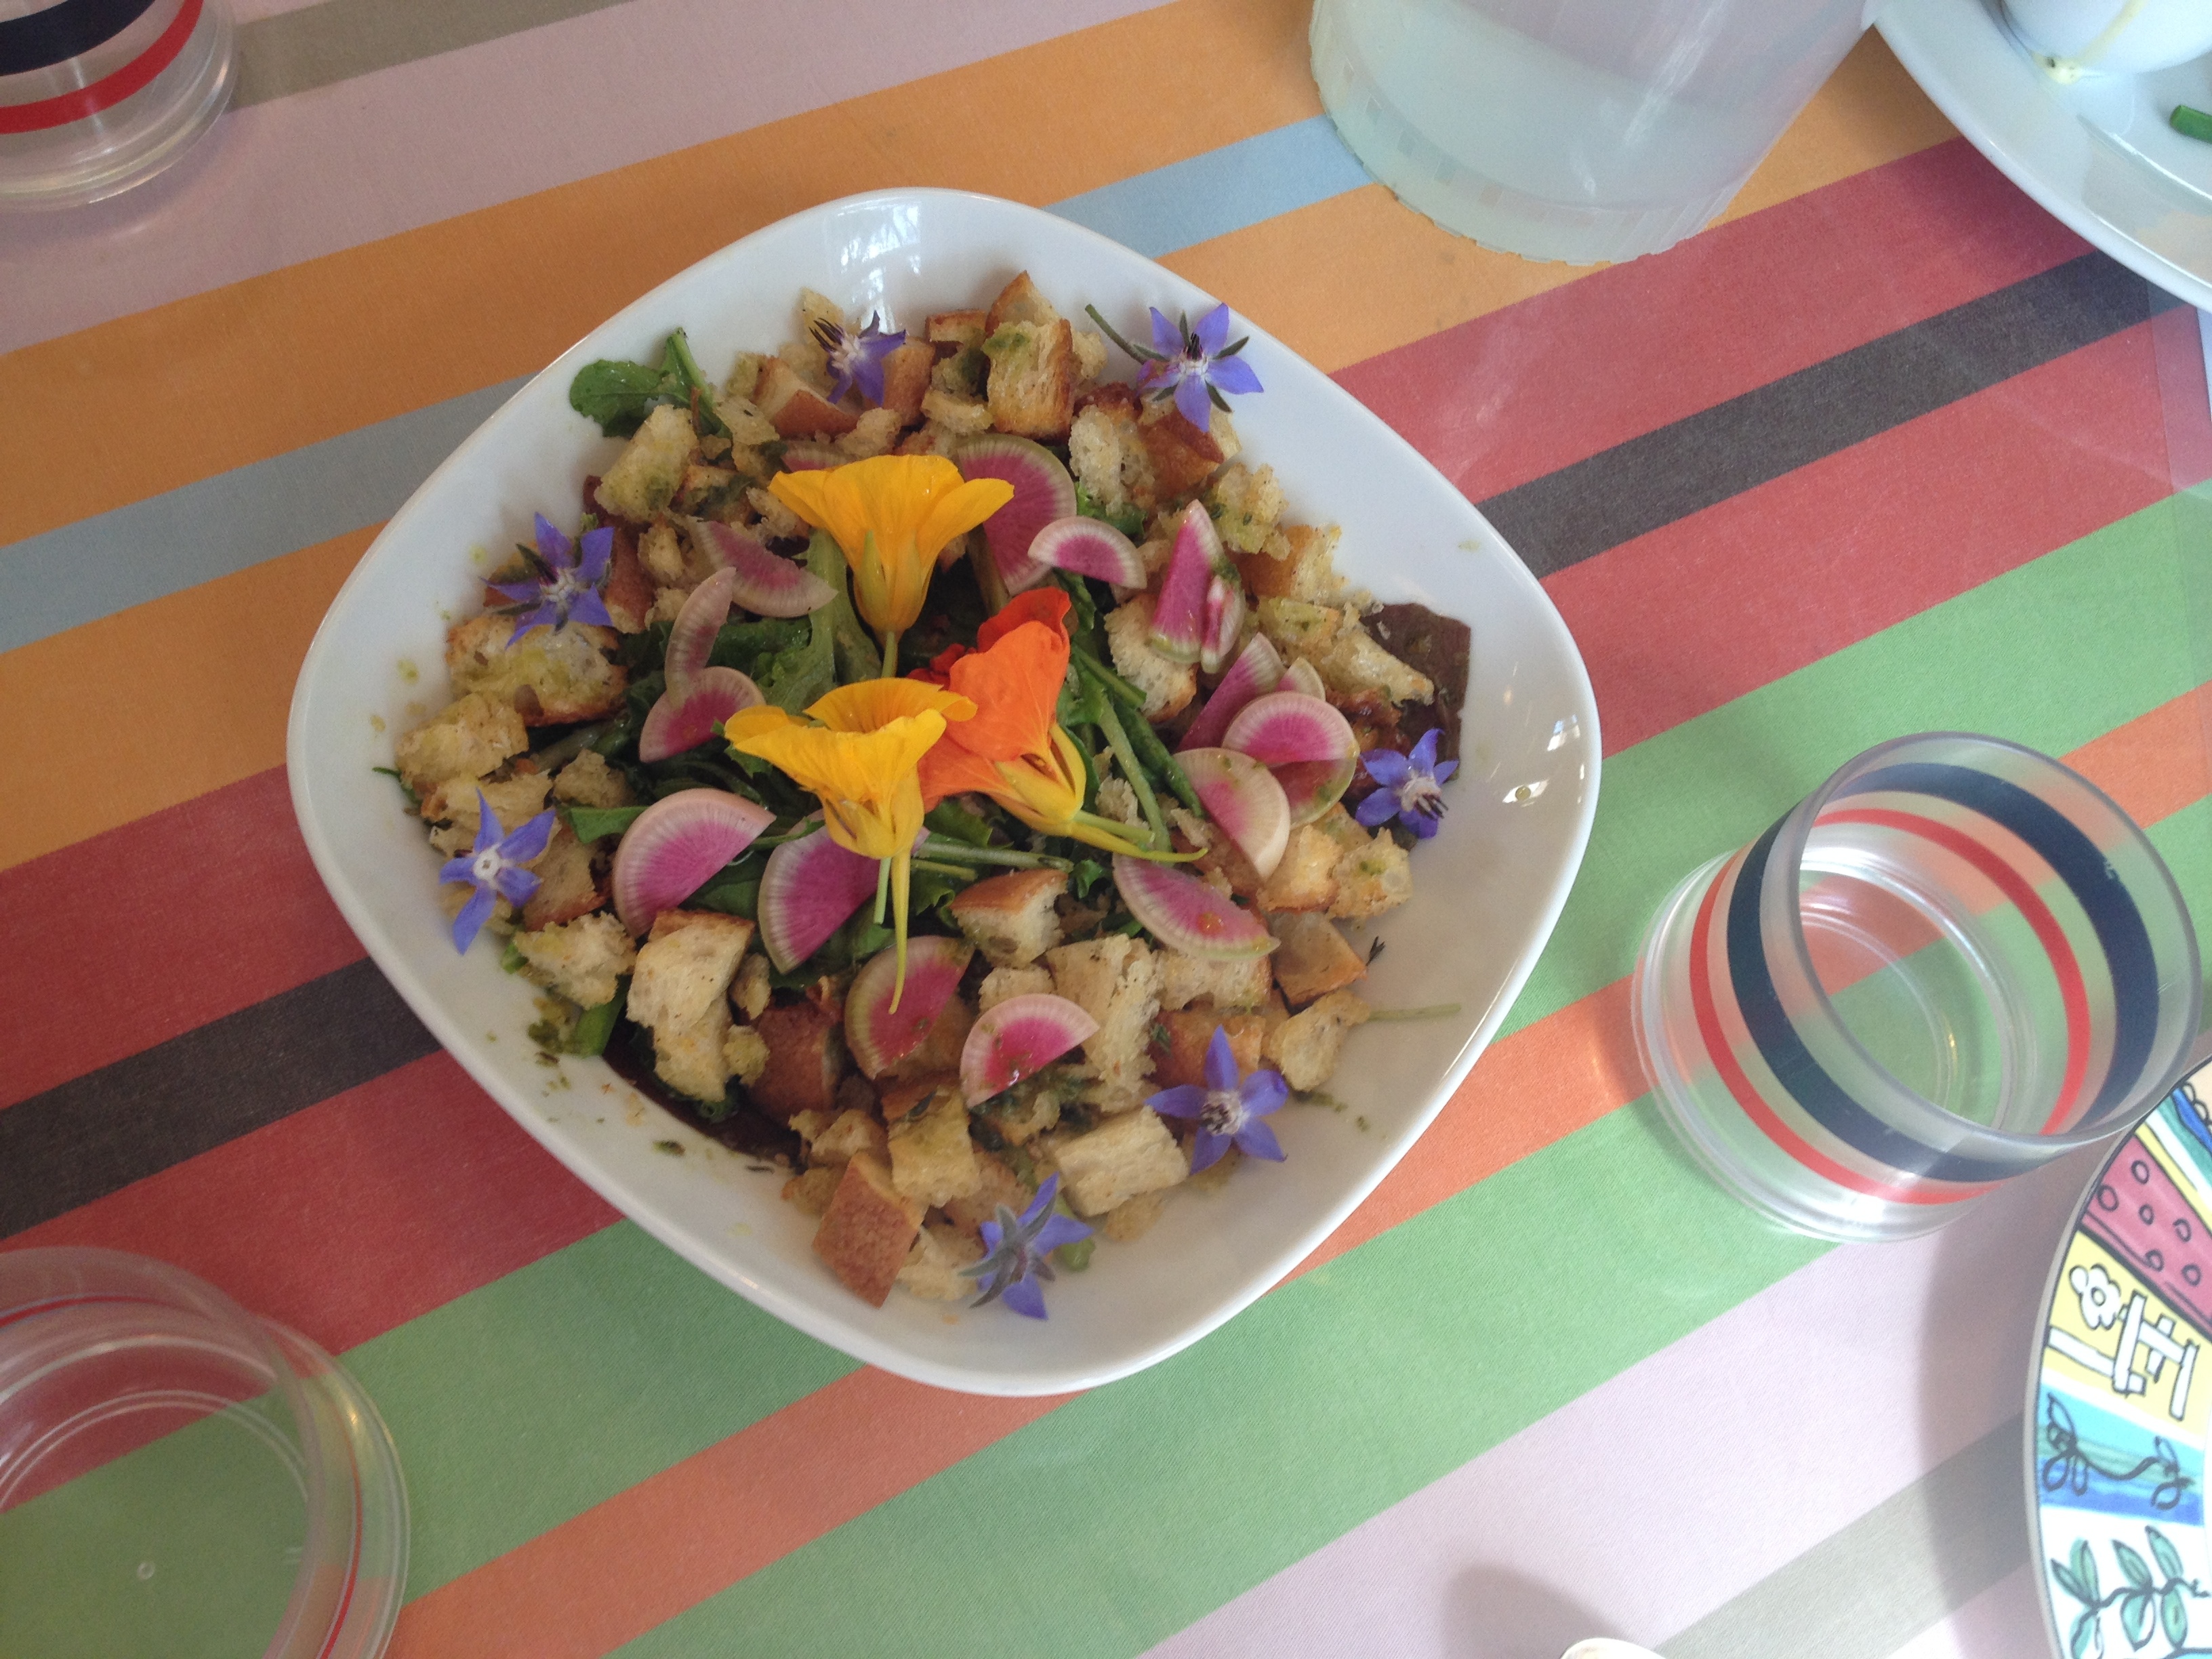
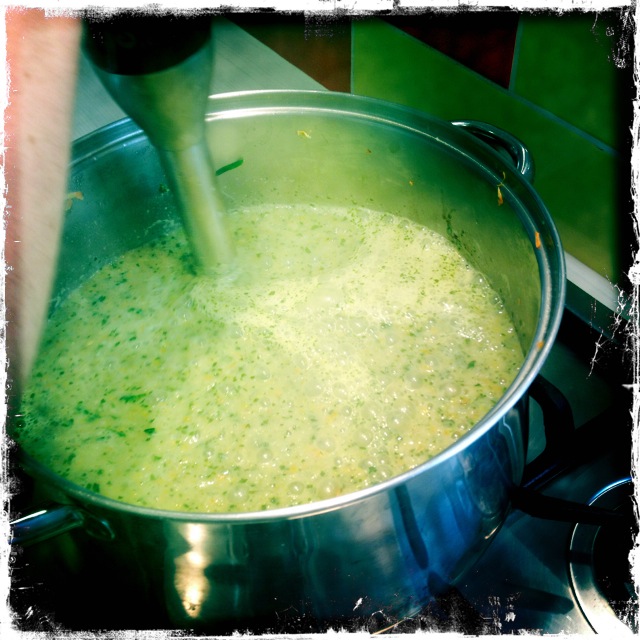
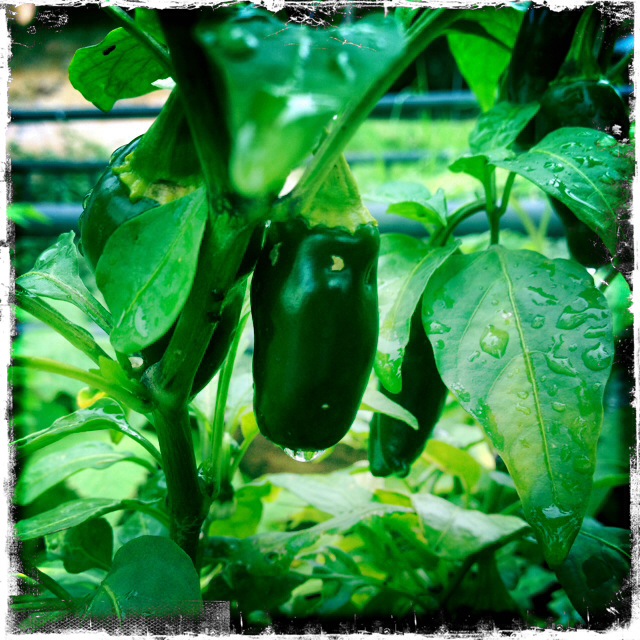
Week 9 and we’re thundering into mid-autumn with stormy skies and downpours aplenty… Best pop on the waterproofs and blend up some something soothing tout-suite! Spinach and parsley soup me’ ladies if you please, ladled up with a chunky Autumn salad with crunchy croutons (and dashing watermelon radishes to lively up itself) – A plate of Dragon’s tongue (or borlotti or French) beans with the most superb basil aioli, and then our blatant rip-off of Sean’s linguine with shredded rocket, lemon, chilli and parmesan, the pasta hand-rolled by ours truly, and slinky, juicy and peppery in every way… And then to finish, and the most delicious way to use up all the egg whites leftover from the garlicky basil mayo: meringues in the style of Rhubarb and rosewater Eton mess

We can only do all of this thanks to our dedicated army of parent and community volunteers! The Kitchen Garden program loves you – and we also love the mums and dads who have been in touch with requests for recipes to cook at home – the thick green soup this week was a veritable hit! It’s wonderful to know that the kids want to replicate the recipes at home… makes it all worthwhile!!!

Have a great week and keep dry 🙂

ourkitchengarden.net

Categories: Kitchen Garden, News | Tags: , , , | Leave a comment

Dragon’s tongue beans with basil aioli

Herby? Garlicky? Yup, ticks all the boxes… yum yum yum! Hooray for mayonnaise! You can use any long beans for this – we were juts lucky to have a few brightly coloured Dragon’s Tongue beans to use alongside some runner beans.

Fresh from the garden: Dragon’s tongue beans (and other long beans) lemon, eggs, basil, garlic
Recipe source: Melissa
Serves: 2 as a side dish

ourkitchengarden.net

Equipment:

  • Small saucepan and lid
  • Colander
  • Salad spinner
  • Scissors
  • Bowls – large, small
  • Chopping board & knife
  • Citrus juicer
  • Garlic press
  • Stick blender & cup
  • Measuring – jug, ½ cup, tablespoon, teaspoon
  • Serving bowls
Ingredients:

  • A handful of dragon’s tongue beans
  • Cooking salt
  • A small handful basil
  • 1 juicy lemon
  • 1 small garlic clove
  • 2 eggs
  • 1 teaspoon Dijon mustard
  • 1/2 cup rice bran oil
  • Flaked salt & black pepper

What to do:

  • Fill up the saucepan with cold water, put the lid on and set to boil.
  • Wash and drain the beans, then snip off the stalk end.
  • When the water in saucepan is boiling, add a teaspoon of salt and the whole beans. Cook the beans for 3 minutes, then drain and refresh in a bowl of cold water. Drain again.
  • Meanwhile for the aioli, pick the basil leaves, wash them well, spin them dry and finely snip with scissors into 5mm ribbons.
  • Cut the lemon in half and juice a half.
  • Smash the garlic clove, peel it and squeeze it through the garlic press.
  • Carefully separate one egg and reserve the yolk in a small bowl.
  • Into the stick blender cup add the whole egg, the egg yolk, the mustard and a teaspoon of lemon juice. Whizz together until all is combined.
  • Measure the rice bran oil, then get a friend to help super-slowly stream in the oil into the egg mixture while you are whizzing (this takes a few minutes so don’t rush it).
  • To make this mayo into an aioli, slowly add in another teaspoon of lemon juice, the pressed garlic, the chopped basil and a good sprinkle of salt and pepper. Blend until smooth. Taste and check if it needs any more lemon juice or salt and adjust if needed.
  • Divide the beans among serving plates and drizzle the mayo over one end of each plate and serve.
  • Any spare aioli can be stored in an air-tight glass jar in the fridge for 3 days.

Notes: What is aioli? Why is it different to mayonnaise? What else could you serve it with? What could you make with the leftover egg whites?


Categories: Kitchen Garden, Recipe | Tags: , , , , , , , , | Leave a comment

Sean’s linguine with shredded rocket, lemon, chilli and parmesan

This dish has been a staple on Sean’s menu since he opened in 1993, and continues to be one of the most popular dishes… a simple dish; great produce being the most important thing!

From the garden: rocket, lemon, chillies, garlic
Recipe source: adapted from the recipe by Sean Moran at Sean’s Panaroma in ‘Let It Simmer’
Serves: 6 at home or 24 tastes

ourkitchengarden.net

Equipment:

  • Large stockpot
  • 2 large bowls
  • Chopping board
  • Grater, citrus juicer
  • Measuring jug, tablespoon
  • Scales
  • Tongs
  • Serving bowls


Ingredients:

  • 500g linguine
  • 5 generous handfuls rocket
  • 100g parmesan (preferably Parmigiano or grana padano)
  • 2 garlic cloves
  • 1 lemon
  • 1 tablespoon chilli oil (see separate recipe)
  • 100ml extra-virgin olive oil
  • Salt & freshly ground pepper

What to do:

  • Three-quarters fill the large stockpot with cold water and bring to the boil.
  • Wash and spin dry and then coarsely shred the rocket into ribbons with a sharp knife.
  • Weigh to measure then coarsely grate the parmesan.
  • Squeeze and strain the juice from the lemon, then squeeze the garlic through the press and combine with lemon juice, chilli oil and olive oil in a bowl large enough to toss the linguine (you may need 2 bowls, so then divide the mixture between them).
  • Throw a handful of salt into the boiling water and let it return to the boil. Cook pasta until al dente – fresh pasta should take about one minute – then lift it into the prepared bowl with tongs, draining it as you go yet taking a slight drizzle of the cooking water with the pasta (this will lubricate and combine dressing).
  • Add the shredded rocket and parmesan, then season and toss together just before serving.
  • Divide into your serving bowls and eat immediately!

Notes: What is rocket also known as? What does to shred mean? What does al dente mean?

Categories: Kitchen Garden, Recipe | Tags: , , , , , , , , , | Leave a comment

Sean’s chilli oil

This chilli oil can be fired up with finely chopped bird’s-eye chillies if you like more fire than the nutty sweetness of the standard recipe. It is also worth grabbing some disposable gloves for this recipe as prolonged contact with chillies will burn the tips of your fingers!

From the garden: chillies, garlic
Recipe source: adapted from the recipe by Sean Moran at Sean’s Panaroma in ‘Let It Simmer’
Makes: about 700ml

 ourkitchengarden.net

Equipment:

  • Plastic gloves
  • Heavy-based stockpot
  • Slotted spoon
  • Colander
  • Paper towel
  • Food processor
  • Glass jars
Ingredients:

  • 250g long red chillies
  • 500ml olive oil
  • ¼ head garlic

What to do:

  • Pre-heat the oven to 160C.
  • Wash and drain the jars and place right side up on the baking tray. Slide into the oven for 10-15 minutes.
  • Wash and drain the lids and place in the small saucepan. Cover with water and set to boil for 2 or 3 minutes. Drain into a colander and then wipe out with a fresh piece of paper towel, taking care not to touch the inside of the lids.
  • Meanwhile put on some plastic gloves before slicing chillies lengthways and scraping out seeds, discarding the seeds.
  • Lightly crush and peel and the garlic cloves.
  • Place chillies in a heavy-based stockpot with the olive oil and garlic.
  • Bring to a gentle boil over a moderate flame, and fry until the chillies and garlic are deep golden and all their moisture has evaporated.
  • Lift out chillies and garlic with a slotted spoon and leave to cool.
  • Bring the jars out of the oven and leave to cool for a few minutes.
  • Process cooled chillies and garlic pulp to a coarse paste with just enough oil to lubricate the motion.
  • Stir the puree into the oil and then carefully pour into the sterilised jars.
  • Shake well before using.

Notes: What does to sterilise mean? Why can’t we touch the inside of the lids? Why do we need gloves to prepare the chillies?


Categories: Kitchen Garden, Recipe | Tags: , , , , , , , , | Leave a comment

Autumn salad with crunchy croutons

We play around with all sort of ingredients in our salads, and this autumn we’ve had beautiful watermelon radishes to include too, as well as the most more-ish spicy croutons.

ourkitchengarden.net

Fresh from the garden: lettuce and salad leaves, tomatoes, radishes, flowers, herbs, lemon
Recipe source: Melissa
Serves: 6 or 24 tastes

Equipment:

  • Small saucepan
  • Chopping board & knife
  • Baking sheet & baking paper
  • Scales
  • Chopping boards & knife
  • Bowls – large, medium, small
  • Small saucepan
  • 2 salad spinners
  • Tea towels, paper towel
  • Mortar & pestle
  • Citrus juicer
  • Measures: 1/3 cup, tablespoon, teaspoon, ½ & ¼ teaspoon
  • Whisk, tongs
  • Serving bowls


Ingredients:

For the croutons

  • 2 tablespoons unsalted butter
  • 1 tablespoon extra-virgin olive oil
  • Half a loaf of sourdough bread
  • 2 teaspoons salt
  • 1/4 teaspoon ground cayenne
  • 1/2 teaspoon ground black pepper

For the salad

  • A big bunch salad leaves (lettuces, tatsoi)
  • A few edible flowers & leaves
  • Tomatoes, radishes, spring onions

Herby vinaigrette dressing

  • 1 clove garlic
  • Flaked salt & black pepper
  • 1 lemon
  • 1/3 cup extra virgin olive oil
  • A small handful herbs

What to do:

  • For the croutons: Preheat the oven to 200C. Gently melt the butter in the small saucepan.
  • Carefully cut the bread into slices and then into cubes.
  • Combine the melted butter and tablespoon of olive oil in a large bowl. Add the cubes of bread, and toss until coated. Sprinkle with salt, cayenne pepper, and black pepper, toss until evenly coated. Spread the bread in a single layer on a baking paper-lined sheet. Bake until croutons are golden for about 10 minutes.
  • For the salad: Fill up 2 big bowls with cold water & wash the salad leaves in several changes of water. Spin dry and wipe the bowls dry. Lay out the tea towel and line it with paper towel. Spread the salad leaves over the paper and roll the whole lot up like a log. Keep the rolled parcel of leaves in the fridge until needed.
  • Fill up the medium bowl with water and wash the herbs and small garnishing leaves & flowers. Dry on a piece of paper towel and reserve in a small bowl. Wash and drain the radishes, tomatoes and spring onions (peeling outer layer) & slice into small pieces.
  • For the vinaigrette: Peel the garlic clove and put it in the mortar with a large pinch of salt. Pound to a paste. Juice the lemon and add the juice to the mortar (without pips) then stir the lot with a teaspoon and scrape it into a large mixing bowl. Stir in the oil and grind some pepper, then whisk the dressing lightly. Wash and pat the herb sprigs dry and pick off the leaves, and add to the dressing.
  • To finish: Unwrap the parcel of salad leaves & tip them into the bowl with the dressing. Gently turn the leaves in the dressing using your hands or tongs, and then transfer the dressed leaves to the serving bowls. Place the tomatoes, radishes & spring onion in the dressing and then add to the salad with garnishing flowers & leaves. Serve immediately with croutons scattered on top.
Categories: Kitchen Garden, Recipe | Tags: , , , , , , , | Leave a comment

Kitchen news – 13th March 2014

ourkitchengarden.net

Kitchen news is back after a fortnight’s holiday in the Bahamas and is all the better for it… Meanwhile back at the ranch,the SAKGP and students have been slaving away over a humid, stormy and altogether fabulous February stove and dishing up some top grub.

On the menu these last weeks: the not so Purple carrot soup with sour cream and coriander, a zesty and wonderful gluten-free alternative Quinoa tabbouleh with poached eggs, and a perfect blend of creamy, garlicky and caramelised Antipasto di peperoni tricolore – roasted capsicum & whole clove garlic (thanks again to Andrew W for our French purple crop that keeps giving) with creamy feta and a drizzle of the hot item Bondi Pesto – the annual pesto sale on again 3pm Thursdays in the basketball court for 2 weeks only!!! One per customer, no pre-orders, form an orderly queue please… served with Garlicky rosemary flatbreads. Mmm-mmmmm!

Thank you to you wonderful Kitchen Garden volunteers who continue to support the program, whether by donating your timeweek after term after year regardless of rain, storm or heatwave – or turning up out of the blue like The Charge of The Light Brigade to rescue a sparse session. Hooray to you however you make it!

Cheers! M

ourkitchengarden.net

Categories: Kitchen Garden, News | Tags: , , , | Leave a comment

Quinoa tabbouleh with poached eggs

White quinoa is the most common variety, but red quinoa is also available and has a nuttier flavour. They can be used interchangeably. Quinoa is a fabulous alternative to grains and is gluten-free.

ourkitchengarden.net

Fresh from the garden: basil, parsley, lemons, mint, cucumbers, tomatoes
Recipe source: Melissa
Serves: 4 or 24 tastes 

Equipment:

  • Stockpot with lid
  • Measures: cup, ½ cup, tablespoon, teaspoon, ¼ teaspoon
  • Wooden spoon, fork, teaspoon
  • Salad spinner
  • Microplane zester
  • Citrus juicer
  • Chopping board & knife
  • Peeler
  • Bowls – large, medium& 4 small
  • Measuring jug
  • Serving bowls
  • Deep-sided frying pan
  • Tea towel


Ingredients:

Cook quinoa:

  • 1 cup quinoa
  • 1½ cups water
  • 1 teaspoon cooking salt

Make tabbouleh:

  • 4 large handfuls of parsley (about 2 cups when chopped)
  • 1 large handful mint leaves (about ½ cup when chopped)
  • 1 large handful basil leaves (about ½ cup when chopped)
  • 1 teaspoon flaked salt plus extra
  • ¼ teaspoon freshly ground black pepper
  • 2 lemons
  • 1 medium cucumber
  • 2 medium tomatoes
  • ½ cup extra-virgin olive oil
  • 4 fresh eggs

What to do:

  • Toast quinoa in a stockpot over gentle heat, stirring frequently until fragrant for about 6 minutes. Add the water and 1 teaspoon salt and bring to a boil. Reduce heat to medium-low, cover, and simmer until grains are tender, about 15 minutes. Remove from heat and let stand, covered, for 10 minutes, then fluff with a fork and let cool to room temperature.
  • Wash, spin dry and pick the leaves from the stems of the herbs and coarsely chop.
  • Zest one lemon then cut both lemons and squeeze through the citrus juicer to yield about 4 tablespoons juice.
  • Peel the cucumber, cut in half lengthways and scrape out the seeds with the teaspoon. Wash the tomatoes and wipe dry, then cut the cucumber and the tomatoes into small dice about ½cm square.
  • Add all the ingredients to the large bowl, measure the olive oil and pour into the bowl, mixing thoroughly to combine.
  • Meanwhile, to poach eggs, fill the medium sized frying pan 5cm deep with water and bring to a simmer. Carefully crack an egg into a small bowl without breaking it and then gently slide into the water one at a time until all four are in the water. Let the pan sit for 4 minutes at a bare simmer.
  • Divide the tabbouleh amongst serving bowls and using the slotted spoon, scoop up an egg, drain it quickly on a clean tea towel and pop on top of each bowl. Sprinkle with salt and serve!

ourkitchengarden.net

Categories: Kitchen Garden, Recipe | Tags: , , , , , , , , , , | 1 Comment

Purple carrot soup

Carrot soup? Why not?! And this one is made with our beautiful purple variations – although our normal orange carrots will taste just as delicious – but I wonder if the soup will be purple too?

ourkitchengarden.net

From the garden: purple carrots, leeks, celery, potatoes, chives, coriander
Recipe source: Melissa
Serves: 6 or 24 tastes

Equipment:

  • Chopping board & knife
  • Small paring knife& scissors
  • Bowls – large, medium
  • Potato peelers
  • Kitchen paper
  • 1 heavy-based stockpot & lid
  • Wooden spoon
  • Stick blender
  • 2 teaspoons
  • Serving bowls


What to do:

Ingredients:

  • 1.5lt boiling water and 1.5 tablespoons bouillon (or vegetable stock)
  • 4 large purple carrots
  • 1 large leek
  • 1 onion
  • 3 large stalks of celery
  • 3 medium potatoes
  • 1 teaspoon ground coriander
  • 1 teaspoon ground cumin
  • 50g butter
  • Small bunch chives & coriander
  • 150ml sour cream
  • Flaked salt and black pepper
  • Fill the kettle and set it to boil.
  • Scrub the carrots under running water but don’t peel. Grate & reserve into a medium bowl.
  • Wash the leeks well, inserting a slit down the middle of each and rinsing out any dirt. Trim and chop finely. Peel and chop the onion. Wash the celery and shake dry, and snip into fine slices.
  • Peel the potatoes over the sink and wash thoroughly. Chop into 2cm cubes.
  • Melt the butter in the large thick-based saucepan, then add the prepared leeks, onion, celery, potato and carrot and sprinkle in the spices. Stir them around so that they’re coated with the melted butter.
  • Next sprinkle in some salt then cover with a lid and let the vegetables sweat over a very gentle heat for about 15 minutes, giving the mixture a good stir about halfway through.
  • After that, add the hot water and bouillon, bring everything up to simmering point and simmer, covered, for about 10-15 minutes or until the vegetables are quite tender. Then remove the pan from the heat and when it has cooled a little, liquidise the soup with the stick blender and check to see if seasoned correctly.
  • Wash the chives and coriander, carefully shake dry & roll up in a piece of kitchen paper to dry. Snip or chop finely.
  • When ready to serve, stir the soup and then swirl in the sour cream. Then ladle in to bowls and garnish each one with the snipped chives and coriander.

Notes: Why don’t we peel the carrots in this recipe? What does to sweat vegetables mean?

ourkitchengarden.net

Categories: Kitchen Garden, Recipe | Tags: , , , , , , | Leave a comment

Antipasto di peperoni tricolore

A wonderful thing happens when you roast capsicum: the crunchy and slightly sour tastes make way for luscious, slippery sweetness & when matched with garlic and herbs the effect is amazing!

ourkitchengarden.net

Fresh from the garden: capsicum, garlic, thyme, marjoram, sage, rosemary
Recipe source: Melissa
Serves: 6 or 24 tastes

Equipment:

  • Paper towel
  • Plastic wrap
  • Bowls – big, medium
  • Salad spinner
  • Baking tray
  • Oven mitts
  • Large tongs
  • Serving bowls


Ingredients:

  • 2 large capsicums
  • Extra-virgin olive oil
  • A head of garlic (10 or 12 cloves)
  • A small handful of thyme sprigs
  • A small handful of marjoram sprigs
  • A small branch of sage
  • A small rosemary stem
  • Flaked salt
  • A 200g slab of Danish feta
  • A cup of pesto

What to do:

  • Preheat oven to 200C.
  • Wash the capsicums and wipe dry.
  • To blacken the capsicums, roast them directly on the gas burner of the stove, turning every minute or so with tongs until the entire surface is blackened. Once charred, set aside to cool in a medium bowl and cover with plastic wrap.
  • Meanwhile separate the garlic cloves but don’t peel them, and put them in the large bowl. Wash and spin-dry the herbs, stripping the herbs from their stalks and putting them in the big bowl.
  • When cool, remove the capsicums from the bowl and peel the charred skin under cool running water with your hands. Cut them in half and remove seeds, drain well and then cut into long thin strips and add them to the bowl.
  • Liberally douse the capsicum strips, garlic and herbs with olive oil and turn to coat.
  • Place strips onto the baking tray with the garlic and herbs scattered over and sprinkle a little flaked salt onto the whole lot and bake for about 15 minutes.
  • Carefully remove the tray from oven with oven mitts and then carefully remove from the oven.
  • To make this an Antipasto Tricolore, unwrap the feta and divide onto serving plates keeping in whole pieces. Pile little mounds of the capsicum, garlic and herbs onto the plates too and then spoon the pesto onto the plates, drizzling some onto the feta cheese. Serve with good bread to mop up!

Notes: What does Tricolore mean? What other vegetables can you use for antipasto? Why do we cover the capsicum in plastic wrap? What does to douse mean?

Categories: Kitchen Garden, Recipe | Tags: , , , , , , , | Leave a comment

Sweet chilli sauce

Banish that gloopy coloured rubbish from your cupboards! This is easy-peasy to make & delish… and if you bottle up any remaining sauce in a sterilised jar, it will last for ages!

ourkitchengarden.net

Fresh from the garden: chillies
Recipe source: adapted from a recipe by Kylie Kwong
Makes: about 250ml 

Equipment:

  • Measures – jug, tablespoon
  • Small heavy-based saucepan
  • Bowls – small
  • Scales
  • Chopping board and knife
  • Wooden spoon
  • Sauce bowl
Ingredients:

  • 250ml white vinegar
  • 165g white sugar
  • 2½ tablespoons fish sauce
  • 1 large red chilli


What to do:

  • Place vinegar and sugar in the small saucepan and bring to the boil, stirring to dissolve the sugar.
  • Reduce heat and simmer, uncovered, for about 10 minutes until liquid is reduced by almost half and slightly syrupy.
  • Remove from heat and allow to cool.
  • Meanwhile, slice down the length of the chilli and carefully scrape out the seeds and white membrane and discard. Chop the chilli into super-thin slices and add to the syrup with the fish sauce.
  • Stir well, then divide among little sauce bowls and serve.

Caution:

  • Wash your hands thoroughly after coming in contact with chilli, as the capsaicin (the oil within the chilli) burns when it comes in contact with your eyes or sensitive skin.

 Notes: Why do you need to wash your hands if handling chill? What is capsaicin? What other sauces could you make at home? What does fish sauce smell like?

ourkitchengharden.net

Categories: Kitchen Garden, Recipe | Tags: , , , , , , | 1 Comment

Create a free website or blog at WordPress.com.